
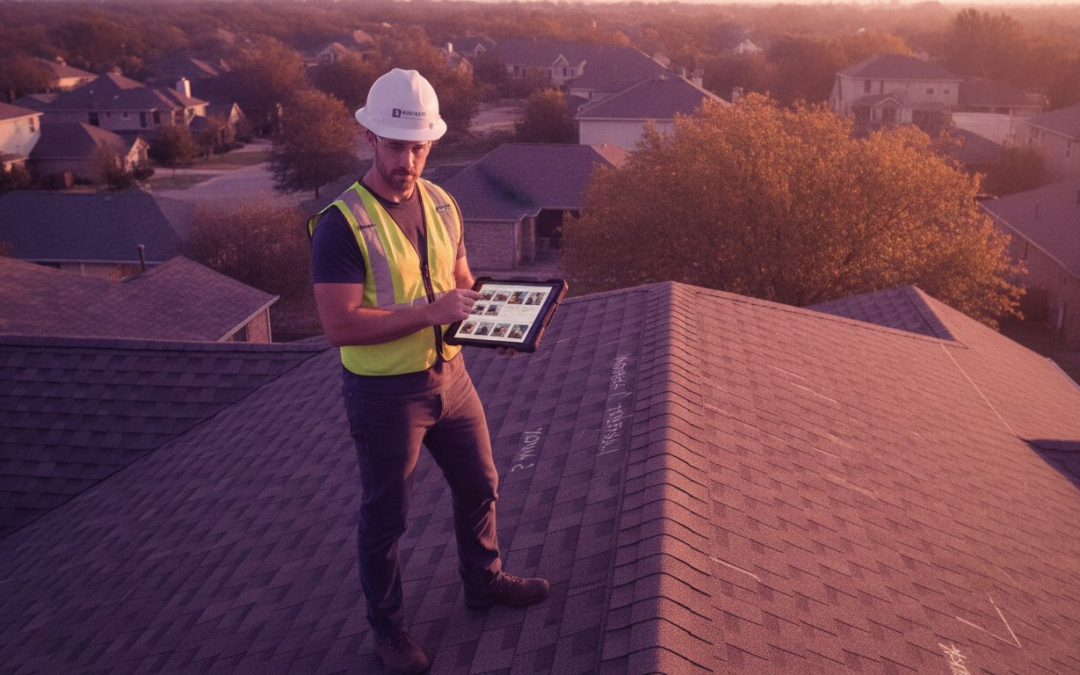
You climbed down from that roof with hundreds of photos, a head full of damage details, and a client waiting on a professional report. Now it’s 9 PM, and you’re still at your desk manually labeling every single image. Sound familiar? The right roofing inspection report template should eliminate that problem entirely, not just make it slightly more manageable.
Here’s the truth every contractor eventually learns: the template itself isn’t the bottleneck. The bottleneck is the time it takes to populate it with organized, labeled photographic evidence. A beautifully structured report framework means nothing if you’re still spending three hours sorting through photo folders and scribbling damage notes from memory after a long day on the roof.
You deserve a faster way to work, and this guide delivers exactly that. Inside, you’ll find a complete framework for professional roof documentation, from what every high-quality template must include to how modern tools like automated photo labeling and instant report generation let you finish the job while you’re still on-site. Better documentation, faster turnaround, and reports that genuinely impress clients and insurance adjusters alike. Let’s get into it.
Key Takeaways
- A professional roofing inspection report template is only as powerful as the workflow behind it — manual photo labeling is the real time thief stealing 10+ hours from your week.
- High-performance reports follow an evidence-first approach, meaning every damage claim must be backed by a labeled, organized photo that satisfies both insurance carriers and homeowners.
- Static PDF templates create hidden friction through manual photo uploads and zero cloud sync — discover why modern mobile inspection apps eliminate these bottlenecks entirely.
- A repeatable on-site SOP transforms every roof visit into a structured, documentable process that produces consistent, defensible reports without the end-of-day scramble.
- Automated tools like voice-to-text labeling and instant report generation mean you can close out a complete, professional report before you’ve even left the driveway.
Stop the Paperwork Bleed: Why Your Roofing Inspection Report Template Matters
A roofing inspection report isn’t a piece of paper anymore. It’s a digital asset — one that wins claims, closes jobs, and builds your reputation long after you’ve left the property. Treat it like a form you fill out later, and you’re leaving serious money on the table.
The shift to digital-first documentation isn’t a trend. It’s the new baseline. In 2026, insurance carriers, homeowners, and project managers expect reports that are instant, labeled, and cloud-synced. Anything less signals that your operation is stuck in the past.
The High Cost of Manual Documentation
Break down a typical post-inspection evening and the numbers get uncomfortable fast. Photo sorting, damage labeling, formatting, and final review can easily consume two to three hours per report. Multiply that across a busy week and you’re looking at a significant chunk of billable time vanishing into administrative work that generates zero direct revenue.
There’s a subtler cost too: photo amnesia. When you’re labeling images 48 hours after the inspection, the specific details blur. Was that granule loss on the north-facing slope or the east? Was the flashing separation on the first or second chimney? Guessing isn’t professional. It’s a liability. Every hour between the roof and the report is an hour where accuracy degrades and defensibility weakens.
- Time lost per report: 2-3 hours of manual photo labeling and formatting
- Opportunity cost: Every hour at the desk is an hour you’re not on a roof generating revenue
- Memory risk: Damage details documented days later are far less reliable than notes captured in real time
Professionalism as a Competitive Edge
Your roofing inspection report template is often the first polished output a homeowner receives from you. A branded, organized digital report with clearly labeled photo evidence communicates competence before you’ve said a word about the damage. A messy handwritten PDF says the opposite.
High-quality photo evidence also dramatically reduces friction with insurance carriers. Adjusters move faster when the documentation is clean, specific, and timestamped. Disputes shrink. Approvals accelerate. The claim cycle tightens.
Here’s the competitive edge most contractors overlook: imagine handing a client a complete, professional report before you’ve backed out of their driveway. That single moment builds more trust than any sales pitch. It’s not just impressive — it’s the kind of experience that generates referrals on the spot.
Speed and quality aren’t a trade-off. With the right tools, they’re the same thing.
Anatomy of a High-Performance Roofing Inspection Report
Most roofing inspection report templates floating around online cover the obvious basics: property address, inspector name, a few checkboxes, a photo gallery. That’s not a report. That’s a starting point. What insurance carriers and homeowners actually demand in 2026 is a structured, evidence-backed document that tells a complete, defensible story about every square foot of that roof.
The distinction matters more than most contractors realize. A professional roof inspection report isn’t just documentation for your client; it’s the primary instrument an adjuster uses to approve or deny a claim. Weak structure means slow approvals. Missing evidence means disputes. The anatomy of your report determines the outcome of the claim.
Structure it in two layers. Lead with an executive summary: property details, inspection date, overall condition rating, and a concise damage overview written in plain language the homeowner can actually follow. Then go deep. The technical section is where you lay out slope-by-slope findings, material specifications, damage categorization, and your complete photo evidence log. Adjusters live in the technical section. Homeowners live in the summary. Your report needs to serve both audiences simultaneously.
Essential Technical Sections for 2026
Three elements separate modern reports from outdated ones. First, aerial measurement data. Integrating drone imagery or satellite-derived measurements into your roofing inspection report template gives every damage claim a precise spatial reference. Instead of “damage near the ridge,” you get coordinates and exact square footage. Second, material identification: shingle type, manufacturer, approximate age, and current condition rating. Adjusters need this to calculate replacement costs accurately. Third, damage categorization by cause: hail strikes documented with impact diameter, wind lift identified by tab position and adhesion failure, mechanical damage separated from weather events. Lumping damage together invites disputes. Separating it by cause closes claims faster.
Time-stamped metadata and GPS tagging on every photo aren’t optional extras anymore. They’re your fraud prevention layer. They prove you were on that specific property at that specific time, which protects you and your client equally.
The Power of Labeled Photo Evidence
Here’s where most reports collapse. “Photo 1, Photo 2, Photo 3” tells an adjuster nothing. It’s an obsolete strategy that forces reviewers to guess what they’re looking at, and guessing slows everything down.
Every image needs context baked in: which slope, what damage type, what’s the severity. Voice-to-text labeling solves this on the spot. Capture the photo, speak the description in real time, and the label is permanent before you’ve moved to the next shingle. No reconstruction from memory later. No ambiguity in the final report.
- Organize by slope: North, south, east, and west-facing sections reviewed independently for directional damage patterns
- Organize by damage type: Group hail strikes, flashing failures, and granule loss separately for faster adjuster review
- Label with specificity: “NE slope, third row from ridge, impact diameter approximately 1.5 inches” beats any generic caption
This evidence-first approach is the single biggest upgrade you can make to your documentation workflow. Tools like automated photo labeling software make it the standard on every inspection, not just the ones where you have extra time.
Static PDF vs. Automated Software: Choosing Your Strategy
Let’s be direct about something the roofing industry doesn’t say loudly enough: a free PDF template isn’t free. It’s a deferred labor cost you pay every single evening at your desk. The choice between a static document and an automated mobile inspection app isn’t a matter of preference. It’s a decision that determines how many jobs you can realistically run, how fast your claims close, and whether your business can scale beyond a one-truck operation.
The PDF Trap: Why “Free” is Expensive
Here’s what using a PDF-based roofing inspection report template actually looks like in practice. You finish the inspection, transfer photos from your phone to a laptop, open the PDF, drag images one by one into the correct fields, retype your handwritten notes, and then format everything so it doesn’t look like a ransom note. That’s not documentation. That’s data entry. And data entry doesn’t bill.
Static files compound the problem with zero version control. Email a PDF to a colleague for review and you’ve instantly created two versions of the same report. Which one is current? Who made changes? There’s no audit trail, no sync, and no way to know. For growing teams, this isn’t just inefficient. It’s a liability.
PDFs also exist in isolation. They don’t talk to your estimating platform, your CRM, or your project management tools. Every piece of data you capture on that form has to be manually re-entered somewhere else. You’re essentially doing the same job twice.
The Automated Advantage: Speed, Accuracy, Scale
Mobile inspection apps flip the entire model. Instead of writing a report after the inspection, you’re capturing structured data during it. The report isn’t a task you return to. It’s a byproduct of the work you’re already doing on the roof.
Instant report generation means the gap between “last photo taken” and “report delivered” collapses from hours to seconds. Combine that with voice-to-text labeling and custom inspection templates, and every field technician on your crew is producing consistent, professional output regardless of their experience level.
For team leaders, the shift is equally dramatic. A real-time management dashboard lets you monitor field progress without a single phone call. You see which inspections are complete, which reports are pending, and where your team is on any given job. That visibility is what makes scaling from three crews to ten actually manageable.
- PDF workflow: Capture, transfer, label, format, send. Five steps, hours of friction.
- App workflow: Capture, label in real time, generate instantly. The report builds itself.
- Team scalability: Dashboards replace check-in calls. Consistency replaces guesswork.
The fundamental shift is this: PDFs ask you to write reports. Automated software asks you to capture data. One drains your evening. The other closes your job before you leave the property.
Executing the Perfect Inspection: A Professional Workflow
Checklists don’t create great reports. Repeatable systems do. The difference between a contractor who finishes documentation on-site and one who’s still at their desk at 10 PM isn’t talent; it’s sequence. Build a locked-in SOP for every roof visit, and the report practically writes itself by the time you’re packing up your ladder.
Start at the perimeter. Before you touch a single shingle, walk the ground level and document gutters, downspouts, fascia, and siding. Granule accumulation in gutters is evidence. Siding dents at consistent heights are evidence. Splash-back staining tells you where water is escaping the drainage system. Ground-level documentation establishes the story before you climb, and it gives your roofing inspection report template a logical narrative arc that adjusters can follow from impact to consequence.
Interior documentation closes the loop. Ceiling stains, attic moisture readings, and insulation saturation levels connect exterior damage to interior consequence. That connection is what transforms a damage report into a complete claim story. Don’t skip it.
The On-Site Systematic Approach
Sequence matters. Follow this three-step capture order on every inspection:
- Step 1: Property overview and aerial measurements first. Capture wide-angle shots and integrate aerial measurement data before you document anything specific. This gives every subsequent photo a spatial context it can anchor to.
- Step 2: Document the undamaged areas. Photograph clean sections of each slope before zooming in on damage. A baseline is your best defense against disputes. It proves the damage is localized, not pre-existing across the entire surface.
- Step 3: Zoom in with voice-labeled specificity. Capture each damage point and label it in real time using voice-to-text. Slope, damage type, severity. Spoken in five seconds. Permanent before you move on.
Integrating with Xactimate and Verisk
Here’s the gap most inspection workflows ignore entirely: the hand-off between field documentation and the estimating desk. If your report doesn’t map to Xactimate line items, the desk adjuster has to translate your findings before they can build a scope. That translation takes time, introduces errors, and slows the claim cycle unnecessarily.
Structure your roofing inspection report template to mirror industry-standard line items from the start. Label damage categories using terminology that matches estimating platforms: “remove and replace three-tab shingle,” “seal and flash chimney,” “replace damaged valley metal.” Moisture mapping deserves its own section, with readings tied to specific locations so water damage scope is defensible and spatially precise.
When your field output speaks the same language as the estimating software, the hand-off is seamless. No back-and-forth calls. No missing scope items. The adjuster opens your report and gets straight to work.
Build this level of structure into every inspection with automated photo labeling and instant report generation that keeps your field documentation and your office output in perfect sync.
Dominate the Field with PHOTO iD’s Automated Reporting
Stop wasting your evenings in a photo-labeling purgatory. You’ve spent the day climbing ladders and documenting damage. You shouldn’t have to spend your night fighting with a file folder. PHOTO iD turns your smartphone into a high-velocity reporting machine. It replaces the traditional, clunky roofing inspection report template with a living, breathing digital workflow that keeps pace with your boots on the ground.
The secret weapon is Voice-to-Text Labeling. Don’t type. Just talk. Capture the hail strike, speak the slope and damage type, and move to the next one. The app labels the image instantly. By the time you’re back in your truck, the heavy lifting is done. You aren’t just taking pictures; you’re building a defensible evidence log in real time. It’s fast. It’s fluid. It’s flawless!
Professionalism shouldn’t be a chore. With the Custom Report Builder, you can tailor every output to match your brand’s specific look and feel. It’s about more than just aesthetics. It’s about delivering a report that commands respect from carriers and homeowners alike. While your competitors are still dragging and dropping photos into Word docs, you’re delivering branded, polished documentation with a single tap.
Managing a crew? The Team Management Dashboard gives you a bird’s-eye view of every project in your pipeline. See field progress as it happens. Review reports before they’re sent. Maintain total quality control without ever leaving the office. It’s the transparency you need to scale your business without losing your mind. This is how you move from a small operation to a market leader.
Automation That Works as Fast as You Do
Capture, label, and organize photos in one seamless motion. The app handles the structural organization so you can focus on the inspection itself. Once you finish the walk-through, you can generate a professional PDF report instantly. No more waiting until you get back to the office. No more “I’ll send it tomorrow.”
Everything you capture is stored in a secure cloud. This means your office team has instant access to the data while you’re still on the roof. They can start the estimate in Xactimate before you’ve even finished your next inspection. It’s the ultimate bridge between field work and office output.
Built by Adjusters, for Professionals
This isn’t software designed in a vacuum. PHOTO iD carries the heritage of “The Claims Coach,” meaning it was built by people who understand the grit and stress of a real-world jobsite. It’s rugged. It’s reliable. It’s ready for the field. From aerial roof and wall measurement integration to seamless photo organization, every feature exists to save you time and protect your bottom line. Use a roofing inspection report template that actually works for you, not against you.
The era of manual reporting is over. It’s time to reclaim your time and dominate your market with speed and precision. Transform your reporting with PHOTO iD today!
Your Next Inspection Ends With a Finished Report
The gap between a good contractor and a great one isn’t skill. It’s systems. A professional roofing inspection report template backed by automated tools means every inspection produces consistent, defensible documentation without the late-night desk work that’s been quietly draining your time and energy.
Three things to carry forward: labeled photo evidence closes claims faster than any written description alone, automated workflows replace manual data entry with real-time capture, and consistent documentation is what separates scalable businesses from ones that plateau at two trucks.
PHOTO iD was built by industry veteran Ken Perry specifically for professionals who can’t afford to lose hours to paperwork. Automated photo labeling saves up to 75% of your documentation time, and the real-time team management dashboard keeps your entire operation visible and accountable from any device.
Don’t let another evening disappear into photo folders and formatting. Start your free trial of PHOTO iD and automate your roofing reports! Your next inspection deserves to end in the driveway, not at your desk.
Frequently Asked Questions About Roofing Inspection Report Templates
What should be included in a professional roofing inspection report?
A professional roofing inspection report needs two distinct layers: an executive summary for the homeowner and a technical section for adjusters. The summary covers property details, inspection date, and overall condition in plain language. The technical section documents slope-by-slope findings, material specifications, damage categorization by cause, moisture readings, and a fully labeled photo evidence log with GPS-tagged, timestamped images.
Don’t forget interior documentation. Attic moisture readings and ceiling stain locations connect exterior damage to interior consequence, which is what transforms a basic damage list into a complete, defensible claim story that adjusters can act on immediately.
How long does it take to create a roof report using a template?
With a static PDF-based roofing inspection report template, expect two to three hours of post-inspection work per report: photo transfer, manual labeling, formatting, and review. That’s a conservative estimate on a straightforward job. Complex multi-slope roofs with extensive damage documentation can push that well beyond three hours.
Automated mobile inspection apps collapse that timeline dramatically. When photos are labeled in real time using voice-to-text during the inspection itself, report generation becomes nearly instant. Many professionals finish their complete report before leaving the property entirely.
Can I use a roofing inspection app instead of a PDF template?
Absolutely, and for most active contractors, it’s the smarter choice. A mobile inspection app captures structured data during the inspection rather than after it, meaning the report builds itself as you work. Features like voice-to-text labeling, custom inspection templates, and instant report generation eliminate the manual data entry that makes PDF workflows so time-consuming.
Apps also solve the version control problem that plagues PDF workflows. Everything syncs to a secure cloud instantly, so your office team accesses the same live data you’re capturing on the roof. No duplicate files, no “which version is current” confusion.
How do I organize hundreds of roof photos for an insurance claim?
Organize by slope first, then by damage type within each slope. North, south, east, and west-facing sections should be reviewed and documented independently because directional damage patterns matter to adjusters evaluating wind or hail claims. Within each slope, group hail strikes separately from flashing failures, granule loss, and mechanical damage.
The real key is labeling at the moment of capture, not afterward. Voice-to-text tools let you speak the slope, damage type, and severity into a label instantly. When you’re sorting through 300 photos two days later without labels, accuracy degrades fast and defensibility weakens with it.
Is voice-to-text accurate enough for professional roofing reports?
Yes, modern voice-to-text technology handles roofing terminology reliably in real-world field conditions. The practical advantage isn’t just accuracy; it’s speed and context. Speaking a label at the moment of capture, “northeast slope, second row from ridge, hail impact approximately 1.25 inches,” produces a far more precise description than anything reconstructed from memory hours later.
The professional output quality depends on your specificity, not the technology. Speak in complete, structured descriptions covering location, damage type, and severity, and the resulting labels will satisfy both insurance carriers and homeowners without any additional editing.
How do automated templates integrate with Xactimate or Verisk?
The integration isn’t about a direct software handshake; it’s about speaking the same language. A well-structured roofing inspection report template uses damage categories and terminology that map directly to Xactimate line items, such as “remove and replace architectural shingle” or “replace damaged valley metal.” When your field output already mirrors estimating platform language, the desk adjuster skips the translation step entirely.
Aerial roof and wall measurement data adds another layer of precision. Integrating measurement data into your report gives every damage claim a spatial reference with exact square footage, which feeds directly into scope calculations without requiring the adjuster to re-measure or estimate coverage areas independently.
What is the best way to document hail damage on a roof?
Start with a test square methodology: identify a representative two-by-two-foot section on each slope and photograph it in detail before moving to individual strikes. This establishes a damage density baseline per slope. Then document individual impacts with close-up shots that show impact diameter clearly, ideally with a reference object for scale. Label each image with slope, row position, and measured impact size.
Photograph undamaged sections of each slope before zooming into damage. That baseline comparison is your strongest defense against pre-existing condition disputes. It proves the damage is localized and event-specific, not a pattern of general wear across the entire surface.
Do I need special equipment for aerial roof measurements?
You don’t need to own a drone to access aerial measurement data. Many inspection platforms, including tools that integrate with roofing inspection apps, pull satellite-derived measurements that deliver pitch, square footage, and slope-by-slope breakdowns without requiring any specialized hardware on your end.
If you do use drone imagery, the key is integrating those measurements directly into your report rather than attaching them as a separate file. Measurements embedded alongside your photo evidence give every damage location a precise spatial reference, which strengthens the claim and speeds up adjuster review without requiring any additional equipment investment beyond your smartphone.