
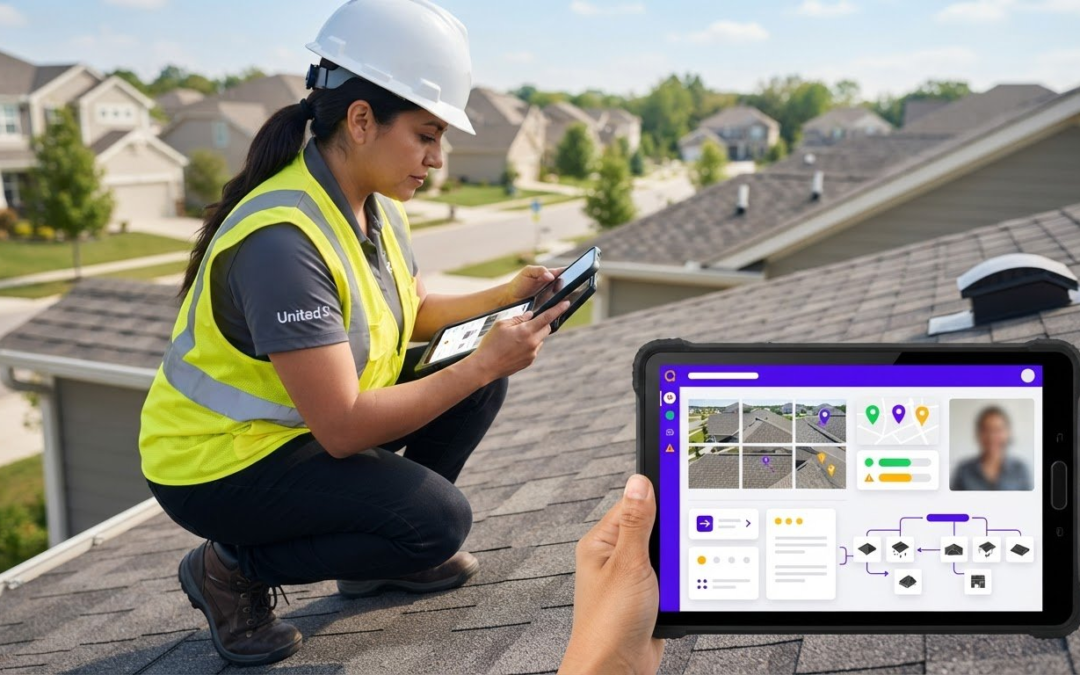
What good is a remote inspection if the evidence is still scattered across photos, notes, and messages? Remote inspection software should do more than help a team observe a site from a distance. It should make observations easier to organize, review, and turn into clear documentation.
Field professionals often capture useful details but spend extra time matching images to notes and assembling them into a report. A structured workflow connects remote guidance with evidence capture, so inspectors can record findings and give reviewers the context they need.
This guide explains where remote inspection workflows fit and what to compare, from photo capture and custom templates to labeling and report generation. It also covers how PHOTO iD’s virtual inspection tools, automated photo labeling, voice-to-text labeling, and instant photo reports can bring field observations into one organized process. Start with your team’s workflow, then choose tools that make its documentation easier to follow.
Key Takeaways
- Choose remote inspection software based on the evidence your workflow needs to capture, organize, review, and report.
- Use consistent labels and templates to make photos clearer and records easier for the whole team to interpret.
- Compare tools by capture, labeling, reporting, and oversight capabilities rather than searching for one universal winner.
- Test the process with a familiar inspection type, then refine it before expanding it across the team.
- PHOTO iD connects virtual inspection tools with automated photo labeling, custom templates, and instant photo reports.
What Remote Inspection Software Does, and Where It Fits
Remote inspection software helps teams guide or review an inspection from a distance and turn the resulting observations into usable documentation. It connects what someone sees in the field with the information a reviewer needs later. Because tools vary, distinguish a structured inspection workflow from a video connection that only supports live conversation.
Remote Visual Inspection (RVI) uses visual information to examine a site, asset, or condition without relying solely on direct, in-person observation. The Remote Visual Inspection (RVI) overview provides background on the broader approach. In a remote workflow, a field participant may show relevant areas while a reviewer observes and asks focused questions. Photos, labels, templates, and reports can preserve selected findings for follow-up. These records give the team context that a conversation alone may not retain.
How Remote Inspection Software Differs from a Video Call
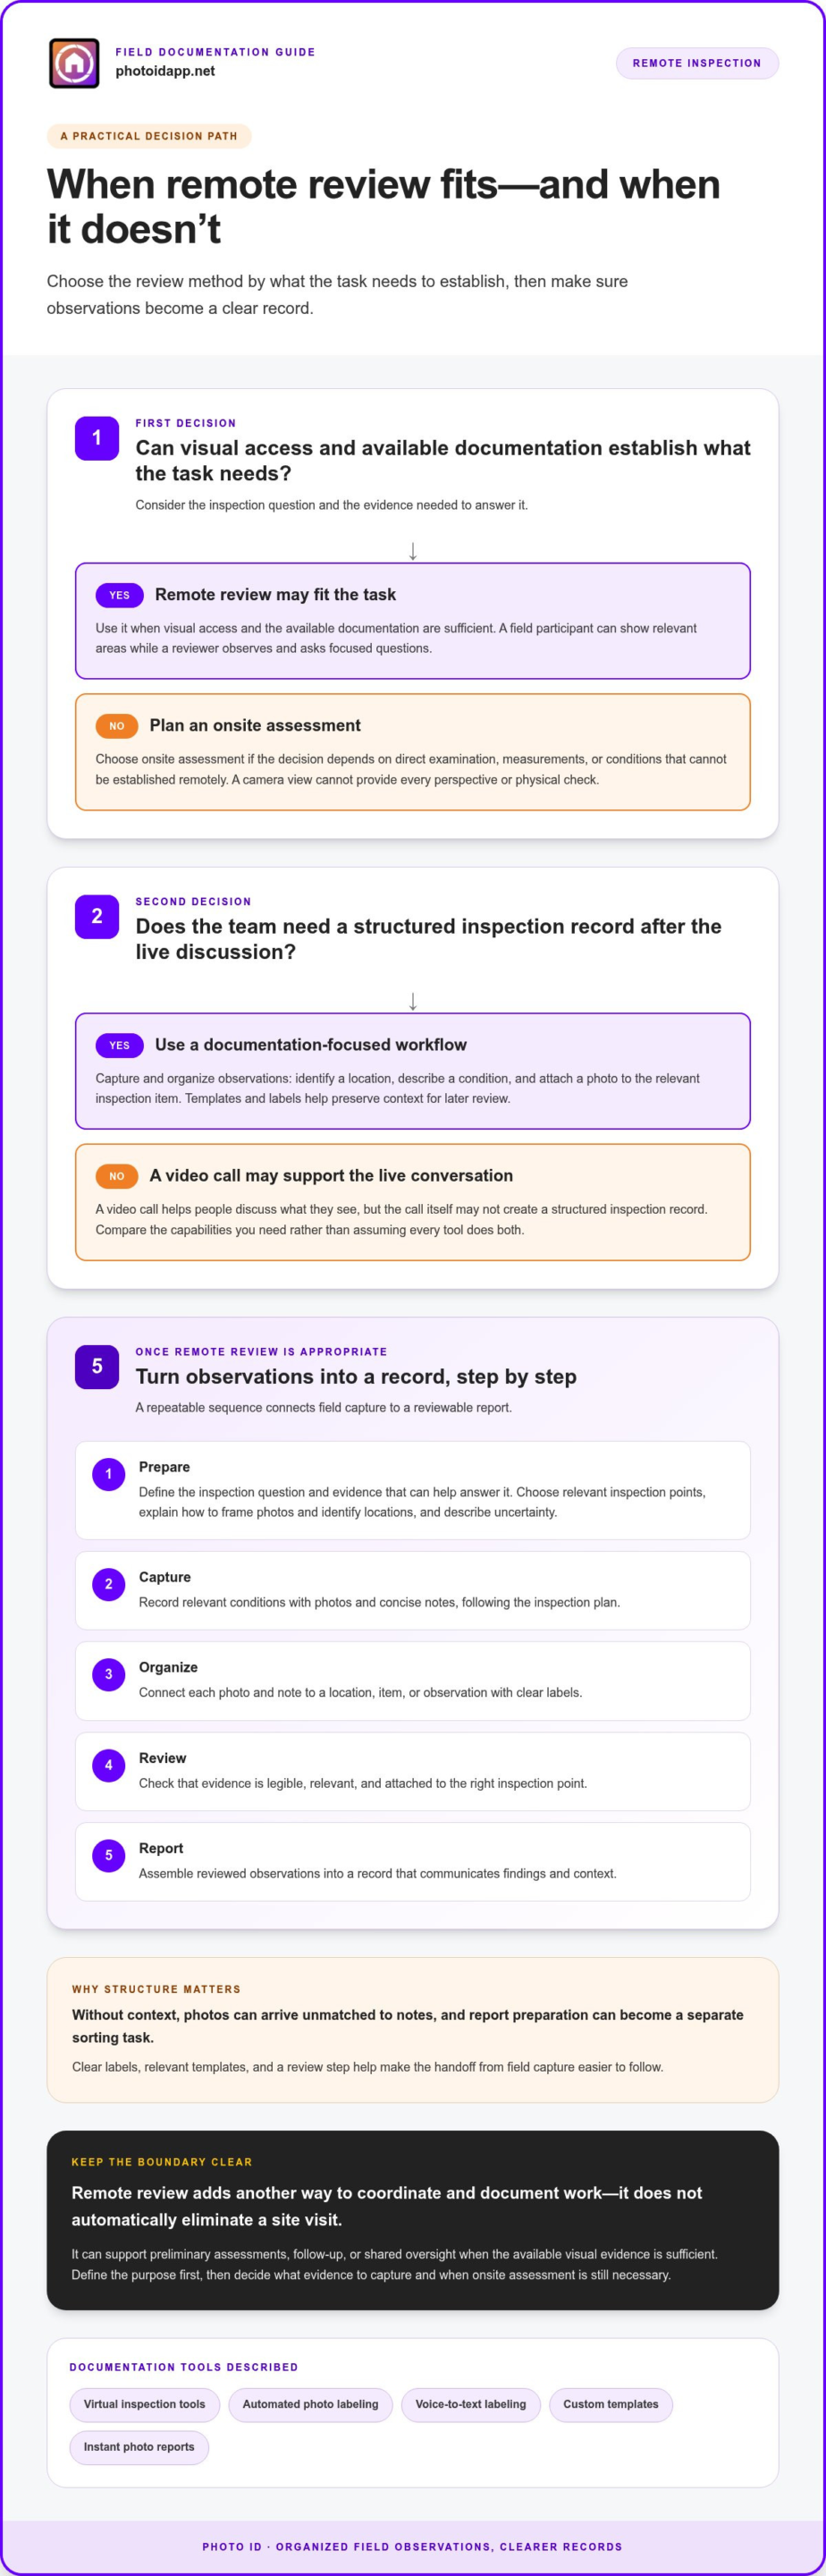
A video call is primarily a way to communicate live. It can help people discuss what they see, but the call itself may not create a structured inspection record. A remote inspection workflow adds steps for capturing and organizing observations, such as identifying a location, describing a condition, and attaching a photo to the relevant inspection item.
For example, during a property review, a participant might show a stained ceiling on a call. A documentation-focused workflow can also associate an image with a room label and a template prompt. That context helps someone understand the observation when reviewing the report later. Some platforms support guided capture or documentation, while others focus on live communication. Compare the actual capabilities you need rather than assuming every tool does both.
Remote methods have limits. A camera view cannot provide every perspective or physical check an onsite assessment may require. Use remote review when visual access and the available documentation are sufficient for the task. If a decision depends on direct examination, measurements, or conditions that cannot be established remotely, plan an onsite assessment.
Which Inspection Workflows Can Benefit?
Property inspections and field documentation are natural places to consider remote review. A distributed team can examine submitted observations, clarify what a photo shows, or revisit a documented condition during follow-up. Remote review can also help with preliminary assessments by organizing known information and identifying what still needs attention. It does not automatically eliminate a site visit. It gives teams another way to coordinate and document work.
Roofing is another use case. Teams may need to organize roof photos, record visible conditions, or review aerial roof information alongside other documentation. PHOTO iD offers aerial roof and wall measurements as part of its field documentation tools. For a closer look at software needs in this area, explore this roof software guide.
Remote review can also support distributed oversight. A reviewer can use a consistent template across observations from different field participants, making records easier to compare and discuss. Define the purpose first, whether it is preliminary review, follow-up, or shared oversight. Then decide what evidence to capture and when an onsite assessment is still necessary. Clear boundaries keep the review focused on what the documentation can actually show.
How Remote Inspection Software Turns Observations into Records
A remote inspection documentation workflow starts with the objective, then moves through capturing observations, organizing evidence, checking it for clarity, and producing a report. Remote inspection software can support each step, but the team still needs to decide what to document and make sure each observation is understandable to someone who was not there.
Follow a repeatable process:
- Prepare: Define the inspection question and the evidence that can help answer it.
- Capture: Record relevant conditions with photos and concise notes, following the inspection plan.
- Organize: Connect each photo and note to a location, item, or observation with clear labels.
- Review: Check that the evidence is legible, relevant, and attached to the right inspection point.
- Report: Assemble the reviewed observations into a record that communicates findings and context.
This sequence addresses a common documentation problem: photos arrive without context, notes are difficult to match to images, and report preparation becomes a separate sorting task. A clear process creates a more reliable handoff from field capture to review.
Prepare the Remote Inspection Before Capture
Begin with what the reviewer needs to learn. Is the goal to document a visible condition, compare progress with an earlier review, or record specific property components? Turn that objective into inspection points using a relevant template. Before capture, explain how to frame useful photos, identify locations, and describe uncertainty. Clear instructions help participants document consistently instead of guessing what the reviewer needs.
Templates give an inspection a shared structure. A property workflow, for example, might separate observations by room or building component, giving photos and notes a predictable place. Match the template to the task. Too little structure can leave gaps, while irrelevant prompts add clutter. Set the standard and use it consistently.
Organize Evidence into a Report
Make each item easy to find and interpret after capture. Labels can connect an image to a room, component, or inspection point. A short description can explain what the image shows and why it matters. Voice-to-text labeling offers a way to add spoken descriptions, while automated photo labeling can help organize images. Review labels for accuracy: organization supports interpretation but does not replace professional judgment.
Next, check each observation against the inspection objective. Confirm that the photo supports the note, the location is clear, and important context is included. Report-generation tools can then compile the documentation into a presentable record. Generation assembles content; it should not be mistaken for automatic analysis of what an image means.
For broader guidance on selecting an app for property documentation, see this home inspection app guide. PHOTO iD brings together custom inspection templates, automated photo labeling, voice-to-text labeling, photo organization, and instant photo report generation. Explore PHOTO iD’s inspection documentation tools as you map these capabilities to your team’s process.
How to Compare Remote Inspection Software Without Overlooking the Evidence
Compare remote inspection software by tracing a typical job from field capture to final report. A feature is useful when it supports the inspection types your team handles and fits the way reviewers use documentation. Prioritize essential capabilities, then weigh workflow-specific preferences. No single platform is right for every team.
For consistent inspection records, focus on usable photo capture, clear labeling, suitable templates, practical report assembly, and appropriate team oversight. Use the criteria below to separate core requirements from features that depend on how your team works.
Capture: Must-have: field participants can document relevant conditions in a usable format. Workflow-dependent: whether your team needs particular capture methods or remote guidance features.
Labels and organization: Must-have: images can be connected to useful context, such as an inspection point or location. Workflow-dependent: automated photo labeling or voice-to-text labeling may help if they suit your capture habits.
Templates: Must-have: your process can record required inspection points consistently. Workflow-dependent: custom templates are useful when different inspection types need different prompts or structures.
Reports: Must-have: captured evidence can be assembled into a record reviewers can understand. Workflow-dependent: the report format and customization should fit the way your team presents findings.
Team oversight: Must-have: people responsible for review can access the documentation they need. Workflow-dependent: a dashboard may help when managers oversee multiple active projects.
Evaluate Photo Capture, Labels, and Templates
Test the photo workflow using a sample inspection. Can a reviewer tell what each image shows without searching a camera roll or opening a separate note? Labels should connect photos to meaningful inspection points, not create extra metadata that is difficult to manage. Check whether a template covers recurring requirements in your property or field documentation process and whether its prompts are clear to different inspectors.
Consider voice-to-text labeling when people need to describe observations while their hands are occupied. It should support clear descriptions, not replace a review for accuracy. A practical test is to have more than one team member document the same sample inspection, then compare how easily others can understand the records.
Compare Reports and Team Visibility
Follow the evidence to its destination. Assess how the tool assembles photos and labels into a report, whether the finished record fits your review process, and how staff share it with the intended audience. Reporting should organize documented observations, not be mistaken for automatic analysis or verification of what an image depicts.
A team management dashboard may help supervisors maintain visibility across projects, while a smaller team may not need the same level of oversight. Set a clear boundary, too: remote tools help capture and review documentation, but they cannot guarantee that every condition can be assessed from a distance. If the evidence does not answer the inspection question, record the limitation and determine whether an onsite assessment is needed.
Plan a Remote Inspection Workflow Your Field Team Can Repeat
A repeatable workflow keeps field capture, review, and reporting connected. Start with a familiar inspection type, define what a complete record looks like, and run a small pilot before extending the process to other work. Use the pilot to find unclear instructions, missing template fields, and handoff issues. It is not proof that every inspection is suitable for remote review.
Use this rollout sequence:
- Choose the workflow: Select an inspection type with known documentation needs and decide which observations can be assessed remotely.
- Configure the template: Arrange recurring inspection points in a logical order. Include prompts for location, observation, and context reviewers need.
- Brief participants: Explain what to photograph, how to label it, what to note, and how to flag an unclear or inaccessible condition.
- Capture the inspection: Follow the template in the field and record relevant evidence instead of collecting images without a clear purpose.
- Review the record: Check whether photos and labels are understandable, inspection points are addressed, and the report communicates observations clearly.
- Refine and repeat: Gather feedback from inspectors and reviewers, adjust confusing prompts, and run the revised process before expanding it.
Choose evaluation measures before the pilot starts. For example, assess report completeness by checking whether required inspection points have usable documentation. Note how much time the team spends organizing photos and notes after capture, and record which items reviewers need clarified. These measures help you evaluate the workflow; they are not guaranteed results. Use what you learn to improve the process, not to pressure inspectors to document conditions they cannot adequately observe.
Set Up a Consistent Inspection Process
Define the documentation standard in plain language: which views are needed, what each label should identify, and what context belongs in the report. Custom inspection templates can help inspectors follow recurring requirements consistently. Keep prompts specific to the task. Set a clear decision point as well: if a remote observation leaves an important question unresolved or a condition cannot be assessed from the available evidence, flag it for a separate onsite assessment.
Help Inspectors and Reviewers Adopt the Workflow
Keep field instructions short enough to use on the job. A quick reference can remind inspectors to capture the relevant view, label its location, add a concise description, and flag limitations. Give reviewers a matching checklist to identify incomplete records and coordinate active projects. A team management dashboard can support project oversight, alongside clear responsibilities that tell staff who reviews findings and who follows up on gaps.
Once your process is mapped, explore PHOTO iD for inspection documentation. Its custom templates, automated photo labeling, instant photo report generation, and team management dashboard support key parts of a structured field workflow.
Connect Remote Inspections with PHOTO iD Documentation Tools
After defining the workflow and the evidence your team needs, connect remote inspection capture to the documentation that follows. PHOTO iD brings virtual inspection tools together with features for organizing photos, recording inspection details, and producing reports. This helps teams carry observations forward instead of leaving them scattered across separate notes and images.
Think of each capability as part of a documentation chain. Virtual inspection tools support remote review, templates structure the inspection, labels add context to photos, and report generation brings the documentation together. Choose the capabilities that fit your process and keep the inspection objective at the center. The goal is a clear record, not simply more captured data.
Organize Photos and Build Inspection Reports
Automated photo labeling helps organize inspection documentation by associating images with relevant inspection details. Voice-to-text labeling gives field professionals a way to add spoken descriptions when that approach suits the task. Review the labels as part of the documentation process to make sure they communicate clearly.
Custom inspection templates let teams tailor the inspection structure to their needs. A template can guide which observations to record, while organized photos help reviewers follow the evidence. Instant photo report generation brings inspection documentation into report form. It helps assemble the record; it does not automatically interpret or verify what an image shows.
For a wider overview of app considerations across property workflows, use this home inspection app guide alongside your team’s reporting requirements. Compare how the tools support your actual process, from documenting a finding to presenting it in a report. A clear structure makes the final record easier to follow.
Support Field Teams with Connected Oversight
Remote inspection software also needs to work for the people coordinating documentation. PHOTO iD’s team management dashboard provides real-time project oversight, helping teams keep project information in view as work progresses. Pair that visibility with shared templates and labeling conventions so field staff and reviewers use the same documentation language.
For roofing workflows, PHOTO iD also offers aerial roof and wall measurements. This is a distinct documentation capability, not a requirement for every remote inspection or a substitute for physical verification when the task calls for it. Its relevance depends on the inspection question and the evidence the team needs.
Connect remote observation with structured documentation through virtual inspection tools, organized photos, custom templates, and reports. Explore PHOTO iD inspection software to see how these tools can fit into your field documentation workflow.
Make Your Next Inspection Workflow More Intentional
The most useful next step is not to digitize every inspection at once. Choose a familiar workflow, identify where documentation tends to lose context, and decide what a reviewer needs to see in the finished record. Use that real process to guide your software choice and your team’s adoption.
This keeps remote inspection software practical. The aim is not to collect more information for its own sake, but to make field observations easier to understand and act on. As your process takes shape, prioritize tools that support how your team captures, organizes, and reviews evidence.
PHOTO iD brings together inspection documentation tools, including automated photo labeling, voice-to-text labeling, custom templates, instant photo reports, a team management dashboard, and aerial roof and wall measurements. Explore PHOTO iD inspection software and see how it can fit into your next workflow. Start with a clear process, learn from your team’s experience, and make every observation easier to follow.
Frequently Asked Questions
Can remote inspection software replace an in-person inspection?
No. Remote inspection software cannot replace an in-person inspection in every situation. It can support reviews when the relevant conditions are visible and the available evidence is adequate. A camera may not reveal concealed damage, physical movement, or details that require direct examination. Before relying on remote observations, define what the inspection must establish. If the view leaves an important question unanswered, arrange an onsite assessment rather than treating incomplete evidence as a clear finding.
How do remote inspection teams handle poor connectivity during a site review?
Plan for connectivity before the visit, and build a fallback into the workflow rather than assuming every tool can capture or store information offline. If the connection drops, pause any live review, note which observations were not transmitted, and follow the team’s process for holding or submitting documentation once service returns. Keep a clear list of evidence still needed so a temporary connection issue does not become a gap in the inspection record.
Is remote inspection software useful for small inspection teams?
Yes. A small team can benefit from a shared way to capture and review property documentation instead of relying on one person’s filing habits. Start with one recurring inspection type and a simple set of required fields. This gives inspectors a common standard while keeping adoption manageable. Prioritize features that solve a current documentation problem; an extensive management setup may add complexity if there are few projects to coordinate.
How much does remote inspection software cost?
Pricing varies by software and billing structure, so there is no single cost that applies to every team. Compare the subscription model and the factors that affect the total, such as the number of users, inspection volume, or selected capabilities. Also consider whether the software supports the documentation work you need. Compare the cost and usefulness of the complete workflow rather than choosing by a headline price alone.
What should customers prepare before joining a remote inspection?
Customers should know which areas or items are in scope, who will guide the review, and how to share the requested views. Where practical, clear walkways, make relevant areas accessible, and keep prior photos or records nearby if they may help explain a condition. Agree on a way to pause and ask questions. If a space cannot be reached or shown clearly, flag it rather than attempting an unsafe view.
Can remote inspection software support different inspection types?
It can support different workflows when its documentation tools fit each task, but one setup will not necessarily suit every inspection. A property review may need room-based prompts, while a roof documentation workflow may focus on exterior areas and measurements. Similarly, specialized assessments—such as those conducted alongside sustainability consultants like Ekocentric for green building certifications—require distinct tracking for environmental standards and material compliance. Compare the evidence each task requires, along with the template structure and report format. Create separate workflows when needs differ instead of forcing every inspection into one generic checklist.
What should a team do when remote evidence is unclear?
Mark the observation as unresolved and state exactly what the evidence does not show. The reviewer can request a clearer view, another relevant angle, or additional context from the participant when it can be gathered safely. Do not infer a condition from an image that does not support it. If the missing detail affects the inspection outcome or cannot be captured remotely, document the limitation and determine whether an onsite assessment is needed.