
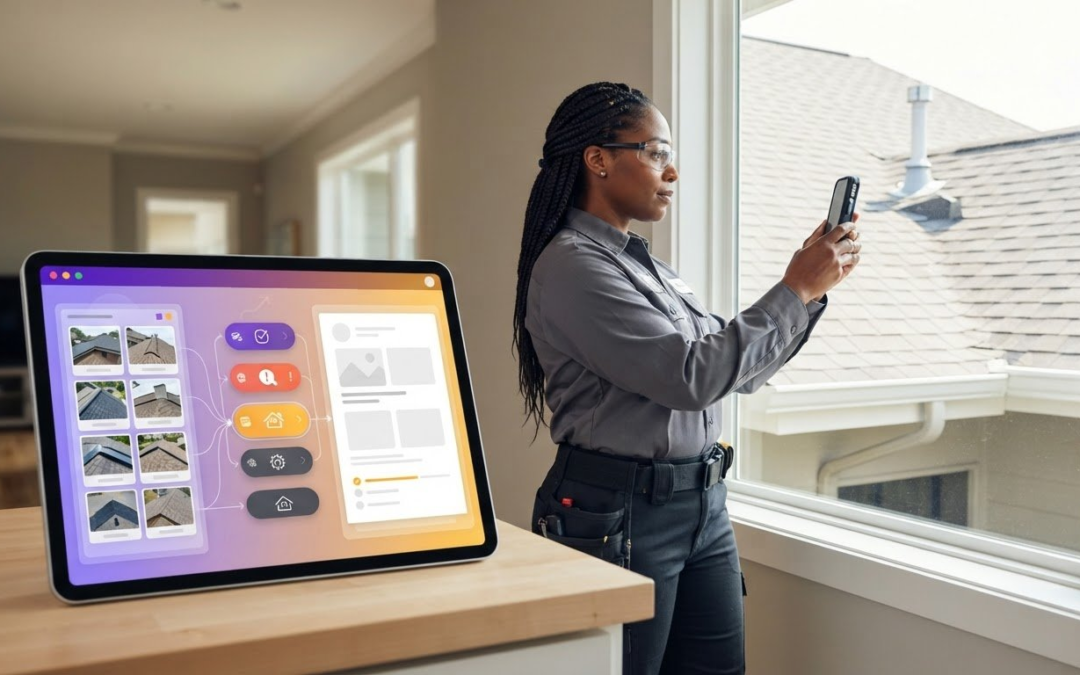
What if the best home inspection report software isn’t the one with the longest feature list, but the one that keeps evidence connected from the first photo to the final report? Onsite, notes, images, and report sections can quickly become hard to organize. Then the inspection ends, and the work of sorting, writing, and formatting begins.
Look beyond a polished demo or a checklist of features. A useful workflow should help you capture organized evidence in the field, turn it into a clear report, and deliver it without repetitive admin. The practical test is whether the software makes each step easier without slowing down the inspection.
This guide shows you how to evaluate the full workflow, from mobile photo capture and labeling to templates, report review, and delivery. You’ll learn what to consider as an individual inspector or as part of a field team, and how automated photo labeling, voice-to-text, custom templates, and instant report generation can connect evidence to reporting. Follow the workflow, not just the feature list, and choose with confidence.
Key Takeaways
- Evaluate home inspection report software by tracing how field observations and photos move into review, reporting, and delivery.
- Use a repeatable workflow to capture and organize evidence, then shape it into clear report sections without losing property-specific details.
- Compare practical criteria such as photo organization, templates, mobile use, report generation, and team oversight instead of relying on feature lists alone.
- Roll out a new workflow in stages: map current steps, configure templates, test a representative inspection, and refine based on feedback.
- See how PHOTO iD’s automated photo labeling, voice-to-text labeling, custom templates, and instant photo report generation support an organized reporting process.
Home Inspection Software: Field Notes to Final Report
Strong reports begin with connected evidence. During an inspection, observations and photos need to stay tied to the right locations and findings. If they’re scattered across a camera roll, loose notes, and a document editor, you have to reconnect them later by sorting images, rewriting observations, and matching each photo to a report section.
A home inspection provides a visual and written assessment of a property’s condition, distinct from an appraisal or code inspection. The Home Inspection overview offers useful background on the scope of this work. Reporting software focuses on documenting findings and presenting them in a structured format for review and delivery.
What is home inspection report software?
Home inspection report software connects field observations and supporting photos to organized report sections, then helps the inspector review and deliver the completed report. It brings evidence and structure into one workflow instead of leaving you to assemble every piece manually.
For example, you can record an observation about a loose handrail, attach a photo that shows its location, and place both within the relevant report section. Templates give recurring sections a consistent structure while leaving room for property-specific details. Automated labeling and report generation can assist with organizing and assembling documentation, but you remain responsible for checking the evidence, wording, and final report.
Why do inspectors need more than a camera and a document editor?
A camera captures images. A document editor holds text. Neither automatically connects a particular photo to the observation it supports or to the right place in a report. A basic photo-storage app may keep images together, but you still have to identify and label them, then pair them with findings.
That separation creates extra steps after the site visit. Imagine photographing a stained ceiling, noting its location elsewhere, then searching through unlabeled images to find the right shot while drafting the report. Repeat that across multiple rooms and findings, and sorting, rewriting, and matching evidence can take time away from reviewing the inspection itself.
Organized, labeled photos make those connections easier to follow. They help you assemble findings into a report and revisit supporting evidence during review. The goal isn’t to automate professional judgment. It’s to keep documentation orderly, make each finding easier to understand, and create a clearer path from fieldwork to a report ready for review.
How home inspection report software moves evidence into a client-ready report
A connected workflow carries each observation from the property into the report, so you aren’t left reconstructing findings from scattered notes and images later. Keep the evidence attached to the inspection item it supports: When a photo stays linked to its finding, you can review the condition and its context together.
Capture and organize inspection evidence onsite
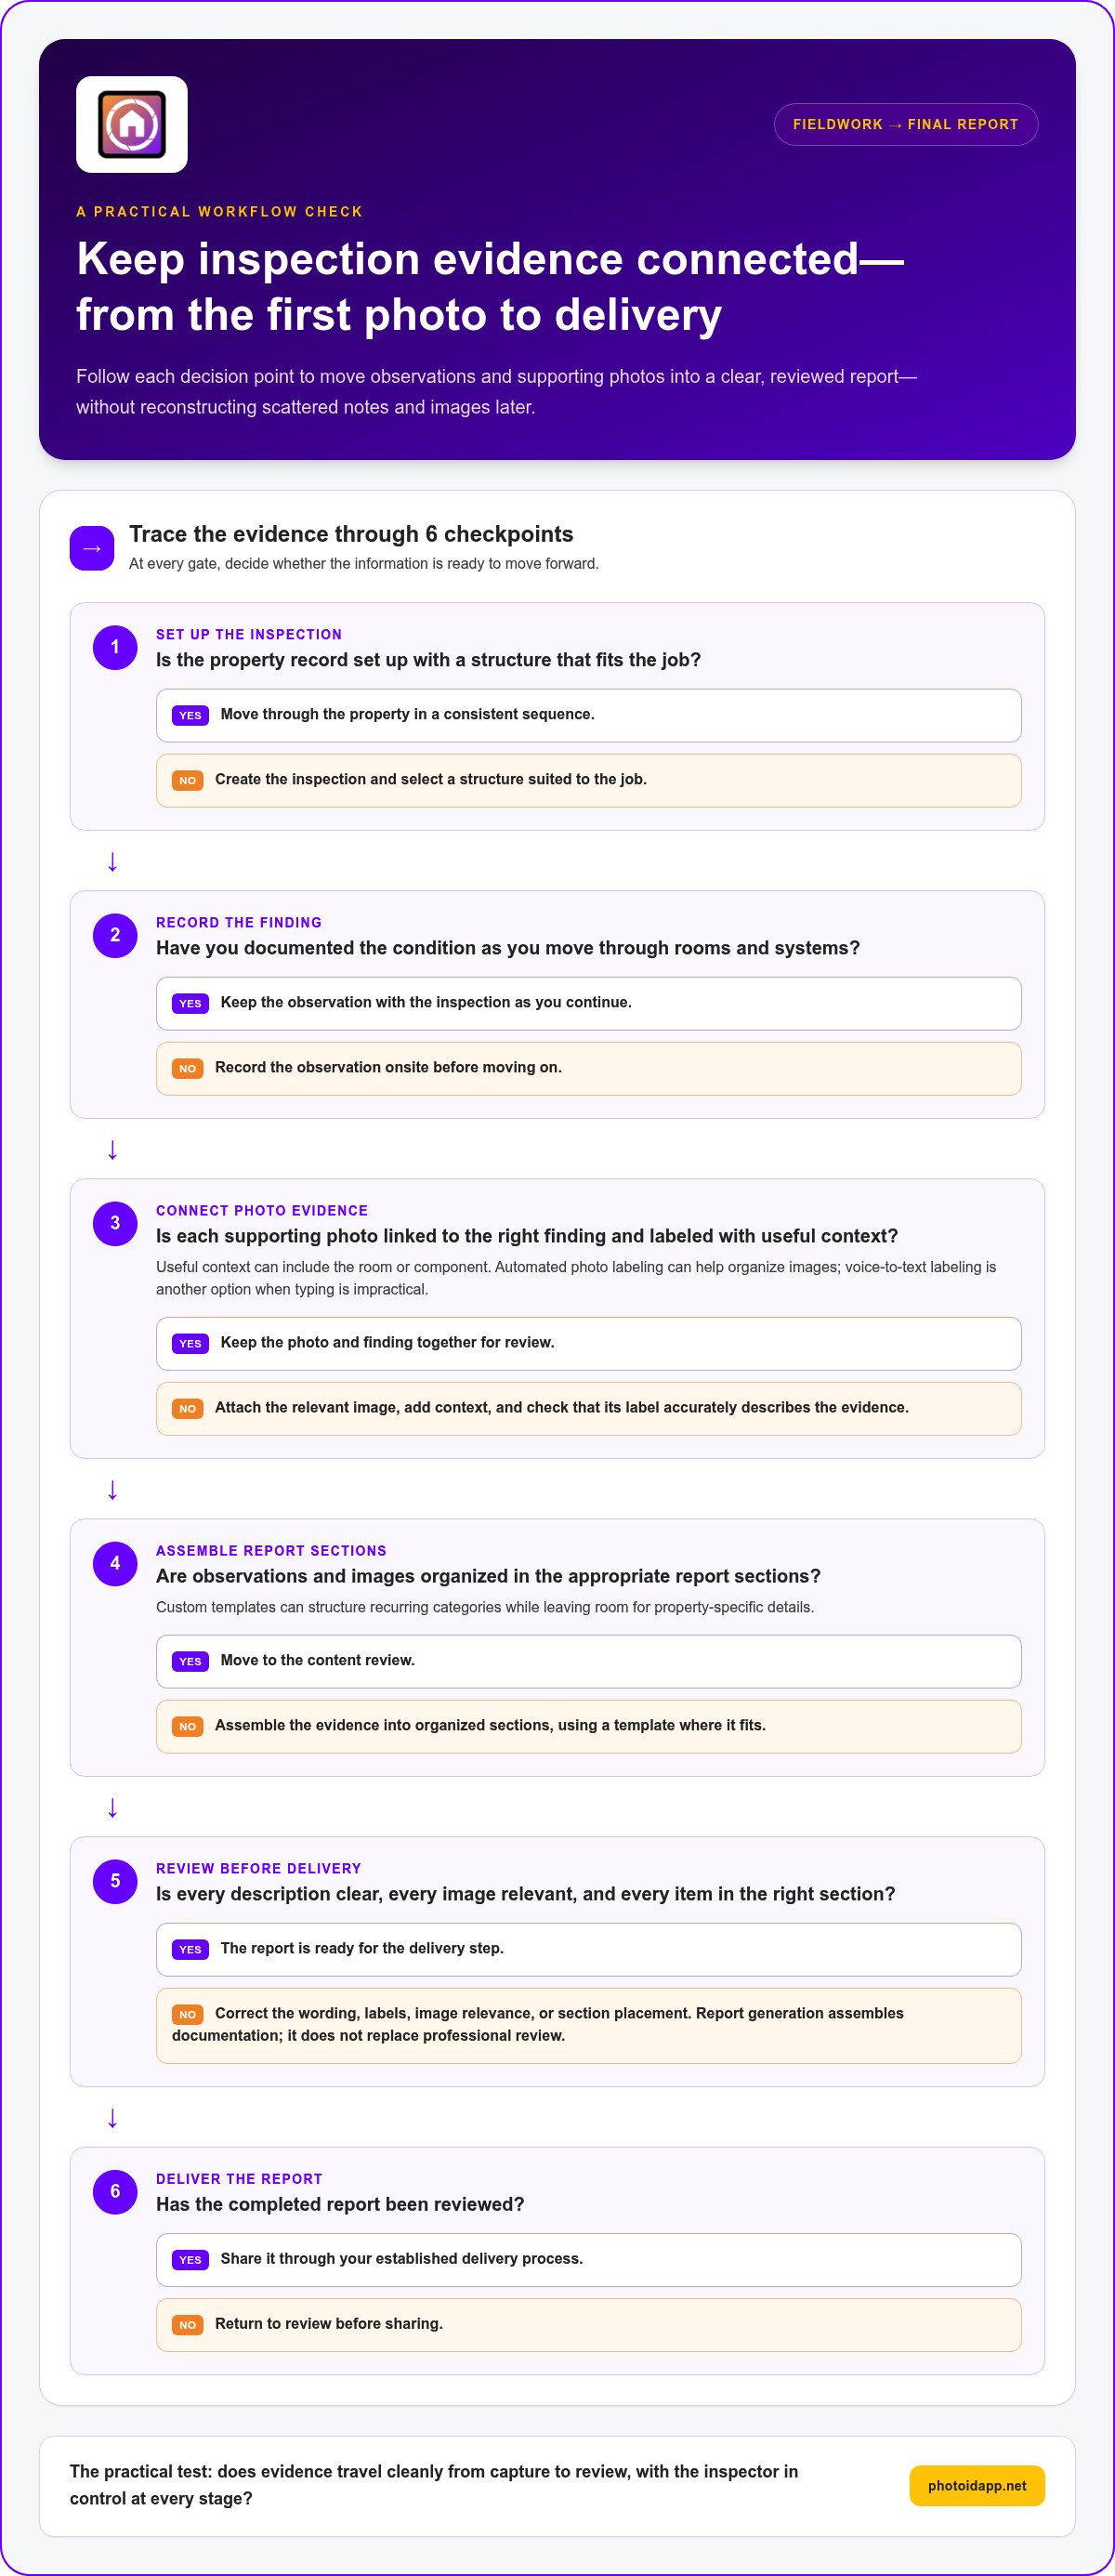
Start by creating an inspection and moving through the property in a consistent sequence. Record each observation, capture supporting photos, and label them with useful context, such as the room or component. Automated photo labeling helps organize images as part of this process. Voice-to-text labeling provides another way to record a label or note when typing isn’t practical. Review each label and observation to make sure it accurately describes the evidence.
- Create the inspection. Set up the property record and select a structure that fits the job.
- Capture observations. Document conditions as you move through rooms and systems.
- Attach and label photos. Connect each image to the relevant finding and add context, such as the room or component.
- Assemble the report. Bring observations and images into organized report sections.
- Review the content. Check descriptions, labels, image relevance, and section placement.
- Deliver the report. Share the reviewed report through your established delivery process.
Build, review, and deliver the report
Custom templates structure recurring categories, so familiar sections are ready to use without forcing every property into identical observations. You can follow a consistent format while adding details that reflect the specific condition, location, or image evidence for that inspection.
Instant photo report generation can bring documentation together in report form, but generation is an assembly step, not a substitute for professional review. Check that each observation is clear, each image supports the right finding, and the content appears in the appropriate section. For a useful reference point, compare your reporting process with the ASHI Standards of Practice, which outline professional inspection scope and reporting considerations.
That sequence is the practical test for home inspection report software: does evidence travel cleanly from capture to review, with you in control at every stage? PHOTO iD’s inspection reporting workflow brings mobile capture, labeling, templates, and photo report generation together.
How to compare home inspection report software features that matter
Compare the work the software helps you do, not the length of its feature list. Picture your actual routine: moving through a property, documenting a finding, connecting evidence, then reviewing the report. The inspection reporting workflow begins with the work onsite, so evaluate whether each tool supports your field habits as well as report assembly. Use this framework to compare options based on practical needs rather than vendor rankings.
| Criteria | Field question | Practical benefit |
|---|---|---|
| Photo organization | Can you label photos and keep them connected to the relevant finding or report section? | Evidence is easier to locate, understand, and review. |
| Templates | Can you structure recurring categories and still add property-specific observations? | Repeatable sections support consistency without forcing identical reports. |
| Report generation and review | Does the software assemble documentation while leaving a clear step for inspector review? | You can check labels, wording, and section placement before delivery. |
| Mobile workflow | Can you capture and organize information in a way that fits how you work onsite? | Field documentation stays connected to the process instead of becoming a separate cleanup task. |
| Team oversight | Can a dashboard provide visibility into inspection projects? | Teams can get a clearer view of project activity and workflow. |
| Optional capabilities | Would virtual inspection tools or aerial measurements support your work? | You can weigh specialized functions against core reporting needs. |
Match features to the way you work
Start with the essentials: organized photos, useful templates, a workable mobile process, and human review before delivery. Then consider optional capabilities, such as virtual inspections or aerial roof and wall measurements, based on the work you perform. A feature adds value when it fits your workflow and solves a real documentation need.
Solo inspectors may prioritize straightforward field capture and a direct path from observations to a finished report. Teams may place more weight on shared oversight and project visibility through a dashboard. In either case, test a representative inspection from start to finish. Check how easily you can capture evidence, find a photo again, place it in the right section, and review the resulting report.
PHOTO iD brings automated photo labeling, voice-to-text labeling, custom inspection templates, instant photo report generation, and a team management dashboard into its inspection workflow. Compare these capabilities against your day-to-day needs, not as a claim of universal fit. For broader app-selection context, see this home inspection app guide. Choose home inspection report software that supports your field routine from capture through review, not just the creation of a polished final document.
How to adopt home inspection report software without disrupting fieldwork
A smooth rollout starts with the routine your inspectors already know. Don’t change every task at once. Map how observations, photos, report sections, and review currently fit together, then introduce software where it can connect those steps without adding friction onsite.
Set up templates and test the complete workflow
Begin by listing recurring report sections and the documentation tasks repeated from property to property. Configure templates around that structure, but leave space for findings unique to each inspection. Then run a representative property through the full process, from field capture to report review and delivery. Check whether sections are clear, evidence is easy to locate, and the report reflects the inspection accurately.
- Map the current process. Note where inspectors capture observations, organize photos, and review reports.
- Configure templates. Build around recurring categories while allowing property-specific notes.
- Test a representative inspection. Follow the workflow from onsite documentation through final review.
- Gather feedback. Ask inspectors where steps feel unclear, repetitive, or out of sequence.
- Refine before standardizing. Adjust templates and routines, then make the tested process the team’s standard.
Use feedback to make practical changes. If inspectors struggle to find a section or understand where a photo belongs, revise the template or clarify the documentation routine before expanding the rollout. A controlled test surfaces issues while the workflow is still easy to adjust.
Help inspectors adopt a consistent field routine
Keep the routine simple: capture the observation, label its supporting photo, and check the related report section. Introduce those habits in manageable steps rather than asking the team to change every part of fieldwork at once. Consistency comes from a process inspectors can repeat, not from adding more rules.
For a team, a management dashboard can support project visibility and help identify where work is slowing down or documentation is being missed. Use that oversight to guide coaching and improve the shared process, not to assume that every inspection follows an identical path. Solo inspectors can use the same rollout steps on a smaller scale, testing the workflow before relying on it for routine reporting.
PHOTO iD connects mobile documentation with automated photo labeling, custom inspection templates, voice-to-text labeling, instant photo report generation, and a team management dashboard. Explore PHOTO iD’s field documentation workflow as you plan a practical rollout.
Make PHOTO iD part of a more organized inspection reporting workflow
The right platform connects the work inspectors do onsite with the documentation they need to review and report. PHOTO iD brings mobile photo organization, labeling, templates, and photo report generation into one property inspection workflow. Consider how those capabilities match your priorities, whether you work independently or coordinate a field team.
Connect field photos, labels, and report structure
PHOTO iD’s automated photo labeling helps organize inspection images, while voice-to-text labeling gives inspectors another way to add context in the field. Custom inspection templates provide structure for recurring documentation, with room to record observations specific to the property. Together, these tools connect captured evidence with report sections instead of leaving image sorting and organization as a separate task.
Once the documentation is gathered, instant photo report generation brings photos and inspection information into report form. Treat this as an assembly step, not a replacement for inspector judgment. Review the observations, labels, and report content to make sure each image supports the relevant finding and the final document reflects the inspection clearly.
Support inspection teams with connected project oversight
For teams, PHOTO iD’s management dashboard supports real-time project oversight, giving managers a view of inspection activity. That visibility can help teams follow work and maintain consistent documentation habits without assuming a particular integration or changing how inspectors make professional decisions.
The platform also includes virtual inspection tools and aerial roof and wall measurements. These capabilities support workflows that extend beyond standard onsite photo documentation. Weigh them alongside the essentials: field capture, organized evidence, usable templates, report generation, and review.
PHOTO iD brings these steps into a connected process for inspectors. Explore PHOTO iD’s home inspection app for a product overview, then consider how its field documentation tools align with your reporting needs.
Bring field photos, labels, and report structure into one workflow with PHOTO iD’s inspection documentation platform.
Build a Reporting Workflow That Works in the Field
The strongest home inspection report software supports the whole job, not just the finished document. Keep observations, photos, and report sections connected from onsite capture through review. Compare tools against the way you actually work, then test the complete process on a representative property before making it your standard.
PHOTO iD brings key steps together with automated photo labeling and organization, custom inspection templates, and instant photo report generation. For field teams, its dashboard adds real-time project oversight. These tools support a structured path from inspection evidence to a report ready for review, while leaving inspectors in control of the final content.
Ready to bring more order to field documentation? Explore PHOTO iD and streamline your inspection documentation.
Frequently Asked Questions
How does home inspection report software work?
It typically starts with setting up an inspection and selecting or creating a report structure. As the inspector moves through the property, they record observations, capture photos, and label evidence with useful context. The software organizes that material into report sections and generates a draft for review. The inspector checks descriptions, labels, and image placement, makes any needed edits, then delivers the completed report through their established process.
Can home inspection report software organize inspection photos automatically?
Yes. Some platforms offer automated photo labeling and organization to help connect images with inspection findings or report sections. This can make evidence easier to locate during report assembly and review, rather than leaving inspectors to sort an unlabeled camera roll later. Automation supports the process, but it isn’t a substitute for judgment. Inspectors should verify that each label is accurate and each photo supports the finding it’s associated with.
Is AI required for home inspection report software?
No. AI-assisted drafting is one possible capability, not a requirement for a useful reporting workflow. Software can also support inspections through custom templates, automated photo labeling, voice-to-text labeling, and photo report generation. These tools help organize field documentation and structure reports without relying on AI-generated comments. Whatever features are used, the inspector should review observations and evidence, confirm the report is accurate, and remain responsible for the final content.
What features should I look for in home inspection report software?
Start with the daily workflow: organized photo capture, clear labeling, templates that fit your recurring report sections, and report generation that leaves room for review. Check whether the mobile process suits how you document findings onsite. If you work with a team, consider dashboard visibility and support for consistent documentation practices. Prioritize features that connect field evidence to reporting, then weigh optional capabilities against the work you perform.
Can home inspection report software work for a team?
Yes. Team-oriented software can provide shared project oversight through a management dashboard, helping managers follow inspection activity and maintain visibility across work. Teams can also establish consistent routines for capturing observations, labeling photos, and reviewing reports. The software supports coordination, but it doesn’t replace clear processes or inspector judgment. Choose a workflow that gives the team useful oversight while still allowing each inspection to reflect the property’s specific findings.
How can inspectors switch to new report software without slowing down inspections?
Map your current process before changing it. Identify recurring report sections and repeated documentation tasks, then configure templates to support them. Test the complete workflow on a representative property, from field capture through report review and delivery. Ask inspectors where steps feel unclear or cumbersome, and refine the setup based on that feedback. Introduce changes progressively, so the team can build a repeatable routine without changing every field habit at once.
Ready to connect field photos, labels, and reporting in one workflow? Explore PHOTO iD’s inspection documentation platform.