
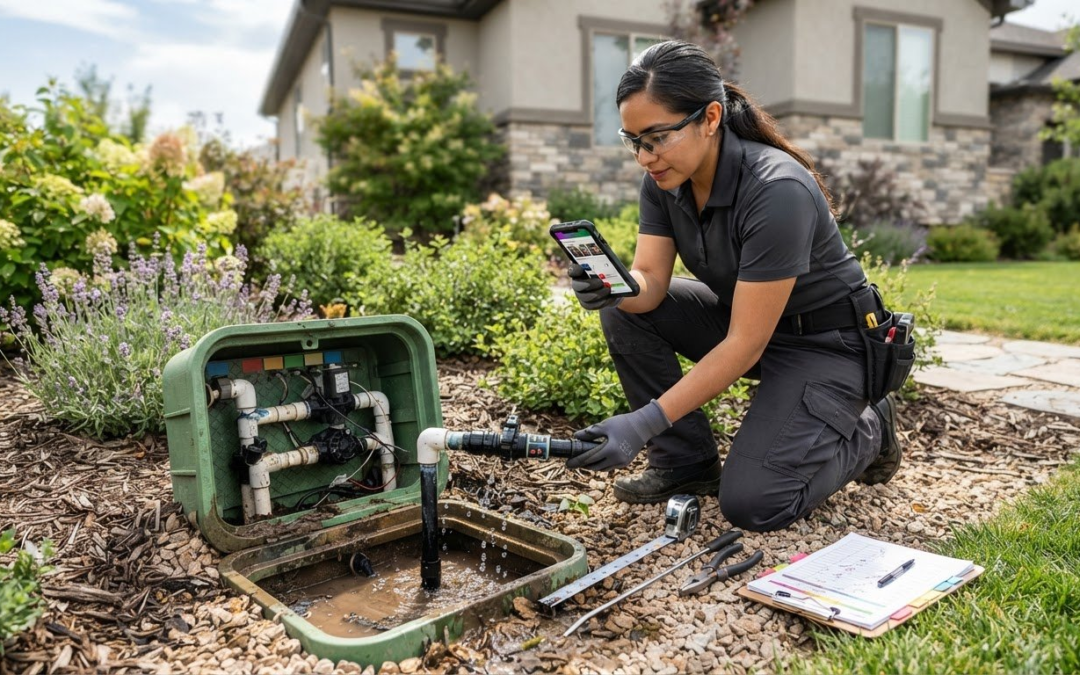
What if every inspection photo could explain itself? A close-up of a leaking valve may seem clear on site, but without its location, system zone, and finding, it can become a puzzle later. Documenting irrigation system inspections means connecting each observation to useful evidence and a next action, so the record makes sense to the next person who reviews it.
Scattered photos and inconsistent notes slow down follow-up. A repeatable field process helps: capture images as you move through the system, label each finding consistently, and organize the details before leaving the property. This guide shows you how to record what you see and create a clear report without assembling one from scraps after the visit.
We’ll cover what to record, how to pair photos with locations and observations, and how templates and digital photo tools can help teams stay consistent. PHOTO iD’s real-time image labeling, voice-to-text labels, cloud storage, and photo reports support that workflow. Qualified professionals remain responsible for interpreting system performance.
Key Takeaways
- Make each finding easier to understand by linking it to a clear system location, observation, and supporting image.
- Build a checklist around system areas or zones, then tailor its prompts to the property and inspection scope.
- Compare paper, spreadsheets, and photo-first apps based on how they handle field notes, images, retrieval, and reporting.
- Use a repeatable process for documenting irrigation system inspections, from preparing the assignment to reviewing and sharing the report.
- PHOTO iD’s real-time image labeling, voice-to-text, customizable templates, and photo reports can help organize field evidence.
Why documenting irrigation system inspections matters
A finding loses value when no one can tell where it came from or what evidence supports it. “Leak near valve” may make sense beside the equipment, but a manager or client reviewing the record later needs to know which valve, which area, and what the photo shows. Connect each observation to its location and evidence to make the inspection easier to understand and act on.
Documenting irrigation system inspections means recording the areas checked, conditions observed, relevant images, and follow-up needs. The record is not the inspection itself, nor is it a technical irrigation audit or a diagnosis of system performance. An inspection may note a visibly damaged sprinkler head; an audit may involve measuring how evenly water is distributed. The types of irrigation systems and their components vary, so tailor the record to the equipment and scope at the property.
Keep the roles clear. Qualified professionals assess equipment conditions and interpret what an observation means. Documentation tools help capture, label, organize, and share the evidence they provide. These tools make records easier to review, but they don’t determine whether a system is functioning correctly.
What belongs in an irrigation inspection record?
Start with enough context to identify the assignment later: property or site name, inspection date, inspector, and the area, zone, or component identifier. Record what was checked and what was visible. Make each note specific enough that someone who wasn’t there can follow it.
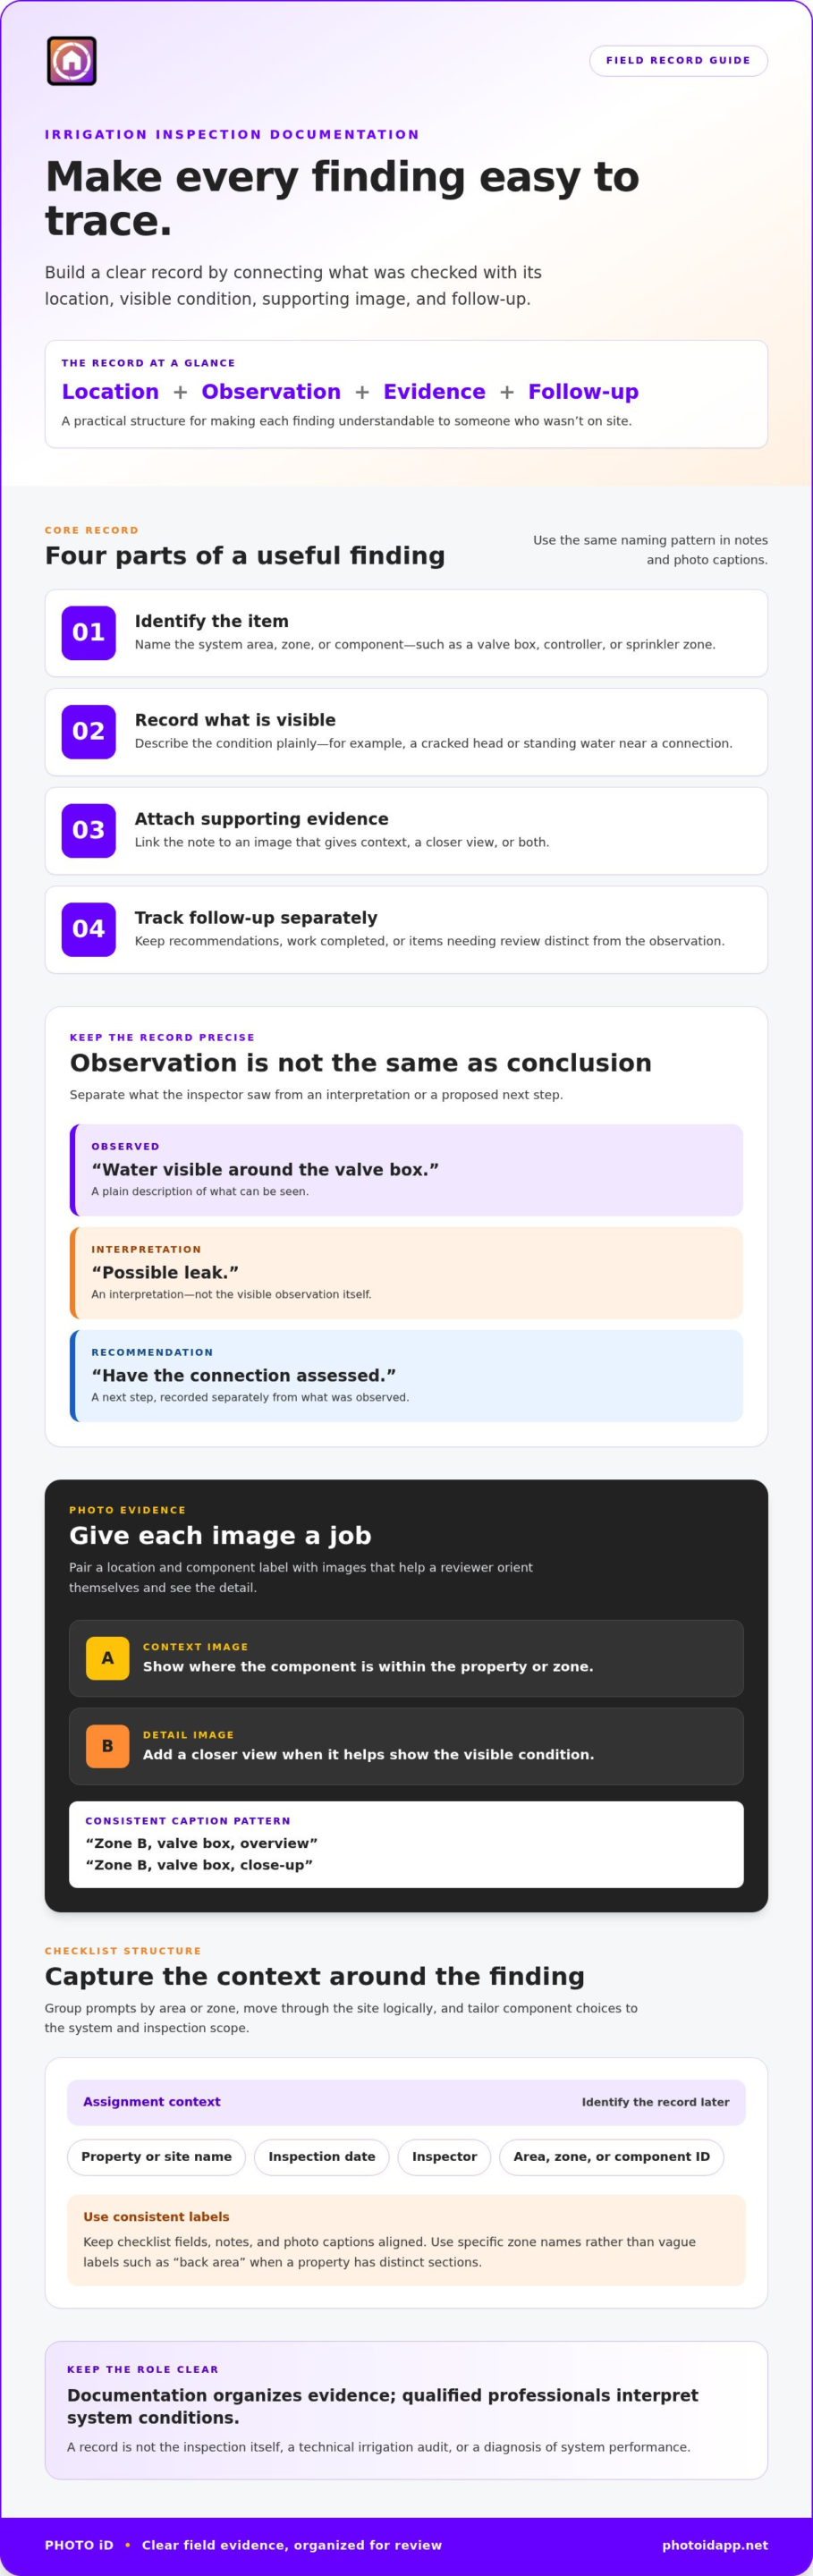
- Identify the item: Name the system area, such as a valve box, controller, or sprinkler zone.
- Record the observation: Describe the visible condition plainly, such as a cracked head or standing water near a connection.
- Attach evidence: Pair the note with an overview image for context and a detail image when a closer view helps show the condition.
- Track follow-up separately: Mark recommendations, work completed, or items needing review as distinct from what was directly observed.
This separation matters. “Water visible around the valve box” is an observation. “Possible leak” is an interpretation. “Have the connection assessed” is a recommendation. Label each clearly so readers can distinguish what the inspector saw from what someone concluded or did next.
Why traceable inspection evidence matters
Location-linked records make follow-up more precise. A zone label, component identifier, and image together help a reviewer orient themselves without relying on memory or a vague caption. Use the same naming pattern in notes and photos, and avoid labels like “back area” when the property has several distinct sections.
Consistency also makes handoffs easier. An inspector can pass a structured record to a manager, who can review findings and share relevant details with a client or team member. Each person can see the same location, observation, and supporting evidence, reducing guesswork and report assembly work. Requirements and outcomes vary by site and situation, so treat documentation as a clear record of the work performed, not a promise of compliance, water savings, or a particular repair result.
Build a consistent irrigation inspection checklist and photo record
A checklist should guide the inspection, not force every property into the same mold. Group prompts by area or zone so the inspector can move through the site in a logical order, then adapt the components and questions to the system and inspection scope. A property with drip irrigation may call for different prompts than one with spray heads. The EPA WaterSense watering tips can inform relevant maintenance prompts, while the checklist should reflect what the assignment requires.
A useful inspection record links a location to an observation, clear evidence, and appropriate follow-up. Keep that principle in view as you build the form. It helps ensure every checklist field has a purpose.
Choose useful inspection fields and labels
Use the same labels in the checklist, notes, and photo captions. A compact structure might include property, zone, component, observation, image sequence, condition, follow-up category, and responsible next step when applicable. Keep prompts short enough to use while walking the site. Tailor component options to the system being inspected instead of treating one checklist as universal.
For example, a prompt might ask the inspector to identify the zone and component, then record the visible condition. Use neutral language: “sprinkler head appears tilted” describes what’s visible; “poor installation caused uneven watering” assigns a cause and conclusion. Record interpretations or recommendations in separate fields so reviewers can distinguish an observation from an assessment.
- Condition: State what is visible, using consistent terms across inspections.
- Evidence: Link one or more images to the relevant zone or checklist item.
- Follow-up: Choose a category, such as review needed or action recorded, if it fits the assignment.
- Next step: Note an owner or action when one has been assigned.
Capture photos that explain the finding
Give each photo a job. Start with a context image that helps a reviewer locate the component within the property or zone. Add a closer view when a visible detail needs emphasis. Use a consistent image sequence or caption pattern, such as “Zone B, valve box, overview” followed by “Zone B, valve box, close-up.” This makes images easier to match to checklist entries after the visit.
Keep captions factual and concise. “Water pooled beside valve box” tells the reader what appears in the image. Avoid guessing at the cause. If glare, distance, or another condition makes the issue hard to see, note that and explain what the image does or doesn’t show. Don’t let an unclear photo stand in for a clear record.
Templates and photo-labeling tools can standardize these fields without slowing down field capture. PHOTO iD’s field documentation tools keep labels and images organized together, making the record easier to assemble and review.
Paper, spreadsheets, or photo-first apps: compare documentation methods
The right format is one your team can use consistently in the field and retrieve easily afterward. Paper forms, spreadsheets, and photo-first apps can all support documenting irrigation system inspections, but they handle notes, images, and reporting differently. Compare the whole workflow, not just how quickly you can fill in a form.
A useful documentation method preserves context from capture through review. If a photo becomes separated from its location or note, even a tidy checklist may leave the next person guessing.
When paper forms or spreadsheets may be sufficient
For a small number of sites, inspectors, and recurring checklist fields, paper can be straightforward. It’s easy to carry and use without building a digital workflow. But photos still need clear labels, and completed forms need a reliable filing and handoff routine. Paper works best when the inspection is simple and the evidence can be organized deliberately after the visit.
Spreadsheets offer structured fields and make it easier to sort or compare entries. They can hold property, zone, component, condition, and follow-up information in consistent columns. The tradeoff is that photos may live elsewhere, leaving someone to match filenames to rows manually. That transfer can add friction, especially when captions or file names don’t follow the same pattern.
If you use separate tools, define the handoff before fieldwork begins. Use a shared naming convention that connects each image to its property, zone, and checklist item. Set an agreed-upon folder structure and decide who adds photos, checks the links, and prepares the report. Resources such as Utah State University Extension’s irrigation system maintenance checklist can help inform inspection prompts, while your record format captures evidence for the specific assignment.
When a photo-first digital workflow can help
A photo-first workflow brings the image and its label together while the inspector is still at the component. That makes retrieval more direct than searching a photo folder and cross-referencing a separate form. With PHOTO iD, teams can also use customizable templates, collaboration tools, and photo reports. Consider how the workflow handles capture, review, and sharing, not just how it looks on screen.
- Field usability: Paper is simple to pick up; digital capture can keep notes and images connected as you work.
- Consistency: A shared form or template can standardize recurring fields across inspectors.
- Retrieval: Clear file names help with any method; linked labels and photos can reduce cross-referencing.
- Reporting: Paper and spreadsheets may need manual assembly, while photo-first apps such as PHOTO iD can generate photo reports.
Choose based on the volume of work, team handoffs, and reporting needs. For a broader look at field-photo workflows, see this home inspection app guide.
How to document an irrigation system inspection in the field
A reliable field workflow keeps evidence connected from assignment setup to final handoff. Prepare the record before arrival, capture observations in a repeatable sequence, then review and share the documentation with its intended audience. The inspection scope and reporting needs can differ by property, so adapt the process rather than relying on a universal checklist.
Prepare the inspection assignment
Before leaving, set up the property or assignment name, inspection scope, zone labels, and relevant checklist or template. Identify who will review the report and what they need to understand or act on for each finding. Confirm the required fields for the assignment, but don’t assume the same inspection frequency, legal requirement, or checklist applies to every site.
- Set up the assignment. Use a clear property identifier and add the inspection date, inspector, scope, and reporting fields. Arrange zones in the order you plan to visit them, if that suits the site.
- Move through the system consistently. Follow the prepared zone sequence, recording each area as you reach it. If the site layout changes the route, update the record so the sequence still reflects where you went.
- Capture evidence as you observe. For each relevant finding, enter the matching zone and component, describe what is visible, and connect the observation to its image. Add a context view and a closer view when each helps explain the evidence.
- Review before wrapping up. Check that the areas within scope are accounted for and that each important observation has a useful location label. Clarify vague captions or notes while the site is still familiar. If an image doesn’t show a detail clearly, explain that in the record rather than leaving the reviewer to guess.
- Prepare and share the record. Assemble the notes and evidence in the format the audience needs. Make recommendations, completed work, and outstanding follow-up easy to distinguish from direct observations. Preserve who owns each next step, when one has been assigned.
Capture, review, and share the record
Keep capture simple and repeatable: label the location, record the observation, attach the evidence, and note follow-up when applicable. PHOTO iD can keep field images, labels, and reports organized, while the qualified professional remains responsible for interpreting equipment conditions. Match the final record to your team’s handoff process, whether it goes to a manager, client, or another team member.
Prepare, capture, review, and share: this sequence turns field observations into a record another person can follow. Use it consistently, then adjust the template to fit the assignment rather than adding fields that don’t help the reviewer.
Organize field photos, labels, and reports in one documentation workflow with PHOTO iD’s photo documentation tools.
Use PHOTO iD to organize irrigation inspection photos and reports
PHOTO iD is mobile and web documentation software for labeling, organizing, sharing, and reporting field photos. For teams documenting irrigation system inspections, it connects images with useful labels and repeatable prompts, then brings the evidence together for review. The app organizes what inspectors capture; it doesn’t conduct a technical inspection or interpret irrigation-system performance. Qualified professionals remain responsible for assessing equipment conditions and findings.
Match PHOTO iD features to documentation tasks
Label images in real time as you capture them, or use voice-to-text photo labels to record location details while moving through the site. Customizable templates help teams create repeatable prompts and adapt them to the property and inspection scope. The goal is a smoother capture routine, not a one-size-fits-all technical checklist.
PHOTO iD includes unlimited photo and video capture, unlimited cloud storage, and unlimited photo reports. Document scanning and PDF building can bring relevant paperwork into the documentation workflow. These tools help keep visual evidence and supporting records accessible in one place rather than scattered across separate files and folders.
PHOTO iD reports 100K+ downloads, 1M+ property inspections, and 20M+ images captured. It also states that users save 30-60 minutes per job-site task. These are website-reported figures, not a guarantee of a specific time saving for every irrigation inspection.
Move from field capture to a shareable report
Capture on a phone or tablet in the field, then use the web app on a desktop to review and organize records. Team collaboration tools, including team chat and shareable assignment links, help pass documentation to inspectors, managers, or clients. Team members can review the same organized evidence and follow the agreed handoff process.
Before sharing, check that the record clearly connects each image to its location and observation. Make follow-up ownership clear where it has been assigned, and keep professional interpretations distinct from captured evidence. For more context on coordinating field teams and documentation workflows, explore this construction management software field guide.
Bring capture, labels, and reports into one workflow with PHOTO iD. Explore PHOTO iD and start a 14-day trial of PRO features.
Make your next inspection record easier to use
Turn your documentation process into a team habit. For the next assignment, choose one workflow to apply consistently, then ask the people who use the report whether it gives them enough context to take the next step. Use their feedback to refine the template, labels, and handoff process over time. A small, steady improvement can make field records more useful on future visits.
Keep the purpose clear: documenting irrigation system inspections should help another person understand what was observed and where, without mistaking recorded evidence for a technical assessment. Let qualified professionals interpret system conditions, and make the documentation support their work with an orderly, reviewable record.
Bring field photos and inspection records into a more organized workflow with PHOTO iD. Build a process that fits your team, refine it with each handoff, and make every record easier to use.
Frequently Asked Questions
What should an irrigation system inspection report include?
An irrigation inspection report should identify the assignment, scope, findings, and supporting evidence. Include the property, date, inspector, and zones or components reviewed, then make each entry specific enough to trace to its location. For example, distinguish “zone 2 controller display is blank” from a conclusion about why it happened. Note follow-up or work completed separately so readers can see what was observed and what happened afterward.
How often should irrigation systems be inspected?
There’s no single inspection schedule for every irrigation system. Timing may depend on the equipment, how the system is used, operating conditions, a maintenance plan, or requirements that apply to the particular site. Some programs set their own checkup schedules, but those aren’t universal. Record the date, scope, and reason for each inspection so the history shows whether it was routine, prompted by a reported issue, or part of a site-specific process.
What photos should I take during an irrigation inspection?
Take photos that help someone who wasn’t present understand the location and visible condition. A context view can orient the reviewer, while a closer view can show a detail relevant to the observation. Use consistent labels for the property, zone, and component; if several images document one finding, give them an order or sequence. Add a written note when lighting, distance, or the angle makes the evidence difficult to interpret.
Can irrigation inspection photos replace a written report?
No. Photos can support a report, but they may not show which areas were checked or what the inspector observed beyond the frame. Pair images with concise notes that identify the inspection scope and explain relevant context. For instance, a photo of a controller may show its display, while a note clarifies which zone or setting was being reviewed. Keep professional interpretations and recommended actions distinct from captured evidence.
What is the difference between an irrigation inspection and an irrigation audit?
An inspection generally documents component conditions within a defined scope; an audit evaluates irrigation performance using measurements or other performance information. For example, a visual record of a sprinkler head’s condition isn’t the same as collecting data to assess water distribution. Terms and methods can vary by organization or program, so describe the task actually performed. A set of labeled photos alone doesn’t establish that an audit or performance assessment took place.
How can teams keep irrigation inspection records consistent?
Teams can improve consistency by agreeing on shared labels, checklist prompts, and a review step before records are handed off. Define how to name zones and components, and give everyone the same way to distinguish observations from interpretations or assigned actions. Review a completed record together and resolve unclear wording. A digital template can standardize repeated fields while leaving room to adjust prompts for different properties and inspection scopes.
Can PHOTO iD be used to document irrigation inspections?
Yes. PHOTO iD helps field teams organize irrigation inspection evidence with real-time image labeling, voice-to-text photo labels, customizable templates, team collaboration tools, and photo reports. For example, an inspector can label a photo with its zone while capturing it, then share the assignment record with colleagues. The app supports documentation and handoffs; qualified irrigation professionals remain responsible for assessing equipment conditions and deciding what follow-up is appropriate.