
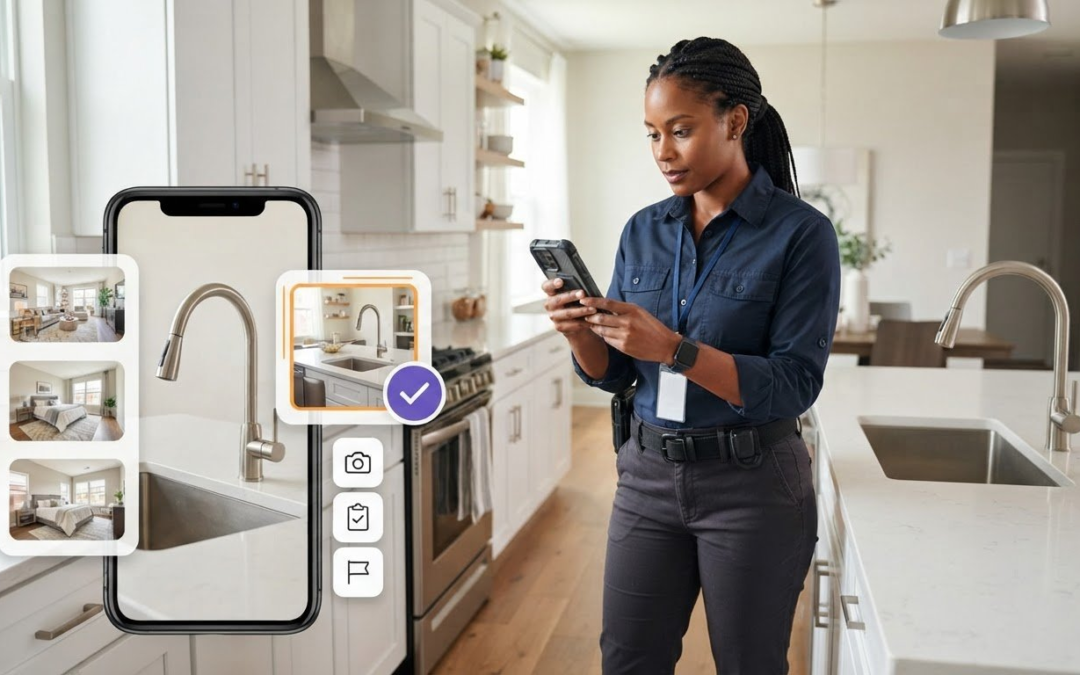
What if the hardest part of a move-in or move-out inspection isn’t taking photos, but figuring out what they show later? A camera roll can quickly become a jumble of rooms, fixtures, and details. Notes may vary between visits, and assembling everything into a useful report can take longer than the inspection itself. A move-in move-out inspection app helps organize that evidence so property condition is easier to document and review.
For both inspection milestones, you need consistent records, photos you can find quickly, and clear reports that don’t require piecing together field notes afterward. This guide explains how to capture and organize inspection evidence, use repeatable templates, and turn photos and notes into property reports. It also covers how automated photo labeling, voice-to-text labeling, and instant report generation can streamline documentation and reduce manual sorting.
Key Takeaways
- Understand how a move-in move-out inspection app supports property documentation without replacing the physical inspection.
- Follow a practical sequence for turning templates, photos, and labeled notes into a report that’s easier to review.
- Compare paper forms, camera apps, and inspection software by how they handle photo labels, templates, reporting, and team visibility.
- Build a repeatable workflow with consistent room names and photo descriptions across both inspection dates.
- See how PHOTO iD’s templates, voice-to-text labeling, and report generation can help reduce post-inspection sorting.
What Is a Move-In Move-Out Inspection App, and What Should It Document?
A move-in move-out inspection app is a mobile documentation tool for recording a property’s visible condition as one occupant leaves and another arrives. It helps organize observations, photos, and notes into a usable inspection record. The app supports the person conducting the inspection; it doesn’t walk through the property or assess its condition on its own.
An inspection app connects property photos and observations to an organized condition record; a basic camera app simply stores images. That distinction matters when someone needs to find a specific detail later. A photo labeled with its room and a brief description gives reviewers more context than an image buried among unrelated pictures. As part of broader property management, consistent documentation can help keep occupancy transitions orderly.
What belongs in a move-in condition record?
Work room by room. Note visible conditions and relevant details about surfaces, fixtures, and features, such as a kitchen counter, bathroom tile, or bedroom door. Keep the language factual: describe what you can observe rather than guessing how damage occurred, who caused it, or what repair it requires.
Give every image a location and a short description. For example, “Living room, north wall, small paint chip beside window” is more useful than “wall photo.” When a detail needs more context, take a wider image to show where it is, then a closer one to capture the condition. Pair both with a written observation so the record doesn’t depend on someone remembering the walkthrough.
- Use the same room and area names throughout the record.
- Describe visible condition plainly and specifically.
- Connect each photo to its location and observation.
Why document both move-in and move-out?
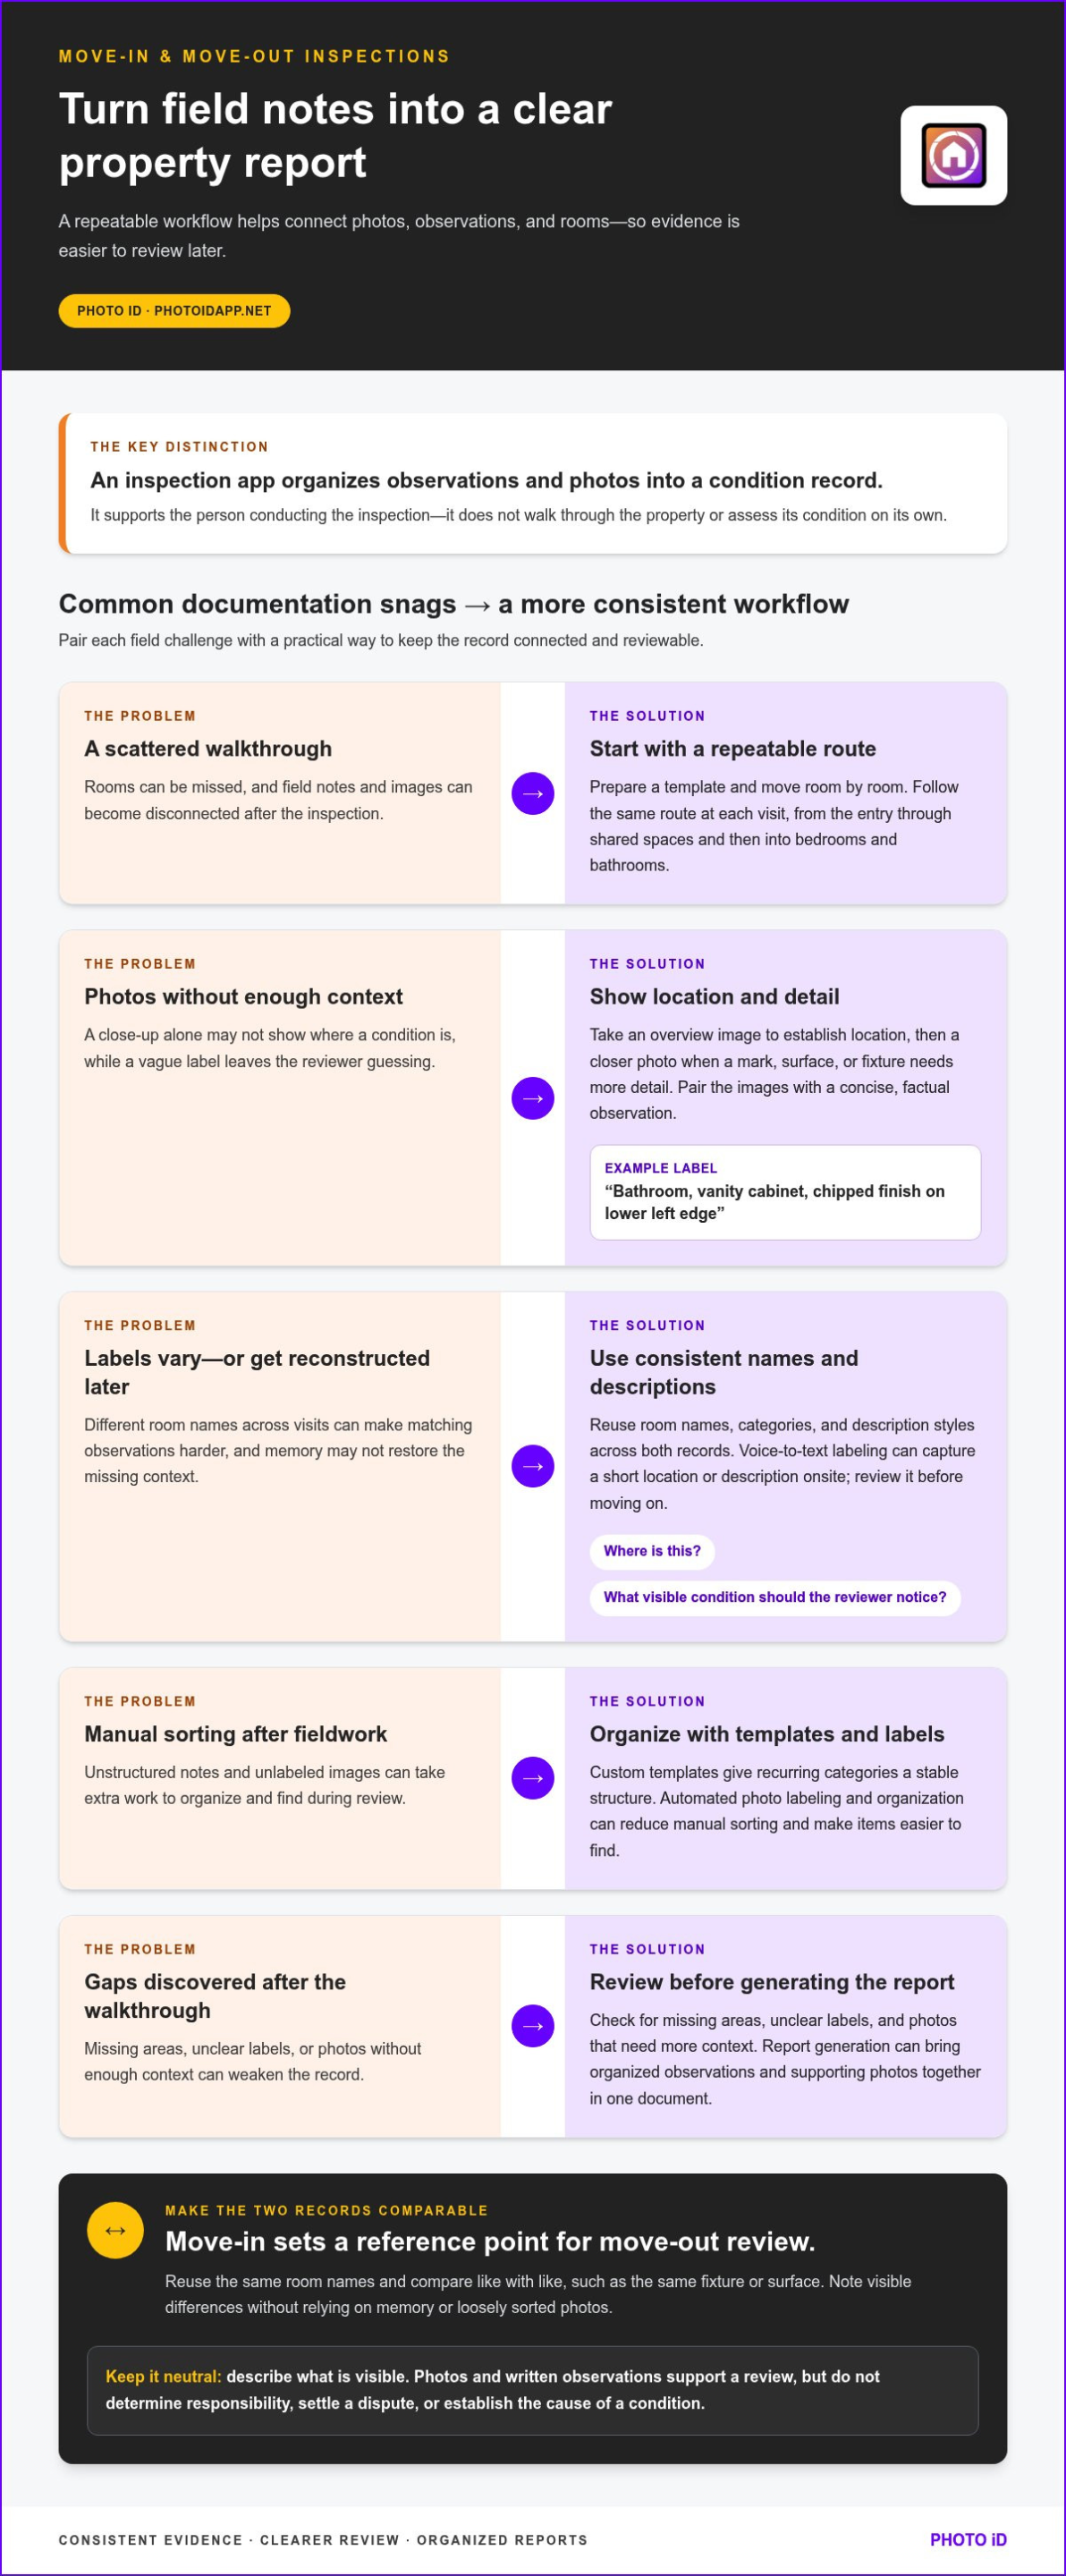
A move-in record provides a reference point for a later review. Without it, a reviewer may see a mark or worn surface at move-out but lack useful context about its earlier condition. Documenting both visits creates a clearer basis for comparing what was recorded at each point, without relying on memory or loosely sorted photos.
Consistency makes that comparison easier. If the entry record calls a space “hallway” and the exit record calls it “corridor,” matching observations may be harder to locate. Reuse room names, categories, and description styles across both records. Then compare like with like, such as the same fixture or surface, and note any visible differences.
Keep the record neutral. Photos and written observations can support a review, but they don’t determine responsibility, settle a dispute, or establish the cause of a condition. Clear documentation gives people better information to consider; conclusions require judgment beyond the record itself.
How a Move-In Move-Out Inspection App Turns Field Notes Into Reports
A reliable report starts before the first photo. A move-in move-out inspection app brings documentation steps into one workflow: prepare a template, capture evidence, label each item, review the record, and generate the report. That structure helps prevent field notes and images from becoming disconnected details after the walkthrough.
Digital tools can make property records easier to manage across recurring tasks. Buildium’s overview of Digital Property Management offers broader context for moving property workflows and documents into digital systems. For inspections, the practical goal is to capture information in a consistent structure and make it easier to review and share.
Capture photos with enough context to be useful
Begin with a repeatable room-by-room route, such as moving from the entry through shared spaces and then into each bedroom and bathroom. Follow the same route at each visit. A familiar sequence makes it easier to cover the property systematically and notice when an area has been missed.
For each finding, take an overview image to establish its location. Add a closer photo when a mark, surface, or fixture needs more detail. Then write a concise note identifying the area and visible condition. “Bathroom, vanity cabinet, chipped finish on lower left edge” gives a reviewer more to work with than “cabinet damage.” Keep the description factual and focused on what the image shows.
Voice-to-text labeling can help capture that context while you’re onsite. Speak a short location or description as you document the item, rather than relying on memory to reconstruct it later. Review the wording before moving on so the label matches the photo and makes sense to someone who wasn’t there.
Organize findings into a shareable report
Labels connect photos to their relevant rooms, areas, and observations. Automated photo labeling and organization can reduce manual sorting after fieldwork, while consistent terminology makes it faster to find a particular item during review. A useful label answers two questions: where is this, and what visible condition should the reviewer notice?
Custom inspection templates give recurring categories a stable structure. Set up sections that reflect the property and the details your team needs to record, then use that structure across visits. Before generating a report, review the record for missing areas, unclear labels, and photos that need more context. A quick quality check can catch gaps while the walkthrough is still fresh.
Report generation brings organized observations and supporting photos together in a clear document, rather than leaving you to assemble them manually from scattered notes. To see how PHOTO iD supports mobile documentation with templates, voice-to-text labeling, photo organization, and report generation, explore the PHOTO iD home inspection app.
How to Compare Move-In Move-Out Inspection Apps With Manual Methods
The right documentation method depends on how often inspections happen, how many people need to review the records, and how reports are assembled. Paper forms and a phone camera can work for a small, straightforward process. As inspection volume or the need for consistency increases, connecting photos, written observations, and final reports can take more coordination. A move-in move-out inspection app brings those tasks into a structured workflow.
Compare options by the work they support, not by how many features they advertise. Consider how each method handles photo context, repeatable categories, report preparation, and review by other team members:
Method | Workflow fit | Organization | Report preparation
Paper forms and camera roll | Flexible for occasional walkthroughs | Notes and photos may need to be matched manually | Information may need to be assembled after the inspection
General camera app | Useful for capturing images quickly | Photo context depends on the user’s naming and sorting habits | Written findings and photos may remain separate
Purpose-built inspection app | Supports a repeatable digital inspection process | Labels, templates, and photo organization can keep findings structured | Report generation can reduce manual assembly
These are tradeoffs, not hard rules. A well-managed paper process may suit a team with few inspections and a simple reporting routine. A digital workflow becomes more valuable when staff repeat the same categories, need to retrieve specific evidence, or share records with colleagues. Whatever the method, the app should support the inspection process, not replace the inspector’s attention or professional judgment—a principle upheld by professional home inspection teams like Prime Defectors when assessing property defects in the field.
When paper forms or a camera roll create friction
The main challenge with separate tools is connecting them. A note such as “scratched surface” may be hard to match to one of several similar photos later. The person reviewing the record may need to search images, check handwritten notes, and infer which observation belongs to which location. That effort can grow as the number of rooms, findings, or repeat inspections increases.
Manual documentation isn’t automatically inadequate. Clear naming habits and a consistent filing process can keep it manageable. The key question is whether that routine still works when inspections become more frequent or multiple people handle the records.
Which app capabilities matter for repeat inspections?
Start with the categories your team already uses. Custom templates can structure recurring inspection sections, while automated photo organization and labeling can make findings easier to retrieve. Then consider report generation and team visibility: do they fit how staff review and share records? A team management dashboard can support oversight, but someone still needs to check each observation and decide what it means.
- Template flexibility: Can the structure reflect the team’s inspection categories?
- Photo organization: Can reviewers locate a relevant image without sorting a camera roll?
- Reporting: Does report generation fit the team’s documentation process?
- Team visibility: Can the people who need to review records access a clear, organized view?
How to Set Up a Consistent Digital Move-In and Move-Out Workflow
A consistent workflow starts with decisions made before anyone enters the property: which areas to cover, what labels to use, and how the finished record will be reviewed. Set up the same structure for move-in and move-out, then adapt prompts to the property’s features and your team’s reporting needs. A move-in move-out inspection app can carry that structure into the field, but the process should remain clear enough for every team member to follow.
- Map the property areas. List rooms and relevant subareas in the order your team will inspect them.
- Set shared naming rules. Choose room names, fixture terms, and description conventions to use at both milestones.
- Build the template. Group prompts by area and keep each prompt focused on an observable condition.
- Capture and label findings. Match each photo and note to the correct location as you work.
- Review before sharing. Check for gaps, confusing labels, and observations that need clarification.
Prepare a repeatable inspection template
Group prompts by property area so the inspector can follow a familiar sequence rather than jumping between unrelated items. Use neutral wording, such as “Describe the visible condition of the countertop,” instead of a prompt that assumes damage or assigns a cause. Keep room names and categories identical in both records. Custom inspection templates can help structure recurring documentation around the categories your team uses.
Tailor the template to the property without changing the shared naming system. If one unit has a patio and another doesn’t, include a relevant prompt where needed, but don’t rename common areas between visits. This balance makes the workflow practical for different layouts while preserving a familiar structure for reviewers.
Review and share the completed record
Before generating a report, scan each section for missing images, unclear labels, and incomplete observations. Confirm that every photo belongs to the room or area shown and that the note describes what’s visible. If a label says “window,” for example, clarify which room or window when the record contains several. Fix gaps while the inspection is still fresh.
Decide who reviews the record and when it’s ready to share. A second team member may check that entries are understandable and organized, while a smaller operation may assign that review to the inspector. Treat this as a practical team choice, not a legal or compliance guarantee. The goal is a record others can follow without having to reconstruct the walkthrough.
Make the workflow easy to repeat: prepare the template, document each area, check the record, then generate and share the report. To organize inspections with PHOTO iD, explore the PHOTO iD inspection app.
Use PHOTO iD to Organize Move-In and Move-Out Inspection Evidence
A clear property report depends on more than having photos. The evidence needs labels, notes, and a structure that makes sense during review. PHOTO iD brings photo organization, voice-to-text labeling, custom inspection templates, and report generation into a mobile documentation workflow. For a move-in move-out inspection app, these tools can help teams spend less time sorting files after the walkthrough and more time reviewing the record.
Match PHOTO iD features to everyday inspection tasks
Use each feature where it helps. Automated photo labeling can make images easier to identify during report preparation, while voice-to-text labeling lets an inspector capture a brief description while moving through a property. For example, a spoken note can identify the room and visible detail, giving the image context without requiring the inspector to reconstruct it later.
Custom templates add structure to recurring inspections. Organize prompts around the property areas and categories your team documents, then use that structure across move-in and move-out visits. After capturing and labeling observations, instant photo report generation can bring the documentation together without manually rebuilding the report from scattered notes.
- Capture: Record images and observations as you inspect.
- Label: Add photo descriptions that make evidence easier to identify.
- Structure: Use templates to give repeated inspections a familiar format.
- Prepare: Generate a report from the organized documentation.
Bring inspection documentation into one workflow
Keeping photos organized alongside inspection documentation can make review more straightforward. Instead of searching through a camera roll after the visit, teams can work with labeled evidence and related observations in a structured record. That makes it easier to locate relevant details when preparing or reviewing a property report. The inspection still depends on the person conducting it: software organizes the documentation, but it doesn’t assess the property or decide what a finding means.
For teams, the management dashboard supports project oversight and tracking inspection work. Use it as part of your team’s review routine, with clear expectations for who checks records and prepares reports.
PHOTO iD’s value is practical: capture details onsite, organize evidence as you go, and prepare reports from a clearer record. Explore PHOTO iD’s professional photo organization for property reports and see how it fits your inspection documentation workflow.
Make Your Next Inspection Easier to Review
Choose a documentation workflow your team can repeat, then put it to work on an upcoming property transition. A move-in move-out inspection app should help field professionals capture and organize evidence without taking judgment out of the inspection. Build a process that leaves reviewers with clear records and fewer loose ends to chase afterward.
PHOTO iD supports that workflow with automated photo labeling and organization, voice-to-text labeling, and custom inspection templates. Once observations are organized, instant photo report generation brings them together for review, while the team management dashboard supports oversight of inspection work. These tools give your team a structured starting point for documenting property condition.
Ready to make field documentation easier to manage? Explore PHOTO iD for organized inspection photos and reports to move from onsite evidence to a clear report. Start with PHOTO iD’s mobile app and build a more organized inspection workflow.
Frequently Asked Questions
What is a move-in move-out inspection app?
A move-in move-out inspection app is software for recording property condition during a change in occupancy. It helps an inspector connect photos and notes to specific parts of a property, then organize those observations for review. It supports documentation, not the physical walkthrough or a judgment about who caused a condition. For example, an inspector can record a note about a loose cabinet handle and associate it with a kitchen photo.
Can an inspection app compare move-in and move-out photos?
Some inspection workflows make it easier to review photos from both visits, but automatic side-by-side comparison isn’t a capability to assume in every app. Use matching room names and capture similar viewpoints where practical, such as photographing the same doorway or appliance from a consistent angle. That gives reviewers useful visual context. Review each image alongside its description, since a photo alone may not explain exactly which detail matters.
What should a move-in inspection report include?
A useful report identifies the property and inspection date, then groups observations by room or area. Include concise descriptions of visible conditions and photos that clarify notable details, such as a stained ceiling tile or a scuffed floor near an entrance. Record neutral facts rather than assigning cause or responsibility. If an area wasn’t accessible or observed, note that clearly so readers can distinguish an unrecorded condition from one that was checked.
How do you document a property’s condition with an app?
Start by selecting the relevant property record and moving through the space in a deliberate order. For each finding, capture an image that shows its context, add a closer view if needed, and write a short note identifying the location and visible detail. Before leaving that area, check that the photo and note match. This quick habit helps prevent confusing entries, such as a close-up with no indication of which room it came from.
Is a move-in move-out inspection app better than paper forms?
It depends on the inspection volume and how records are handled afterward. Paper can be practical for occasional walkthroughs with a simple filing routine. An app may better suit repeated inspections or teams that need structured photo records and a consistent reporting process. Compare the time spent connecting notes to images, finding older observations, and preparing reports. The best fit is the method your team can use consistently and review clearly.
Can tenants and landlords use the same inspection report?
They can refer to the same inspection record if both parties are working from an agreed version and can understand its notes and images. Keep descriptions factual, identify each room clearly, and distinguish an observation from a comment or follow-up question. For instance, “crack visible above the bedroom door” describes a condition without asserting when it appeared. How the report is reviewed or shared depends on the parties’ process and applicable arrangements.
How can an inspection team keep move-in and move-out reports consistent?
Create a shared naming guide for rooms, fixtures, and common condition terms, then use it during both visits. Give team members a short example of a complete entry, such as a location, a plain-language observation, and a supporting image. Periodically review finished records together to spot unclear wording or inconsistent labels. Adjust the team’s process when a recurring issue appears, while keeping the core categories stable for future reviews.