
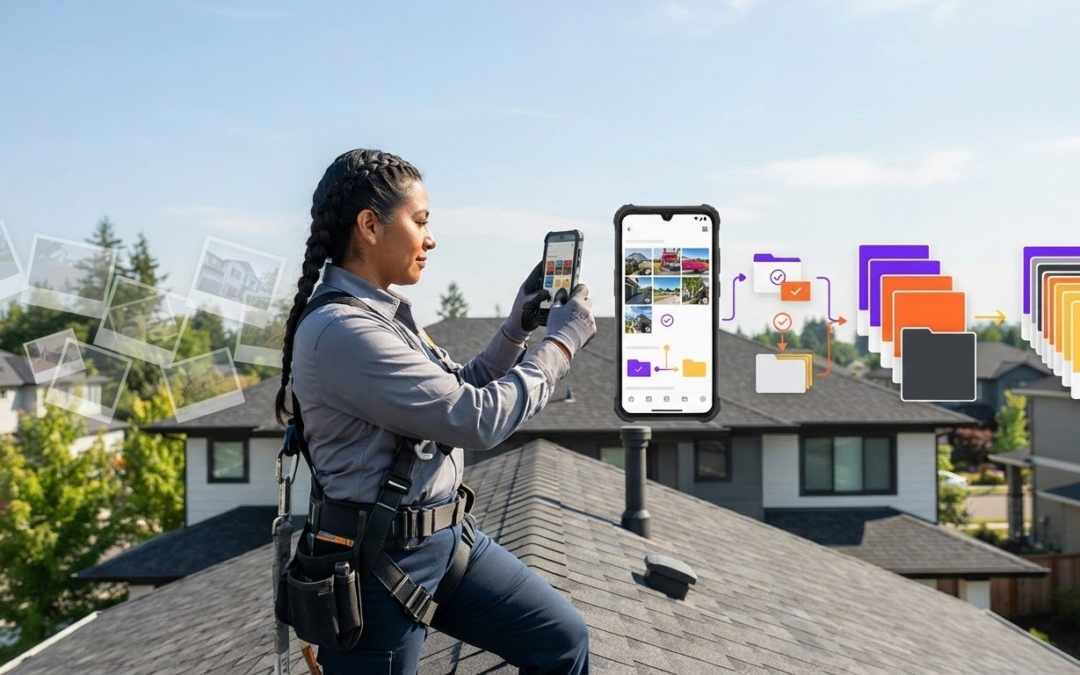
What if the fastest way to organize inspection photos is to stop sorting them after the site visit?
If you’ve returned to a desk full of unlabeled images, you know how quickly a simple report can become a search mission. Without clear context, it’s easy to lose track of which property, room, component, or issue a photo documents. Learning how to stop wasting time organizing photos starts with a practical habit: capture useful labels and context while you’re still in the field.
This guide walks through a capture-to-report workflow that makes photos easier to identify, find, and use as evidence. You’ll learn how to set up a consistent photo sequence, label images as you take them, and choose tools that fit your inspection process. We’ll also look at how inspection-focused features, such as voice-to-text labeling, custom templates, and instant photo report generation, can help move images from camera to report with less manual sorting.
Key Takeaways
- See how missing or inconsistent photo context creates extra work during reporting, review, and team handoffs.
- Learn how to stop wasting time organizing photos with a repeatable field workflow that connects each image to its inspection area and purpose.
- Compare phone albums, folders, cloud storage, and inspection apps to find an approach that fits your team’s capture and reporting needs.
- Build a practical rollout plan with clear naming rules, workflow testing, and team training.
- Assess whether automated labels, voice-to-text, templates, or instant photo reports could address your biggest workflow bottleneck.
Why organizing inspection photos takes so much time
Photo disorganization is more than a cluttered camera roll. It’s missing or inconsistent context that makes an image hard to identify, verify, and reuse. A close-up might show a damaged component, but without the property, room, or inspection area attached, it can be difficult to place correctly in a report. Mixed jobs, generic filenames, inconsistent folders, and reliance on memory all create the same problem: someone has to work out what the photo shows and where it belongs.
Capturing a photo records what you saw; documenting it records where, why, and what it shows. That context makes an image more useful as evidence.
This is a workflow challenge as much as a storage challenge. Digital asset management uses approaches such as metadata and indexing to make files easier to find and use. The same principle applies to inspection photos: give each image meaningful context, then keep that information with it as the file moves into reporting and review.
Spot the hidden rework in your current photo process
Follow one image from capture to handoff. After taking it, do you later search the camera roll, rename the file, move it into a folder, add a report label, and explain it to a colleague? Each step may seem small, but repeating them across a job adds up. Note where staff search albums, ask someone else to identify an image, or try to reconstruct missing details. Occasional cleanup may be manageable. If the same delays happen on every inspection, your workflow likely has a bottleneck.
Why camera rolls and generic folders break down on jobs
A single camera roll can combine photos from different properties, rooms, tasks, and personal use. Generic filenames may show when an image was taken, but not which component or issue it documents. Folders help only when everyone sorts images consistently and files them in the right place.
Memory is an unreliable labeling system. After leaving the site, similar-looking fixtures or details can blur together. A colleague who wasn’t there may have no way to tell them apart. That uncertainty leads to extra checking and slower handoffs. To understand how to stop wasting time organizing photos, look for points where context gets separated from the image, then build a step into your process to keep them together.
Build a capture-to-report workflow that organizes photos as you work
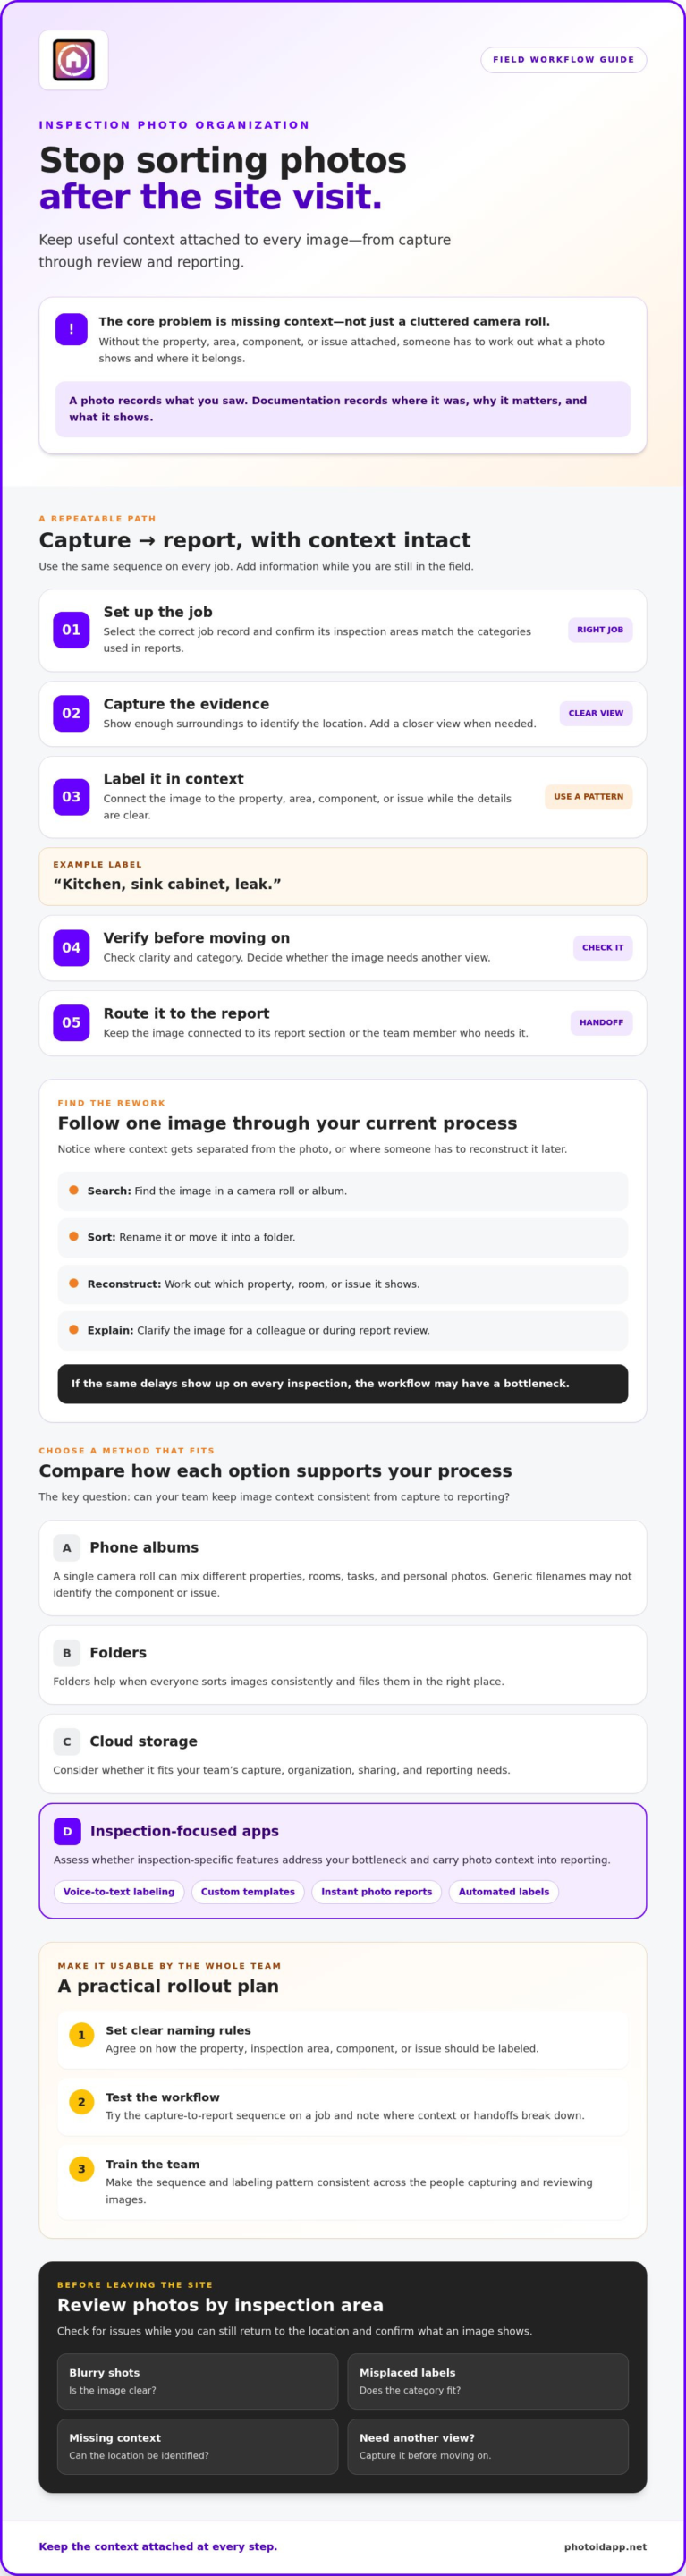
The most direct way to reduce end-of-day sorting is to add context before it gets separated from the image. Use the same sequence on every job: set up the record, capture the evidence, label it, review it, then route it to the report or team member who needs it. This turns how to stop wasting time organizing photos into a practical field habit instead of another cleanup task.
Prepare the job before taking the first photo
Create or select the correct job record before opening the camera. Check that its inspection areas match the categories your team uses in reports, such as exterior, kitchen, or electrical. Before work begins, confirm that the device has storage available, camera access is enabled, and you know how images will be backed up or shared. These checks help prevent photos from ending up in the wrong job or an untracked camera roll.
Capture, label, and review each image in context
Show enough of the surroundings to identify where a detail belongs, then take a closer image if needed. Add a concise label while the location and subject are still clear, using a consistent pattern such as “Kitchen, sink cabinet, leak.” A professional photographer’s workflow also illustrates how a repeatable sequence can move images from capture into later work. For inspections, keep the image and label focused on evidence and report context.
Use this loop as you move through each area:
- Capture: Take a clear image with enough surrounding context to identify the location.
- Label: Connect it to the property, area, component, or issue.
- Verify: Check clarity and category, and decide whether another view is needed.
- Report: Route the image to the appropriate report section or handoff.
Capture, label, verify, and report: keep the context attached at every step.
Before leaving the site, scan the job’s images by inspection area. Look for blurry shots, misplaced labels, missing context, or issues that need another view. This quick quality check is easier while you can still return to the location and confirm what an image shows. If labeling slows the team down, voice-to-text or automated photo labeling in an inspection-focused app may fit the process. You can review the inspection photo workflow as one option.
Compare photo organization methods for inspection work
The right setup depends on where work slows down. Phone albums are quick to start, folders add structure, shared cloud storage can make access easier across a team, and inspection-focused apps can connect images more directly to job records and reports. Compare the trade-offs against your actual workflow rather than assuming one method suits every team.
| Method | Capture effort | Labeling | Searchability | Collaboration | Report readiness |
|---|---|---|---|---|---|
| Phone albums | Low | Usually manual | Limited without consistent albums or labels | Limited | Often requires sorting before reporting |
| Manual folders | Low during capture, higher during filing | Manual filenames and folder names | Good if naming stays consistent | Depends on access and clear ownership | Files may need to be matched to report sections |
| Shared cloud storage | Varies by upload process | Manual or folder-based | Improves with organized folders and searchable labels | Supports shared access, depending on setup | Photos may still need separate report assembly |
| Inspection-focused apps | Can connect capture to a job workflow | May support job-linked or automated labels | Can organize around inspection details | May support team visibility and handoffs | May connect photos with templates and reporting |
EXIF metadata can preserve basic details such as when a photo was captured and, depending on the device and settings, where. That information can help sort files, but it doesn’t explain which property, room, component, or issue the image documents. Job-specific labels still matter. If you’re comparing inspection tools, start with this guide to the best home inspection app.
When folders and shared storage are enough
A small team with predictable jobs may do well with a shared folder structure, such as property, inspection area, then issue photos. Set short naming rules, decide who files and uploads images, and make sure everyone follows the same process. This approach can be straightforward, but it depends on consistent follow-through. If labels and folders vary by person, the team still has to search and interpret images.
When inspection-focused photo tools may fit better
Consider a dedicated app if staff repeatedly move photos between systems, label them after the visit, or rebuild the same report structure. Job-linked labels, inspection templates, and report creation can bring those steps closer together. Shared project visibility may also help when several people review or handle a job. For roof documentation, see this 2026 roof software guide. The best choice is the one that addresses recurring friction and helps you stop wasting time organizing photos.
Set up a photo organization system your team will actually use
A good system is easy to follow while a job is moving. Keep labels short, assign clear ownership, and test the process before asking everyone to adopt it. This rollout can make how to stop wasting time organizing photos a team habit instead of another rule that gets skipped under pressure.
Create simple photo labels and review standards
Choose a small set of labels that reflects your property types and reporting process. For example, agree on area, component, and issue labels your team already understands. A complete image should make three things clear: what it shows, where it is, and enough surrounding context to identify its place in the inspection.
Keep the review simple. Before photos move to the report, check for:
- Missing or unclear labels
- Blurry images or duplicates that add no useful evidence
- Issues or areas that need another view
Decide who owns each step. The person taking photos can check labels and coverage in the field. Assign a specific reviewer to confirm completeness, and make clear who selects and prepares images for the report. Clear ownership prevents handoffs from turning into questions about who was supposed to sort the files.
Make adoption practical for field teams
Test the workflow on a representative job before standardizing it. Include people who take the photos and people who assemble reports, since each group sees different friction. Ask where labels feel unclear, where steps are repeated, and whether anyone is unsure who handles the next handoff.
Then revise the process. Remove duplicate entry, simplify labels that take too long to apply, and assign any unowned task. Keep the rules in a short reference that staff can check during a site visit, rather than a long procedure. If your process uses custom inspection templates or voice-to-text labeling, test those steps under the same field conditions your team encounters.
After rollout, review a sample of completed jobs. Check whether photos arrive with usable context, whether report preparation is straightforward, and where staff still have to search or ask for clarification. Use what you find to tune the workflow. A system should support the team’s actual inspection process, not add extra steps for the sake of uniformity.
To see how a dedicated tool can support field labeling and reporting, explore an inspection-focused photo workflow. You can also review PHOTO iD’s inspection photo tools as you refine your team’s process.
Choose a photo organization solution that carries work into reporting
The best tool is the one that removes your team’s recurring friction, not necessarily the one with the longest feature list. Pinpoint where work gets stuck: capturing images in the right job, adding labels, finding evidence later, coordinating handoffs, or assembling reports. Then test whether a solution addresses that specific bottleneck from field capture through final documentation.
Match tool capabilities to the actual source of wasted time
Map each repeated task to a feature you can evaluate. If staff add labels after the visit, test automated photo labeling or voice-to-text labels. If reports need the same structure, check whether custom inspection templates fit your process. If placing photos slows report assembly, evaluate instant photo reports and confirm how images and labels carry into the finished report.
PHOTO iD combines these inspection-focused capabilities in a mobile app. Assess each in context: do the labels describe the details your team documents, do the templates reflect your reporting requirements, and does the report output support the next step in your workflow? Before choosing any platform, verify its current device requirements, user access options, and data-handling practices with the provider.
Run a practical workflow comparison before deciding
Try your current method and a proposed solution on comparable inspection tasks. Use the same type of job and involve both the person capturing photos and the person preparing reports. Track the work, not just the final result:
- How often does someone sort or relabel images after capture?
- Where do people search for photos or ask a teammate to identify them?
- Which steps require duplicate entry or a separate handoff?
- What review is needed before images are ready for the report?
Compare the answers and note where the process feels clearer or still creates extra work. A tool may organize photos well but leave report preparation unchanged, or support reporting while requiring labels your team won’t use. Choose based on workflow fit, clear ownership, and field usability. The practical way to stop wasting time organizing photos is to capture useful information once and carry it forward.
Ready to evaluate an inspection-focused option? Explore PHOTO iD for inspection photo organization and consider how its labeling, templates, and photo reports fit your team’s process.
Make every inspection photo ready for what comes next
A smoother photo workflow keeps context attached from capture through reporting. Set clear labels, review images before leaving the site, and choose a system the whole team can follow. That’s how to stop wasting time organizing photos: reduce the sorting and searching that happen after the inspection without adding unnecessary steps in the field.
For teams that want to connect photo capture with report preparation, PHOTO iD offers automated photo labeling and voice-to-text labels, custom inspection templates, and instant photo report generation. Its team management dashboard can also support project oversight. Evaluate these features against your inspection process and documentation needs, then choose a workflow that fits.
Explore PHOTO iD for a more organized inspection workflow and see how field photos can move into reports. Start with a consistent process, refine it with your team, and make every image easier to find and use.
Frequently Asked Questions
How do I organize inspection photos quickly?
Set up a job record and consistent inspection categories before taking photos. Capture each image in the correct job, add a short label that identifies its area or subject, then review the images before moving on. This is a practical way to learn how to stop wasting time organizing photos: make each image easier to recognize when you take it instead of leaving all the sorting until later.
Why does organizing photos take so much time?
Photo organization takes time when images lack clear, consistent context. A camera roll may mix jobs, while generic filenames don’t explain which property, room, component, or issue a photo documents. Later, someone must search, rename, sort, or ask a colleague to identify the image. Those repeated steps slow report writing and review, especially when the person preparing the report wasn’t at the site.
Should I use folders or an app to organize property inspection photos?
Use folders if your jobs follow a predictable structure and the team can reliably name, file, and share images. An inspection-focused app may be a better fit if you repeatedly sort photos after visits, need job-linked labels, or want photos to carry into reporting. Compare both approaches against the work your team actually does. Choose the simplest system people will follow consistently.
How should I label photos during a property inspection?
Use short, specific labels that connect the image to its location and subject. A useful pattern is area, component, then issue, such as “Kitchen, sink cabinet, leak.” Include enough context to distinguish similar features in different rooms or properties. Agree on a small set of terms with your team, and check labels while you’re still at the location and can confirm what the photo shows.
Can voice-to-text help organize field photos?
Yes. Voice-to-text labeling can help you add a concise description without typing each label, which may suit busy fieldwork. Speak the location and subject clearly, then check that the resulting label is accurate and attached to the right image. Treat voice input as a capture aid, not a replacement for review. PHOTO iD offers voice-to-text labeling as part of its inspection platform.
How can a team keep inspection photos organized across multiple jobs?
Give every job a separate record or folder, use the same short naming rules, and define who checks photo completeness and prepares images for reports. Make the handoff explicit so images don’t sit in one person’s camera roll or depend on their memory. A team management dashboard, such as the one included with PHOTO iD, can support project oversight across the team.
What should I look for in photo organization software for inspectors?
Start with your main bottleneck: capture, labeling, retrieval, collaboration, or report assembly. Check whether the software connects photos to inspection jobs, supports labels and templates your team can use, and carries images into reports. Also verify current device requirements, access options, and data-handling practices. PHOTO iD includes automated photo labeling, custom inspection templates, and instant photo report generation for field documentation workflows.
How do I stop inspection photos from getting lost in my camera roll?
Keep inspection images tied to a dedicated job record or clearly named folder instead of relying on one mixed camera roll. Label photos during the visit, then confirm they’re stored or shared in the intended location before clearing or reusing device space. Use a consistent process across jobs so everyone knows where to find images and how to identify the property and inspection area.