
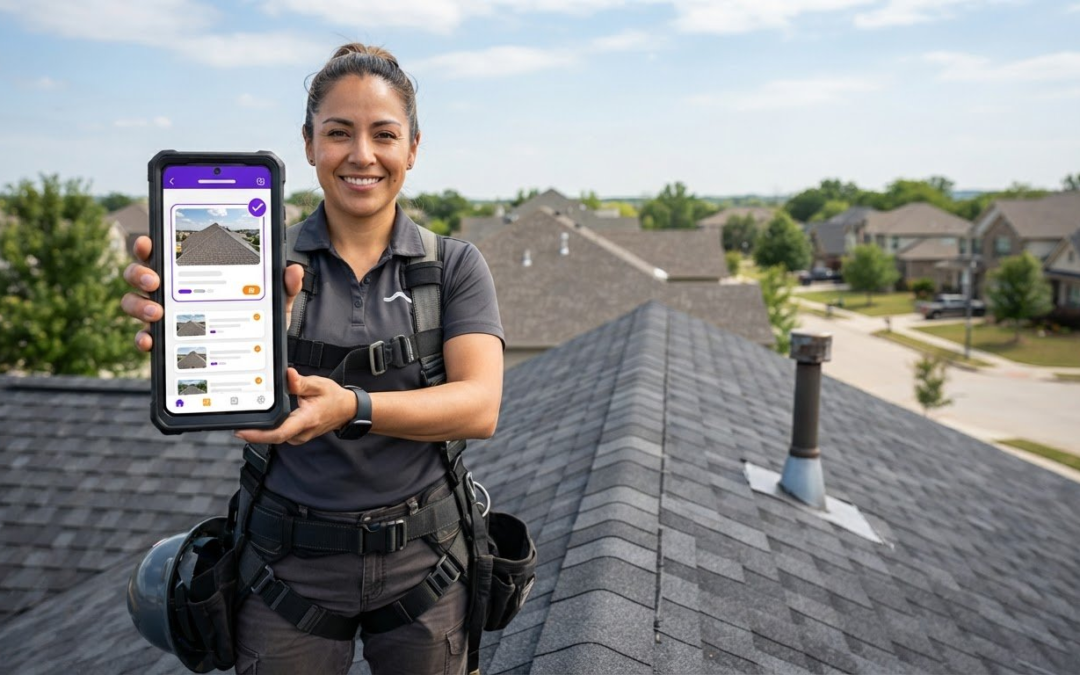
The fastest way to lose time after a roof inspection is to leave photo organization until you’re back at your desk. A roof inspection photo organization app helps you label images onsite, so roof areas and inspection details don’t blur together in a crowded camera roll. Clear photos matter, but finding the right image, adding context, and assembling a useful report can be the harder part.
A consistent workflow connects capture, labeling, and reporting. This guide covers what to look for in an app, how to capture useful context and detail, and how to organize images by roof area or inspection task. PHOTO iD offers voice-to-text photo labeling, custom inspection templates, and instant photo report generation to support this process. Use the practical selection criteria below to assess which tools fit your team and reduce the need to sort images after the job.
Key Takeaways
- Choose a roof inspection photo organization app that connects images with clear labels and useful context, not just storage.
- Use a repeatable photo sequence, from a wide overview to area-specific views and close-up details.
- Compare how apps handle labeling, search, reports, sharing, and team oversight before weighing optional tools like aerial measurements.
- Set a simple naming convention and test it on a sample inspection before making it the crew standard.
- See how PHOTO iD’s voice-to-text labeling, custom templates, and report generation can support your documentation workflow.
Why roof inspection photos need an organization system from the first shot
A roof inspection photo organization app connects images to labels, context, and reports while the inspection is underway. This structure matters because a camera roll can quickly fill with similar roof planes, edges, and close-ups. A timestamp shows when a photo was taken, but not whether it shows the front slope, a ridge detail, or damage near an eave.
Unclear photos create avoidable rework. Inspectors may need to revisit notes, ask a teammate to identify an image, or leave a finding out of a report because its location is uncertain. A consistent record helps crews retrieve evidence and communicate observations clearly. It doesn’t make inspection decisions for them: photo organization, roof measurement, estimating, and professional assessment are separate tasks. Even the science of photogrammetry, which uses photographs to obtain information about physical objects, is distinct from labeling and filing inspection images.
What makes roof photos hard to manage?
Several roof sections can look alike in a thumbnail, especially when an image shows only shingles or a narrow edge. A close-up of flashing may capture a useful detail, but without a wider view, another person may not know where to find it. Timestamps preserve sequence, not location or meaning.
Build context into the capture sequence. Take an overview that establishes the roof area, then medium views that narrow the location, followed by close-ups of details such as shingles, flashing, or gutters. Together, these images tell a clearer story than isolated details.
What should an organized roof photo record include?
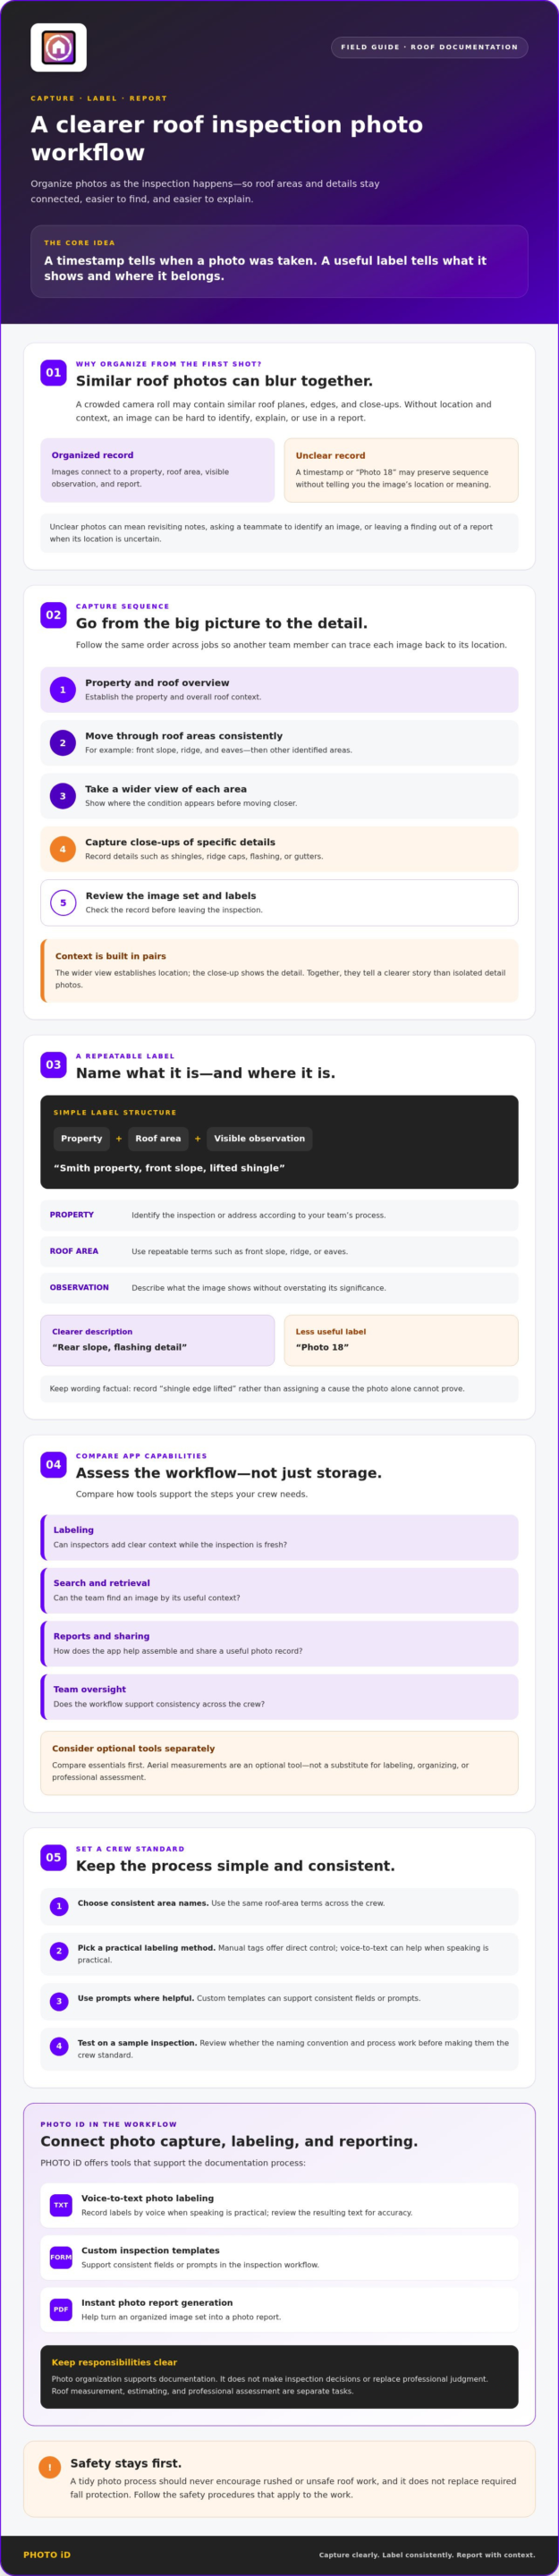
Use a consistent label that identifies the property, roof area, and visible observation. For example: Smith property, front slope, lifted shingle. Keep area names consistent across the crew, and pair each detail image with a wider view showing where the condition appears. This makes photos easier to find and interpret during report preparation.
- Property: Identify the inspection or address according to your team’s process.
- Roof area: Use a repeatable term, such as front slope, ridge, or eaves.
- Observation: Describe what the image shows without overstating its significance.
Labels and report descriptions support documentation, but they don’t replace professional judgment. The inspector remains responsible for interpreting the evidence and deciding what an observation means. Start organizing with the first shot, and the final record will be easier to navigate, explain, and share.
Build a roof photo workflow from the first overview to the final detail
A reliable sequence makes each image easier to place and use later. Start with an overview of the property and roof, move through roof areas in a consistent order, then capture specific conditions. Before leaving, review the image set and its labels. This rhythm helps another team member follow the inspection without guessing where a photo belongs.
Keep safety first. A tidy photo process should never encourage rushed or unsafe roof work, and it doesn’t replace required fall protection. Review OSHA fall protection standards and follow the safety procedures that apply to the work.
Capture a sequence that preserves location and context
Begin with property and roof overview images, then document each area in the same order across jobs. For example, record the front slope, ridge, and eaves before moving to other identified areas. Within each area, take a wider scene before close-ups of shingles, ridge caps, or flashing. The wide view establishes location; the close-up shows the detail.
Keep the sequence predictable. A teammate reviewing the images should be able to move from the overall roof to a specific area, then understand what the detail image records. Avoid jumping between areas without a clear reason or label.
Label each image while the inspection is fresh
Use short, factual labels that pair the roof area with the visible subject. “Rear slope, flashing detail” is more useful than “Photo 18.” Describe what the image shows, not a conclusion it can’t prove. For example, record “shingle edge lifted” rather than assigning a cause based on the photo alone.
Choose a labeling method that works in actual field conditions:
- Manual tags give inspectors direct control, but require attention after each capture.
- Voice-to-text can help record labels hands-free when speaking is practical. PHOTO iD offers voice-to-text labeling. Test it in your work conditions and review the resulting text for accuracy.
- Custom templates can support consistent fields or prompts. Check whether the template can use your team’s roof-area naming conventions.
Finish with an onsite review. Check that each area is represented, labels are clear, and important details have a matching wider view. Remove or distinguish duplicates when they add no new information. A roof inspection photo organization app can support this capture-and-review routine, but the crew’s process still determines how consistently it’s used. To see how PHOTO iD’s photo labeling and reporting tools fit your field requirements, compare them with the steps your team needs to complete.
How to compare roof inspection photo organization apps
Compare the whole workflow, not just how an app takes pictures. A camera roll stores images, while structured inspection software can connect photos to project records, labels, and reports. That difference matters when you need to retrieve an image of a particular roof area or share a clear record without sorting files manually. Start with the practices your team expects to follow, using NRCA technical resources as one reference for roofing-related technical guidance.
Use this matrix to assess each roof inspection photo organization app against your field and closeout needs. Treat the capabilities below as questions to verify, not assumptions about any vendor.
Capability | What to verify | Priority
Capture | Can you capture and review images in the inspection workflow without adding unnecessary steps? | Essential
Labeling | Can inspectors add clear labels quickly, and can templates reflect the team’s terminology? Confirm customization options. | Essential
Search | Can users find images by project, label, or inspection record? | Essential
Reports | Can selected photos be organized into a report, and can users edit descriptions before sharing? | Essential
Sharing | Can the finished documentation be shared with the intended people in a practical format? Check access and review controls. | Essential
Team oversight | Does a dashboard help managers review team activity or documentation? | Depends on team size
Aerial measurements | Are roof measurements part of the workflow your team needs, or would this be an extra tool you rarely use? | Optional
Which features matter during roof photo capture?
Test the app in field conditions. Check how many steps it takes to label a photo, correct a mistaken label, and review an unclear or duplicate image. Ask whether templates can use terms such as “front slope,” “ridge,” and “eaves,” then check that they can be configured for your workflow. Voice-to-text labeling and custom templates can support consistency, but evaluate how they work with your crew and chosen terminology.
Which features matter after the inspection?
Try retrieving a specific image from a sample inspection, then build and share a report. Check whether the label stays connected to the photo and whether the description can be reviewed before it goes out. For larger teams, assess what the dashboard shows and who can access or manage records. Aerial roof measurements can be useful when they serve a defined need, but they don’t replace the core tasks of labeling, finding, reporting, and sharing photos.
Compare capabilities against the same sample job, and avoid ranking vendors without current, verified evidence. The best fit is the tool your team can use consistently from capture through closeout.
Set up a consistent roof photo organization process for your crew
A photo process only works if every inspector can follow it on a busy job. Agree on a short naming convention, try it on a sample inspection, then refine it before making it the crew standard. Keep the rules visible in your team’s workflow, and assign one person to check labels and report completeness before documentation is shared.
Create a reusable roof-area labeling convention
Choose stable names for recurring locations, such as front slope, rear slope, ridge, eaves, and valley. Use one term for each area across properties. If one inspector writes “front pitch” and another writes “front slope,” searches and handoffs become less predictable.
Keep labels concise and consistent. A simple pattern is area, subject, observation, such as “front slope, shingles, lifted edge.” Treat that as a description, not a diagnosis. If your crew uses app templates, make sure they accommodate your chosen terms and that the people who need them can use the templates. Test the labels on a sample inspection before rollout. Can another inspector understand where each image belongs without asking the person who took it? If not, refine the convention.
Review, share, and refine the photo record
Before sharing a report, have a designated reviewer check that labels match the images, each photo has enough context to locate the area, and the report follows a logical order. Confirm that image captions remain clear in the finished report. Correct unclear labels and remove duplicates that add no useful information.
- Inspector: Captures and labels photos using the agreed naming pattern.
- Reviewer: Checks image context, label consistency, and report completeness.
- Crew: Shares feedback on recurring gaps and confusing terms.
Use feedback to improve the process, not to add complexity. If reviewers repeatedly need to clarify which slope a photo shows, update the capture prompt or area vocabulary. A roof inspection photo organization app can support labels, templates, and reports, but your team still needs a clear standard for using them.
If your team is also reviewing broader roofing workflows, explore this roof software guide. You can also explore PHOTO iD photo organization features and compare them with your process.
Use PHOTO iD to connect roof photo capture, labeling, and reporting
A useful roof inspection photo organization app should help your crew carry image context from the jobsite into the finished record. PHOTO iD offers voice-to-text photo labeling, custom inspection templates, and instant photo report generation. These features support organized photo documentation, with the right setup depending on how your team works.
Match PHOTO iD capabilities to your documentation needs
Start with your team’s preferred roof-area terms. Consider how custom inspection templates can accommodate labels such as “front slope,” “ridge,” or “eaves.” A template should guide consistent documentation without forcing inspectors into labels that don’t match the property or task.
Next, assess voice-to-text labeling in your actual workflow. Can an inspector add enough context to identify the image clearly? Review the resulting labels for accuracy. Then generate a sample report and check whether its image order, descriptions, and structure make the documentation easy for a colleague or client to follow.
Also assess team oversight and reporting against your needs. PHOTO iD includes a team management dashboard, as well as a custom report builder. Consider how these fit your team’s review process and how the resulting documentation will be shared.
Take the next step without adding workflow friction
Before evaluating an app, write down the bottlenecks you want to solve. Perhaps images are hard to retrieve, labels vary between inspectors, or report assembly takes too many steps. Use that list to keep the evaluation focused. Then test one representative roof inspection, from image capture and labeling through report review and sharing.
- Can the crew apply its roof-area naming convention?
- Can a reviewer find and understand images in the resulting record?
- Does report generation fit the team’s existing closeout process?
Use the test to spot friction, not just confirm that the software has a feature. If a template needs adjustment or a label is unclear, resolve that before rolling the workflow out to the full crew. For broader guidance on choosing inspection software, read the home inspection app guide. To assess PHOTO iD against your documentation needs, explore PHOTO iD for inspection photo documentation.
Make every roof photo easier to use
A dependable roof inspection photo organization app brings structure to documentation from capture through reporting. Start with a repeatable image sequence, apply consistent labels for each roof area, and review the record before sharing. These habits help your team find evidence and communicate observations clearly.
PHOTO iD offers voice-to-text photo labeling, custom inspection templates, and instant photo report generation to support organized inspection documentation. Its team management dashboard and aerial roof and wall measurements can also support specific workflows. Build your process around the documentation tasks your team needs to complete.
Ready to assess a more connected approach to photo documentation? Explore PHOTO iD’s inspection photo tools and see how they fit your crew’s workflow. Start with one consistent process, refine it with team feedback, and make every photo easier to use.
Frequently Asked Questions
How do you organize roof inspection photos?
Organize roof inspection photos by property, roof area, and visible subject. Start with property and roof overview images, then group photos by consistent area names such as front slope, ridge, or eaves. Pair close-ups with wider images that show where the detail appears. Before sharing, check that labels are clear, key areas are represented, and duplicate or unclear images don’t make the record harder to follow.
What should a roof inspection photo organization app do?
A roof inspection photo organization app should connect images to useful labels and inspection records, then make them easier to retrieve and include in reports. Compare how each option handles capture, labeling, search, report generation, sharing, and team oversight. A camera roll may store images, but structured inspection software can link photos with documentation. Check that the workflow fits your crew’s terminology and closeout process.
Can an app automatically label roof inspection photos?
Some inspection apps offer automated photo labeling, but check what “automatic” means before relying on it. PHOTO iD offers automated photo labeling and voice-to-text labeling. Voice entry can help record context, while labels still need review for accuracy and usefulness. Test the features with representative images, and don’t assume an app identifies roof areas or conditions unless that capability is confirmed.
How should roof inspection photos be labeled?
Use a short, consistent label that identifies the property, roof area, and visible subject. For example, “Oak Street property, rear slope, flashing detail” gives more context than a file number alone. Choose one name for each recurring area and use it across the crew. Describe what the image shows rather than asserting a cause or conclusion. Pair detail photos with wider views so readers can locate the subject.
Can I use my phone’s camera app for roof inspection photos?
Yes. A phone’s camera app can capture roof photos, and its gallery may offer basic date-based browsing or albums. The limitation is that images may still need to be sorted, labeled, and assembled into documentation manually. Dedicated inspection software may connect photos with labels, templates, or reports. Choose based on your workflow: if you need organized records and easier retrieval, test whether a purpose-built app addresses those needs.
How do you create a roof inspection photo report?
Group images by roof area, arrange each set from overview to detail, and add concise labels or descriptions. Review the sequence for missing context and unclear wording before sharing. An inspection app with report-generation tools may help assemble photos into a structured record. PHOTO iD offers instant photo report generation and a custom report builder. Check that the output meets your team’s documentation and sharing requirements.
Do roof inspection apps support teams and multiple inspectors?
Some inspection platforms include team features, but collaboration options vary, so verify how each app supports your crew. PHOTO iD offers a team management dashboard for team oversight. Before adopting a platform, check how your team can use it to maintain consistent labels and review reports. Test the process with more than one inspector to see whether handoffs remain clear from onsite capture through final documentation.