
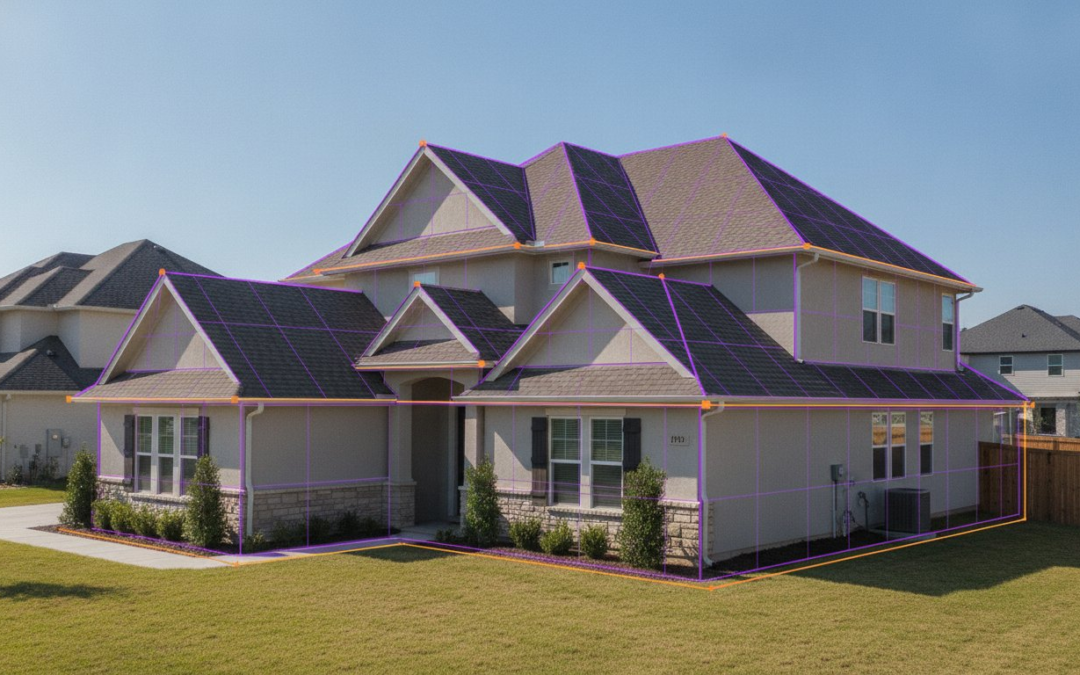
Stop wasting hours on manual sketching. Last week, another estimator lost an entire afternoon fighting a complex roof layout, only to have the carrier reject the sketch for a minor pitch error. It’s a frustrating, expensive, and completely avoidable cycle. Master the technical workflow of importing roof measurements into xactimate to reclaim your time and restore order to your workday. You know that manual data entry is the enemy of a profitable claim, and it’s time to eliminate that bottleneck for good.
We’re going to turn your technical friction into a high-velocity estimating machine. This guide provides the blueprint to convert aerial data into a perfectly rendered 3D sketch in Xactimate 2026 in just a few clicks. You will learn how to leverage the PHOTO iD Mobile App to pair these measurements with automated photo labeling, ensuring your estimates are fast, professional, and data-backed. Get ready to slash your cycle times, impress your carriers, and take control of your onsite documentation.
Key Takeaways
- Stop drawing by hand! Learn the exact process for importing roof measurements into xactimate to slash your claim cycle times immediately.
- Master the technical distinction between ESX and XML files so your 3D sketches render flawlessly every time.
- Compare satellite and fixed-wing aerial data to ensure you’re using the highest resolution imagery for complex roof inspections.
- Follow our streamlined, step-by-step guide to move measurement reports from your desktop into Xactimate’s project tab in seconds.
- Sync your imported data with the PHOTO iD Mobile App to provide the professional, labeled evidence carriers need for instant approval.
Understanding Roof Measurement Integration in Xactimate
Stop drawing by hand. In 2026, manual sketching is no longer a standard practice; it’s a bottleneck. Integration is the technical process of populating your Sketch tab using external data files. This workflow represents the “Death of the Pitch Gauge,” replacing ladders and tape measures with high-velocity digital assets. When you master the workflow of importing roof measurements into xactimate, you aren’t just moving a file. You are reconstructing a physical structure in a virtual environment with surgical precision.
Successful integration relies on three core pillars: Geometry, Materials, and Line Items. Geometry provides the 3D shape and slope. Materials calculate the actual quantities needed for the job, including waste factors. Line Items bridge the gap between the sketch and the final estimate. This digital evolution aligns with the broader industry shift toward Building Information Modeling (BIM), where every data point serves a structural purpose. By automating these pillars, you move from hours of tedious drawing to minutes of high-level reviewing.
Why Manual Sketching is Costing You Money
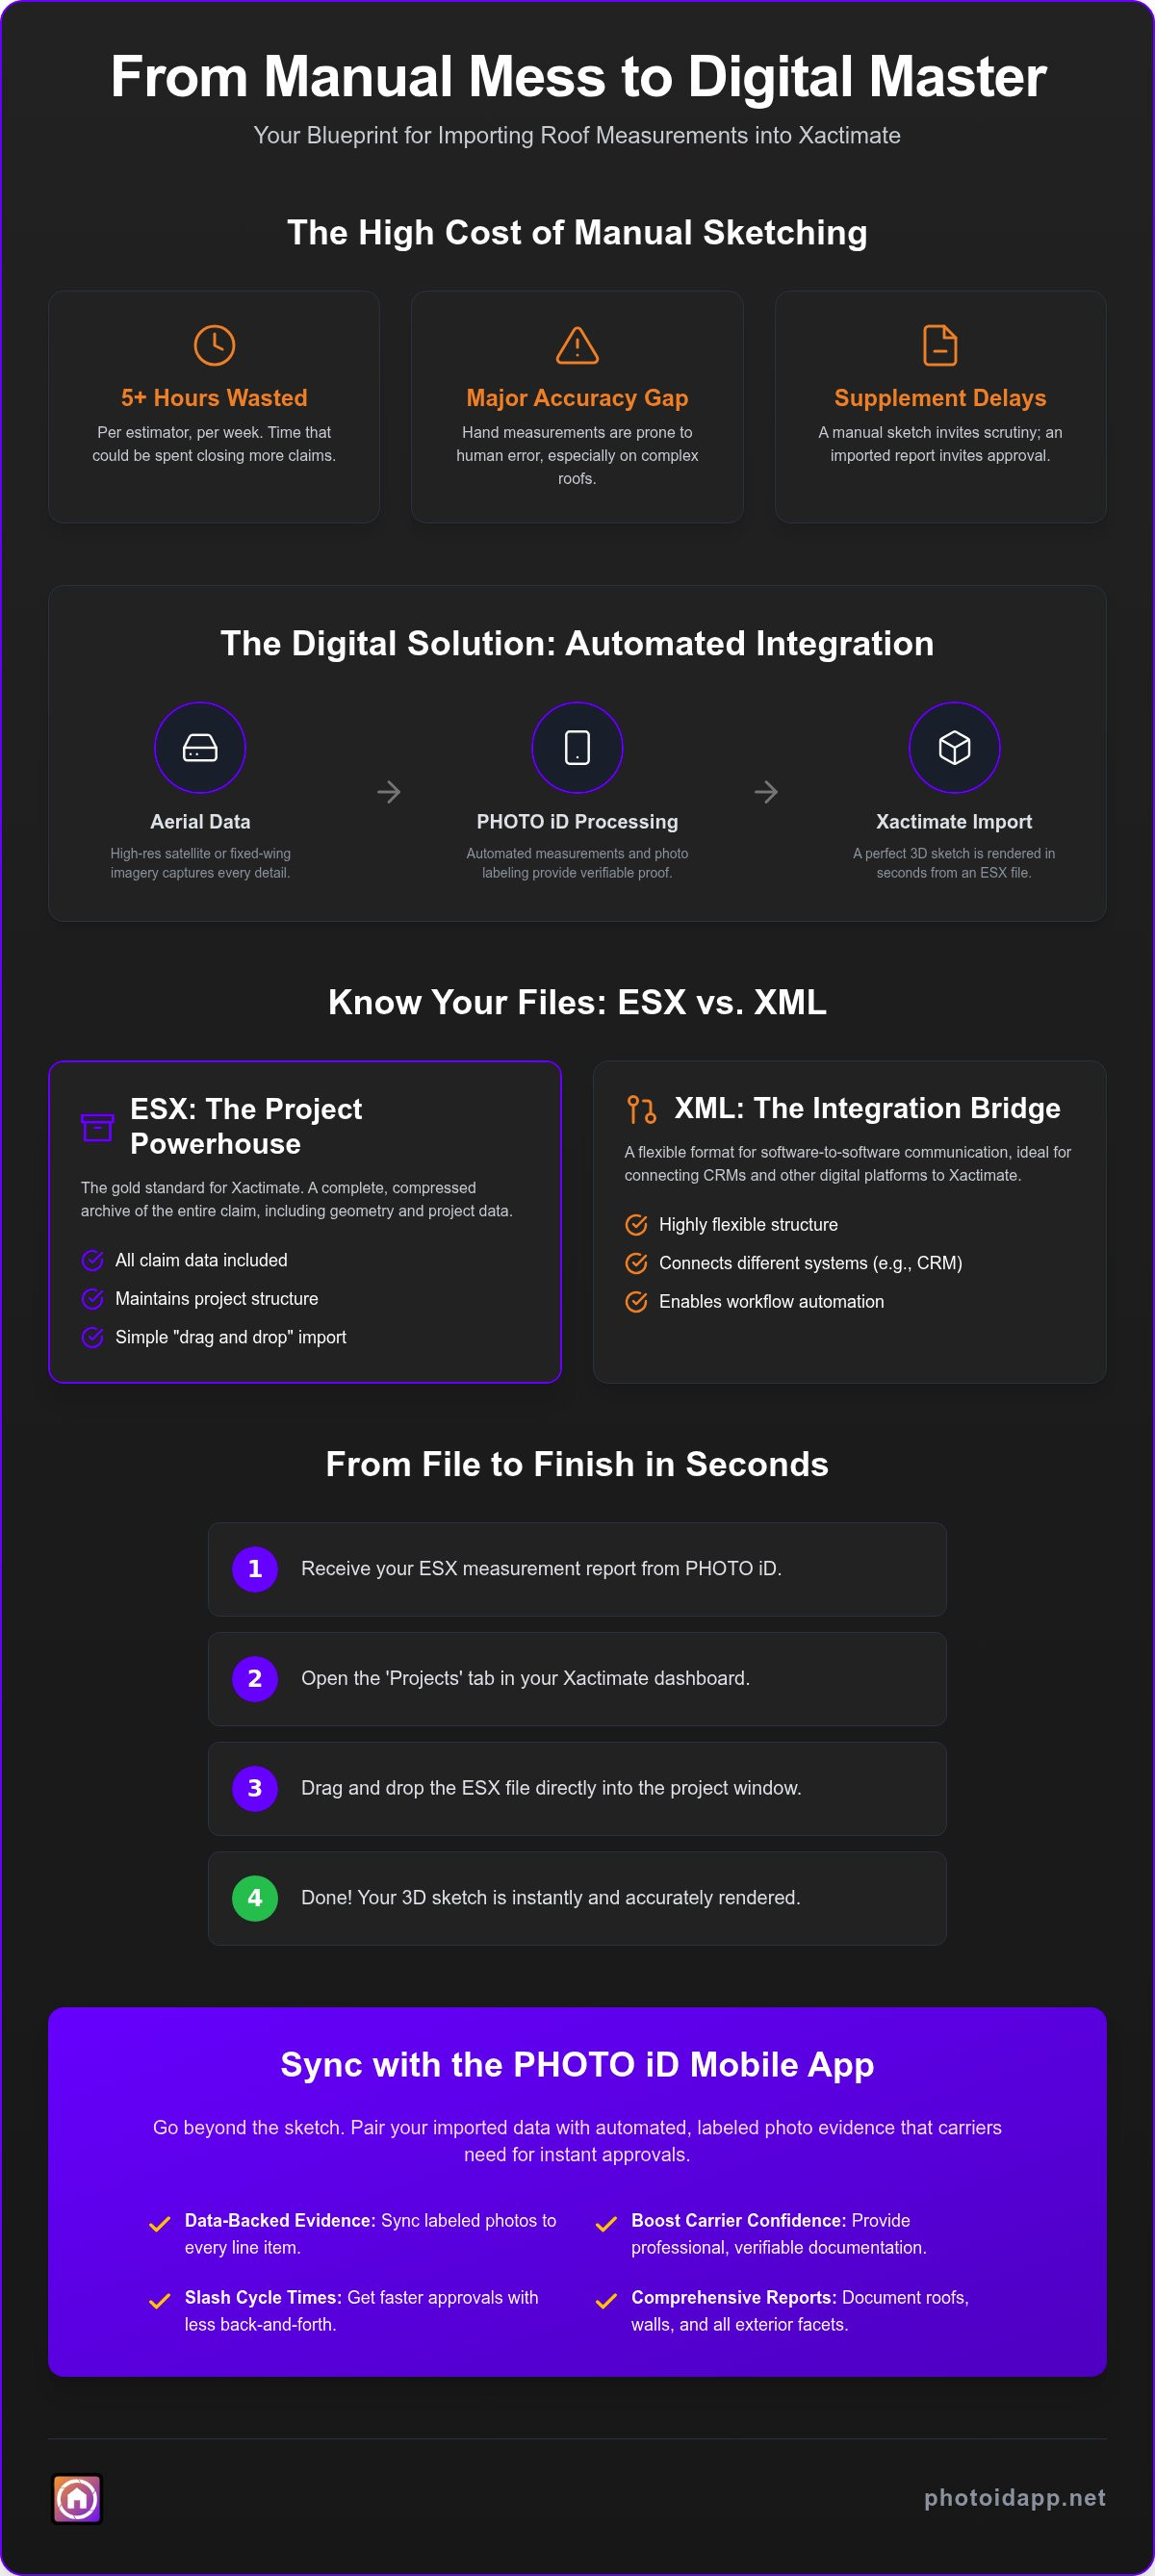
The hidden cost of a 30-minute manual sketch is staggering. If your team handles ten claims a week, that’s five hours of lost productivity every single week. Beyond time, there is a massive accuracy gap. Hand-measurements are prone to human error, especially on complex multi-hip roofs with varying pitches. Carriers now prioritize files backed by third-party measurement audits because they provide an objective, verifiable truth. A manual sketch often invites scrutiny; an imported report invites approval. Don’t let a “close enough” measurement lead to a supplement delay that stalls your cash flow.
The Role of Aerial Measurements in Modern Estimating
Modern estimating relies on the conversion of aerial imagery into vector data. Sophisticated algorithms analyze satellite or fixed-wing photos to identify ridges, valleys, and eaves, turning pixels into a format Xactimate understands. This process is essential for capturing wall measurements, which are often overlooked in standard roof-only claims but are vital for comprehensive exterior estimates. By utilizing PHOTO iD’s aerial measurement capabilities, you ensure that every facet of the property is documented. This high-velocity approach to importing roof measurements into xactimate gives you a professional edge that manual estimators simply cannot match. It’s about working smarter, moving faster, and documenting better.
ESX vs. XML: Decoding the File Formats for Seamless Estimating
Understanding the logic behind your data is the first step toward high-velocity estimating. When you are importing roof measurements into xactimate, you’ll encounter three primary file types: ESX, XML, and SKX. Each serves a specific purpose in the digital ecosystem. Most professionals prefer the ESX format because it acts as a comprehensive container for the entire claim. However, understanding XML is crucial if you are scaling your business through automated CRM integrations. To keep your workflow moving, ensure your measurement provider, such as the PHOTO iD Mobile App, delivers the format that fits your specific tech stack.
The ESX Powerhouse: Why it’s the Gold Standard
The ESX file is the undisputed gold standard for Xactimate users. An ESX file is a compressed archive of claim data that includes everything from headers and folders to specific line items. Unlike simpler formats, ESX maintains your organizational structure and project settings. In the current Xactimate 2026.6.1000 environment, the “drag and drop” functionality makes importing these files nearly instantaneous. You simply pull the file into the Projects tab, and the software reconstructs the entire estimate. It’s fast. It’s reliable. It’s professional. This format ensures that your geometry and project data remain synced without manual intervention.
When to Use XML for Data Transfer
XML excels in high-volume software-to-software communication. If you are moving data between a CRM and estimating software, XML provides the necessary bridge. It offers a flexible structure that allows different platforms to “talk” to each other through structured data fields. However, this flexibility requires precise mapping to ensure data lands in the correct Xactimate fields. While ESX is rigid and project-focused, XML is versatile and integration-friendly. Use XML when your workflow involves multiple digital platforms that need to share information without manual data entry. It is the backbone of a truly connected digital office.
The SKX file is a specialized format focused entirely on Sketch geometry. Use this when you only need the roof diagram without overwriting existing project headers or claim info. For most field professionals, the goal is a seamless transition from the roof to the final report. You should demand ESX files for full-project imports and SKX for geometry-only updates. This strategic choice eliminates technical friction and keeps your claim cycle moving at full speed. By selecting the right format, you restore order to your documentation and eliminate the errors common in manual transfers.
Comparing Aerial Data Sources for Xactimate Sketch
Choosing the right data source is the foundation of high-velocity estimating. You need to know when satellite imagery works and when fixed-wing resolution is required. When importing roof measurements into xactimate, the quality of your source file dictates the accuracy of your sketch. Satellite imagery offers massive availability and speed. It’s the go-to for most standard claims. However, tree-cover interference is a real threat. If foliage obscures the eaves or valleys, satellite data can fail. In these cases, fixed-wing aerial photography is the superior choice. It provides the resolution needed for high-pitch detail and complex architecture where precision is non-negotiable.
Don’t ignore the “boots on the ground” verification. Use on-site measurements to confirm aerial data on problematic properties. The most efficient professionals adopt a hybrid workflow. They use the PHOTO iD Mobile App to capture and label field photos while relying on aerial data for the geometry. This dual approach ensures your estimate is backed by both physical evidence and digital precision. It restores order to your documentation and provides the “ground truth” that carriers demand. When you combine high-resolution data with labeled field photos, your estimate becomes bulletproof.
Accuracy Benchmarks: What Carriers Expect
Carriers generally expect a 95% accuracy threshold for any third-party measurement report. If a roof is deemed “unmeasurable” due to heavy foliage, you must pivot to manual verification or ground-based documentation. Using a certified measurement report also creates a critical liability shift. By importing roof measurements into xactimate from a trusted provider, you move the responsibility for dimensional accuracy from your shoulders to the data source. This protection is vital for maintaining professional standing and ensuring faster, dispute-free claim approvals.
Cost vs. Speed: Finding the ROI Sweet Spot
Analyze the ROI by looking at the time saved rather than just the report cost. An adjuster’s time is their most valuable asset. If an aerial report eliminates a 45-minute manual sketch, the report pays for itself in a single claim. High-capacity roofing contractors can maximize these gains through volume discounts and streamlined team management. The PHOTO iD Mobile App scales with your team via a centralized management dashboard. It allows you to manage multiple inspections and aerial measurements in one ecosystem. This is how you build a scalable, high-velocity estimating machine that thrives during busy storm seasons.
Step-by-Step: Importing Your Roof Measurement File into Xactimate
Execution is everything. You have the data; now you need to deploy it. Before you begin importing roof measurements into xactimate, ensure your measurement report is saved in a dedicated directory on your local drive. This prevents the “missing file” scramble that kills your momentum. Open the Xactimate desktop client and navigate directly to the Projects tab. This is your command center for data integration. Whether you are a solo contractor or part of a large team, these steps ensure your digital sketch lands perfectly every time.
The Drag-and-Drop Method (Xactimate X1)
Speed meets simplicity with the drag-and-drop method. This is the fastest import technique available in the desktop version. Simply locate your ESX file in your file explorer, click and hold, then release it directly onto the Projects list within Xactimate. A notification will appear in the bottom corner confirming a successful import. If the file won’t drop, ensure you aren’t running Xactimate in Administrator mode while your file explorer is in User mode. This permissions mismatch is a common hurdle that stops the import dead in its tracks.
Once the project appears, open it and head straight to the Sketch tab. Toggle the 3D view to verify the scale and orientation. You need to ensure the ridges and valleys align with your field observations. To finalize the process, drag the sketch into the appropriate grouping within your estimate tree. This links the geometry to your line items instantly. For a truly high-velocity workflow, get the PHOTO iD Mobile App to ensure your field photos are ready to justify every dimension you just imported.
Importing via XactAnalysis
For insurance-side adjusters, server-side imports are the standard. Navigate to the communication tab within your claim file and select “Request Data.” This triggers a secure transfer from your measurement provider directly into the claim. You must manage your data tokens carefully to ensure automated delivery without manual intervention. This method is highly secure and keeps the chain of custody for the data intact, which is vital for carrier compliance.
Common Import Errors and How to Fix Them
Don’t let technical glitches stall your workday. Most import failures are easily resolved with a quick check of your file logic. Always verify that you are running the latest software version, currently Xactimate 2026.6.1000.459.459, to ensure compatibility with modern data formats.
- Invalid File Format: This usually happens when you try to import a PDF or a flat image. Double-check that your file extension is .ESX or .XML.
- Zero-Dimension Sketches: If your sketch appears as a single point, the coordinate data is likely corrupted. Re-download the file from your provider and try the import again.
- Mapping Failures: Ensure your project headers match the incoming file data. If the claim numbers don’t align, Xactimate may reject the import to prevent data overwriting.
Beyond the Sketch: Syncing Field Photos with Your Xactimate Estimate
A perfectly rendered 3D sketch is a powerful tool, but it’s only half the battle. Carriers don’t just pay for lines and numbers; they pay for verified damage. While importing roof measurements into xactimate gives you the “how much,” your field photos provide the “why.” Without organized, labeled visual evidence, your high-velocity sketch is just an unsupported request for funds. You must bridge the gap between aerial geometry and ground-level reality to secure instant approvals and maintain your professional standing.
The PHOTO iD workflow is designed to restore order to this documentation chaos. By aligning your aerial data with ground-level evidence, you create a bulletproof Proof of Loss. This unified approach ensures that every facet of the roof shown in your sketch is backed by a corresponding photo of the actual damage. It’s about building a narrative that carriers can’t ignore. When your digital sketch and physical photos tell the same story, claim cycle times drop and approvals happen faster.
Automated Photo Labeling: The Missing Link
The PHOTO iD Mobile App serves as the vital link between your digital sketch and the physical job site. While importing roof measurements into xactimate handles the dimensions, our automated photo labeling uses voice-to-text technology to label damage on the fly. This creates a critical “Image-to-Sketch” mental link for adjusters. When an adjuster sees a labeled photo of hail impact that perfectly matches a specific facet in your Sketch tab, the technical friction disappears. Carriers frequently reject claims that lack organized documentation. Don’t let a disorganized photo gallery stall an otherwise perfect estimate.
Closing the Claim: A Unified Digital File
Your goal is a unified digital file where every line item is justified by a labeled image. This is where instant photo report generation transforms your daily grind. By using PHOTO iD templates that mirror your Xactimate line items, you create a seamless data flow. You aren’t just sending a sketch; you’re delivering a comprehensive, data-backed report that justifies every dollar of the estimate.
Having your sketch and your photos ready for export simultaneously means you can close the file before you even leave the property. This level of efficiency protects your time and ensures your cash flow remains steady during peak storm seasons. It’s time to stop fighting with disconnected tools and start using a partner that understands the value of a saved hour. Elevate your professional standing and start a free trial of PHOTO iD today to experience the power of a unified estimating ecosystem!
Master the High-Velocity Estimating Workflow
Efficiency defines your success in this industry. By mastering the technical process of importing roof measurements into xactimate, you’ve removed the single greatest bottleneck in your daily routine. You now possess the expertise to navigate file formats, select the best data sources, and execute imports with surgical precision. This isn’t just about drawing roofs; it’s about reclaiming hours of your life every single week and restoring order to your workspace.
A sketch is only as strong as the physical evidence supporting it. Syncing your aerial data with labeled field photos ensures your estimates are bulletproof and ready for instant approval. Built by industry veterans for the field, the PHOTO iD Mobile App is trusted by thousands of adjusters and contractors to restore order to onsite documentation. It reduces photo documentation time by 40% and pairs perfectly with your high-velocity estimating workflow.
Stop manual labeling and start scaling with PHOTO iD today! Take control of your claim cycle and experience the relief of true digital efficiency. You have the knowledge; now put it to work!
Frequently Asked Questions
Can I import roof measurements into Xactimate Online?
Yes, you can import roof measurements into Xactimate Online by using the “Import” tool located on the main projects dashboard. Simply select the ESX file from your local storage and upload it directly to the cloud-based project. This ensures your data is accessible across all devices instantly. While the interface differs slightly from the desktop version, the underlying logic remains the same for seamless data integration.
How much does it cost to import an ESX roof report?
Xactimate doesn’t charge a fee for the act of importing, but you must pay the third-party provider for the report itself. Prices vary based on complexity and provider. For example, some reports start as low as $17 while others can range from $32.75 to over $50. Always check with your specific data provider for their current per-report or subscription pricing models to find your ROI sweet spot.
What is the difference between an ESX and an XML file in Xactimate?
An ESX file is a comprehensive compressed archive that contains the entire project, including the sketch, headers, and line items. In contrast, an XML file is a structured data format designed for software-to-software communication. While ESX is the industry standard for importing roof measurements into xactimate projects, XML is often used for high-volume data transfers between CRMs and other inspection platforms. Choose the format that best fits your requirements.
Do I still need to take manual measurements if I use an aerial report?
You don’t usually need full manual measurements, but a “ground truth” verification is still a professional best practice. Always verify a few key dimensions, such as the eave length or a specific pitch, to ensure the aerial data matches reality. This is especially important for properties with heavy tree cover or complex architectural features that might be obscured from above. Combining aerial data with field verification builds carrier trust.
Why is my imported roof sketch showing the wrong dimensions?
Wrong dimensions usually stem from coordinate corruption or a software version mismatch. Ensure you are running the latest version, currently Xactimate 2026.6.1000.459.459, to ensure full compatibility with modern vector data. If the scale is off, delete the sketch and re-import the original ESX file. Always check the 3D view immediately after the import to catch these errors before you start adding line items to your estimate. It restores order to your file.
Can PHOTO iD measurements be imported directly into Xactimate?
Yes, aerial roof and wall measurements from the PHOTO iD Mobile App are designed specifically for importing roof measurements into xactimate. The platform provides data in formats that the software recognizes, allowing you to populate your Sketch tab without manual drawing. This integration ensures that your precise dimensions are paired with automated photo labeling, creating a unified documentation package that is ready for carrier review and instant approval.
How do I handle tree-covered roofs that aerial measurements miss?
When heavy foliage obscures the roof, you must pivot to ground-based documentation. Use the PHOTO iD Mobile App to capture clear photos of the eaves and valleys from the ground or a ladder. You may need to take manual measurements of the obscured sections to supplement the aerial report. Combining these manual data points with the visible portions of the aerial sketch ensures your estimate remains accurate despite environmental challenges on the job site.
Is there a way to automate the photo labeling process inside Xactimate?
While Xactimate allows for basic photo descriptions, the most efficient way to automate the process is by using the PHOTO iD Mobile App before you export. Our voice-to-text labeling and custom templates reduce manual entry by 40%, ensuring every photo is perfectly organized. Once your labeled report is generated, you can attach it to your Xactimate file as a PDF, providing the “proof of loss” needed to justify your imported measurements.