
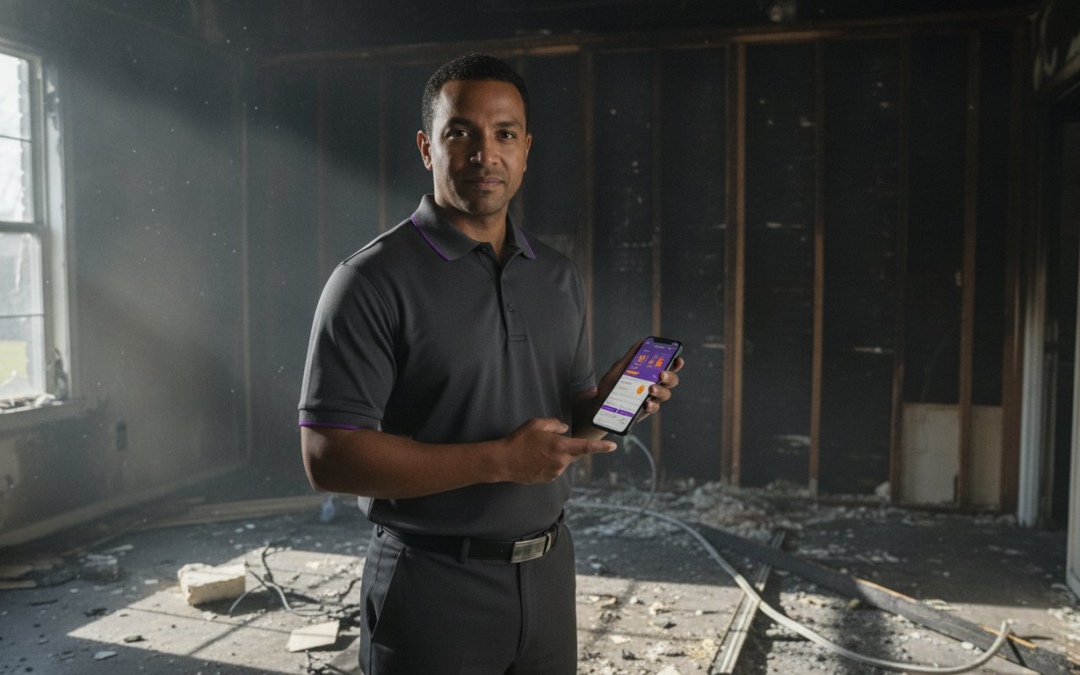
Your claim isn’t won by what you saw; it’s won by what you proved. Standing in a charred room with a thousand damaged items is an absolute grind. You’re fighting the clock, the soot, and the constant fear that an adjuster will overlook hidden smoke damage behind the studs. You know that manual photo labeling is a black hole for your office time, yet you can’t afford to miss a single detail. It’s a high-stakes race where the quality of your evidence dictates the size of the check.
Mastering how to document fire damage for insurance claims is about more than just snapping pictures. It’s about building an airtight, professional-grade evidence package that leaves zero room for disputes. With new 2026 regulations like SB 877 requiring insurers to provide documents within 15 days, your documentation speed is now your greatest leverage. This guide teaches you how to capture, label, and report with high-velocity precision. We’ll show you how to slash cycle times, automate your workflow, and secure the maximum settlement your clients deserve. Stop the manual chaos and start documenting like a pro.
Key Takeaways
- Distinguish between direct charring and indirect smoke damage to ensure adjusters never overlook hidden structural losses.
- Master the professional sequence of how to document fire damage for insurance claims by establishing an exterior perimeter before capturing interior tiers.
- Eliminate the manual photo labeling bottleneck and slash your claim cycle times with automated report generation.
- Utilize hands-free voice-to-text technology to document hazardous scenes safely and build a comprehensive, dispute-proof evidence package.
The Critical Role of Documentation in Fire Insurance Claims
Fire damage documentation is the systematic recording of physical, chemical, and structural losses. It is your only defense against lowball offers. A fire does not just burn; it corrodes with soot, stains with smoke, and warps with heat. You must establish the “before and after” context to define the true scope of loss. Without clear evidence, a total loss looks like a minor repair to an adjuster sitting in a remote office. Understanding how to document fire damage for insurance claims is the difference between a stalled claim and a successful settlement.
In the world of property insurance, the burden of proof rests entirely on you. The carrier is not obligated to find damage on your behalf. You must prove every square inch of soot, every warped stud, and every ruined heirloom. High-quality documentation slashes claim cycle times because it leaves no room for debate. It transforms a subjective argument into an objective fact. Capture the evidence. Organize the data. Secure the payout. It is that simple!
Why Standard Photo Galleries Fail in Fire Claims
Standard phone rolls are a productivity nightmare. You often end up with 500 unlabelled photos that look identical in the dark. Was that heavy charring in the kitchen or the master bedroom? Missing metadata and lack of context lead to “denial by confusion.” If an adjuster cannot understand your evidence in thirty seconds, they will deprioritize the claim. Plus, manual labeling back at the office creates a massive 40% time leak in your workflow. You are losing hours of billable time to clerical drudgery that should be automated. Stop the manual upload cycle and start using a system that works as fast as you do.
The Legal and Financial Weight of Your Evidence
Your documentation is more than a report; it is a permanent legal record. If a claim moves to appraisal or litigation, your photos are the primary evidence used to determine value. Professional documentation follows IICRC standards to ensure nothing is missed. This includes recording hidden “ghosting” from soot or chemical residues that are not always visible to the naked eye. Learning how to document fire damage for insurance claims correctly ensures these invisible losses are paid. Structured reports prevent oversight and protect the total settlement value. Be authoritative. Be thorough. Be professional. Your documentation should speak for itself so you don’t have to fight the carrier for every cent.
The Anatomy of Fire Evidence: What to Capture
Professional documentation isn’t just about photographing what burned; it’s about proving what is ruined. You must distinguish between direct fire damage, like charring and ash, and indirect damage, which includes acidic soot, pervasive smoke, and water from firefighting efforts. These secondary effects often cause more financial loss than the flames themselves. To build an airtight case, categorize your evidence into three distinct tiers: Structural, Personal Property (Contents), and Loss of Use. Each tier requires specific proof to trigger the corresponding coverage in a policy.
Don’t just focus on the “hot zone.” Capturing “unaffected” areas is vital to show the clear contrast of smoke migration throughout the property. This visual baseline makes it impossible for adjusters to claim that soot was pre-existing. As you scan the site, look for subtle cues that indicate deeper issues. Soot ghosting is a critical but often missed indicator of structural smoke damage. According to the NAIC Post-Disaster Claims Guide, providing this level of detail immediately after a loss is the most effective way to expedite your recovery. When you know how to document fire damage for insurance claims with this level of granularity, you eliminate the adjuster’s ability to “guesstimate” the scope.
Structural and Exterior Documentation
Perform a “Roof to Foundation” sweep of the entire exterior. Capture all four elevations to show the full impact of heat and smoke. Use aerial roof and wall measurements to verify structural compromises without risking a fall on a brittle, heat-damaged surface. Document charred framing, melted siding, and compromised window seals. Even if a window isn’t broken, the heat may have destroyed the gas seal, leading to future failure. Prove it now so it’s paid later!
Contents and Personal Property Inventory
Execute a meticulous room-by-room sweep. Open every drawer and closet to document the contents inside. For high-value items, you must capture serial numbers, brand names, and model tags. This is the only way to ensure a “like kind and quality” replacement. If items are being hauled to a landfill, photograph them in the pile. Once that debris is gone, your leverage for a contents payout disappears with it. Be fast, be thorough, and be relentless with your inventory.
Hidden Damages: Smoke, Soot, and Odor
Smoke travels through the path of least resistance. Photograph HVAC filters and ductwork to show how far soot has traveled into the mechanical systems. Look for soot “shadows” behind picture frames or inside cabinets where the particles settled. Don’t forget moisture mapping. The thousands of gallons of water used to extinguish the fire can lead to hidden mold and rot. Documenting these invisible threats is the hallmark of a professional who knows how to document fire damage for insurance claims properly. Scan the scene, label the damage, and secure the claim!
Manual vs. Automated Documentation: A Productivity Analysis
Manual documentation is a relic of a slower era. It is slow, sloppy, and expensive. The traditional workflow is a fragmented chain: you capture images, upload them to a server, match them to a room, label them manually, and eventually compile a report. This friction creates a massive gap between the field inspection and the final submission. Every manual touchpoint is an opportunity for a misidentified room or a lost photo. In a high-stakes fire claim, a single missing photo of a charred joist can cost thousands in unclaimed structural repairs.
When you master how to document fire damage for insurance claims through automation, you eliminate these administrative hurdles. Automated photo labeling creates a “living” inspection record that builds itself in real-time. This “Capture-to-Report” workflow ensures that every image is geotagged, time-stamped, and categorized before you ever leave the job site. It transforms a pile of raw data into a structured evidence package. No more guesswork. No more clerical errors. Just pure, professional results!
The “Office Bottleneck” in Claim Reporting
Field professionals often spend two hours in the office for every one hour spent onsite. This is the office bottleneck. It drains your billable hours and stalls the recovery process for the policyholder. Delayed reports lead to delayed payouts, which can ruin a contractor’s cash flow or a homeowner’s timeline. Instant photo report generation removes this burden entirely. It kills the weekend backlog. You finish the inspection, sync the data, and the report is ready for the carrier. Speed is your greatest competitive advantage in a hardening insurance market.
Technology as the Great Claims Equalizer
Voice-to-text labeling allows you to describe complex damage while your lens is locked on the loss. You stay focused on the evidence. You stay safe in hazardous environments. Custom inspection templates act as a digital safety net, ensuring no closet, crawlspace, or attic is skipped during the sweep. This structured data is the new gold standard for integration with major estimating platforms. It makes your files “adjuster-ready” the moment they land in the inbox. By adopting these tools, you ensure your documentation meets the highest industry standards for accuracy and transparency. Elevate your workflow. Automate your reporting. Secure your settlements.
Step-by-Step Professional Fire Documentation Workflow
Safety is your absolute priority. Never enter a structure until the fire marshal has declared it safe for entry. Once you have clearance, begin your systematic sweep immediately. You need a process that is repeatable, reliable, and rapid. Don’t wander aimlessly through the debris. Start at the exterior and work your way in. This disciplined approach ensures you never miss a critical detail that could cost your client thousands in unclaimed losses.
Establish a perimeter first. Capture wide-angle exterior shots of all four elevations to show the full context of the loss. Move to the interior and perform a room-by-room systematic sweep. Use a clockwise rotation in every room to ensure 360-degree coverage. This method prevents “blind spots” in your evidence package. Mix macro and micro documentation. Take an overview photo of the entire room, then zoom in on specific defects like charred joists or smoke-stained crown molding. This is the professional standard for how to document fire damage for insurance claims. Capture the room. Zoom on the damage. Prove the loss!
Labeling for Clarity and Speed
A photo without a label is just a picture. A photo with a label is evidence. Use the “Identify, Describe, Locate” framework for every shot you take. Instead of a generic “Damage” tag, your label should read “Living Room – Ceiling – Heavy Soot.” This level of detail makes the adjuster’s job effortless. Stop typing on a cracked screen in a dark, soot-filled room. Use voice-to-text labeling to tag photos in real-time. It’s faster, safer, and significantly more accurate. Ensure every image includes a timestamp and GPS tag. These metadata points are non-negotiable for preventing fraud and proving the exact time and location of the inspection.
Organizing Evidence for the Adjuster
Organization is the key to a fast payout. Group your photos by category: Structural, Contents, and Emergency Mitigation. This structure allows the adjuster to find what they need in seconds. Create a “Proof of Loss” photo report that mirrors the insurance policy structure. When your documentation follows the same logic as their claim file, they can write their estimate in half the time. You aren’t just taking photos; you’re building a roadmap to a settlement. Present the evidence clearly. Eliminate the friction. Get paid faster. It’s time to upgrade your field workflow with a professional photo app designed for high-velocity documentation.
Streamlining Claims with PHOTO iD: The Modern Solution
Stop fighting your phone roll. PHOTO iD is the industry-leading tool that automates the entire documentation cycle. When you’re learning how to document fire damage for insurance claims, you quickly realize that speed and organization are your biggest hurdles. PHOTO iD removes them. It’s built for the field professional who needs to capture, label, and report without the friction of manual data entry. It transforms your mobile device into a high-velocity evidence engine. Capture the loss. Label the damage. Sync the report. It’s that simple!
Fire scenes are hazardous and chaotic. You’re often wearing heavy PPE in low-visibility environments where typing on a screen is impossible. Our Voice-to-Text Labeling feature allows for completely hands-free documentation while you move through the soot and debris. Speak the damage description. Capture the high-resolution image. Move to the next room. This seamless interaction keeps you safe, keeps your hands free, and ensures every photo is tagged with professional-grade context in real-time.
Don’t wait until you get back to the office to start the paperwork. Our Instant Photo Report Generation sends professional, branded PDFs to the carrier before you even pull out of the driveway. For large-scale fire losses involving multiple structures or massive contents inventories, the Team Management Dashboard provides real-time oversight. You see exactly what your field team sees as it happens. This instant visibility restores order to the chaos of onsite documentation and ensures no detail is missed by your crew.
Seamless Integration with Industry Standards
Efficiency is only useful if it integrates with the tools you already use. PHOTO iD simplifies the transition of field photos into major estimating software and industry platforms. This ensures your estimates and evidence are perfectly aligned from the start. Use our custom templates for IICRC-compliant fire and smoke inspections to ensure your data meets the highest professional standards for restoration and remediation. By using these automated workflows, some industry professionals report reducing claim cycle times by 40%. It’s the fastest path from the initial inspection to a final, approved settlement.
Empowering the Field Professional
Eliminate report fatigue once and for all. Stop spending your evenings and weekends matching blurry photos to room names in a spreadsheet. PHOTO iD does the heavy lifting so you can focus on the expert assessment. This level of transparency builds immediate trust with policyholders. They see a comprehensive, structured record of their loss generated right in front of them. It provides a sense of relief and professional confidence during a traumatic event. It’s time to reclaim your billable hours and prove your expertise with every click. Transform your fire documentation with PHOTO iD today and experience the power of high-velocity reporting!
Dominate Your Claims Workflow Today
Your documentation is the bridge between a charred property and a full recovery. By following a systematic, clockwise sweep and capturing both macro overviews and micro defects, you ensure no soot ghosting or structural compromise goes unpaid. Mastering how to document fire damage for insurance claims transforms you from a stressed field professional into a high-efficiency expert. Don’t let manual photo labeling or office bottlenecks stall your progress. Embrace the digital shift to secure the settlements your clients deserve.
It’s time to restore order to the chaos of onsite inspections. Experience a 40% reduction in claim cycle times with automated photo labeling and hands-free voice-to-text technology. Generate instant, professional reports that are ready for the carrier before you even leave the job site. Stop wasting hours on manual labeling; Try PHOTO iD for free! You have the skills to handle the loss; now you have the tech-savvy partner to prove it. Take control, stay fast, and win the claim!
Frequently Asked Questions
How many photos should I take for a fire insurance claim?
Take as many photos as necessary to prove the full extent of the loss, which often means 200 to 500 images for a standard residential claim. Start with wide-angle overviews of every room to establish context. Move to close-up shots of specific charring, soot, and heat-warped fixtures. Capture every angle, drawer, and closet to ensure the adjuster sees the complete scope of the damage.
Can I use a mobile app to document fire damage for my insurer?
Yes, a professional photo app is the most efficient way to document fire damage for insurance claims. These tools allow you to capture, label, and organize images in real-time while you are still on the job site. Using a dedicated app ensures your metadata, such as GPS coordinates and timestamps, is preserved. This builds immediate credibility with the carrier and speeds up the approval process.
What happens if I accidentally throw away fire-damaged items before the adjuster sees them?
Discarding items before an inspection can lead to a denial of that portion of your claim. If safety concerns require immediate disposal, you must take high-resolution photos of every item in the debris pile first. Document brand names, model numbers, and serial tags to prove the value of what was lost. Without visual evidence, the insurance company has no obligation to pay for those items.
Is smoke damage covered the same way as fire damage?
Smoke and soot damage are typically covered under the same peril as fire, but they require more detailed documentation. You must prove smoke migration into seemingly unaffected rooms by photographing HVAC filters, interior cabinets, and soot “shadows” behind wall hangings. These acidic particles cause long-term corrosion. Prove the presence of smoke early to ensure the carrier pays for professional cleaning and deodorization.
What is the best way to organize hundreds of fire damage photos?
Organize your evidence by room and then by category, such as structural, contents, or emergency mitigation. Using automated photo labeling allows you to tag images as you take them, which eliminates the need for manual sorting later. This structured approach helps the adjuster write their estimate faster. It ensures your final report mirrors the layout of the insurance policy for a seamless review.
Do I need to document the “clean” parts of my house after a fire?
Documenting unaffected areas is a critical step in showing the contrast of smoke and soot migration. These photos serve as a visual baseline to prove that the damage in other rooms is new and fire-related. It prevents the carrier from claiming that discoloration was pre-existing. Always capture a full visual record of the entire property to protect the integrity of your claim.
How does voice-to-text labeling help with insurance inspections?
Voice-to-text labeling allows you to describe complex damage hands-free while your eyes stay on the loss. This is vital in dark, soot-filled environments where typing on a screen is difficult and slow. You can dictate specific details like “Heavy charring on south wall studs” and have it instantly applied to the photo metadata. It saves hours of clerical work and keeps you safe onsite.
Can I use aerial measurements to document fire damage to my roof?
Aerial measurements are a safer and more accurate way to document roof and wall damage after a fire. Intense heat can make roofing materials brittle and dangerous to walk on. Using drone or satellite-based measurements provides a comprehensive view of the structural impact without putting anyone at risk. It ensures your structural estimate is precise and based on verifiable data.