
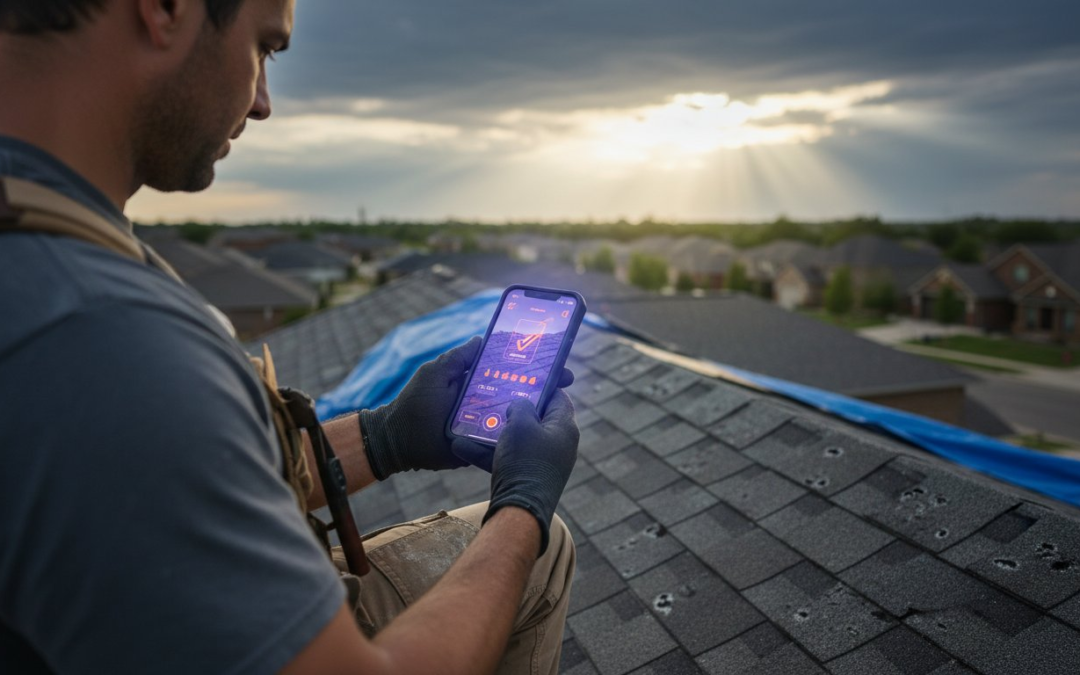
Approximately 1 in 18 insured homes in the U.S. files a claim each year, but a staggering number of these are delayed or denied simply because the documentation was a mess. You know the grind of standing on a damaged roof or in a flooded basement, snapping hundreds of photos and hoping they’re enough to satisfy a skeptical adjuster. It’s overwhelming, it’s chaotic, and it’s risky. Learning exactly how to document storm damage for insurance is the only way to ensure your evidence is undeniable and your claim is bulletproof.
We’re here to replace that frustration with professional-grade efficiency. This guide promises to master your documentation process so you can secure faster approvals and full reimbursements for every covered loss. You’ll learn the specific photo sequences that adjusters demand, the critical 2026 filing deadlines you can’t afford to miss, and how to use mobile technology to automate your entire reporting workflow. It’s time to work faster, document smarter, and get paid sooner!
Key Takeaways
- Take control of the claim process by understanding that professional-grade documentation is your strongest asset against delays.
- Capture the perfect evidence every time by following a strategic checklist that moves from wide-angle elevations to detailed peril shots.
- Master how to document storm damage for insurance by replacing chaotic photo dumps with organized, instantly labeled images.
- Build dispute-proof reports using structured virtual inspection templates that guide you through every critical detail of the property.
- Slash your claim cycle times by generating comprehensive inspection reports instantly before you even leave the jobsite!
Why Precise Documentation is Your Strongest Asset in an Insurance Claim
Own the process. In the high-stakes world of property claims, the burden of proof rests entirely on your shoulders. Your insurance carrier isn’t looking for ways to pay you more; they are looking for evidence to justify a payout. When you learn how to document storm damage for insurance with professional precision, you shift the power dynamic. You aren’t just asking for money. You are presenting an undeniable case. Clear, organized data builds immediate credibility with your insurance carrier. It shows you are an expert who understands the technical requirements of a successful claim.
Professional documentation is the ultimate defense against the dreaded “pre-existing wear and tear” denial. Adjusters often attribute roof damage or siding cracks to age rather than weather. Without high-resolution proof of the specific storm impact, you lose the argument before it starts. High-impact documentation eliminates the friction of back-and-forth questions. It provides the “why” and the “when” in a format that adjusters can’t ignore. Your goal is simple: make it impossible for them to say no. Capture the damage, organize the data, and accelerate your recovery!
The Cost of Poor Documentation
Poor photos equal poor payouts. If you provide a sea of 200 unlabeled images, you trigger “photo fatigue.” Adjusters are human; they will overlook subtle damage when forced to scroll through a disorganized mess. Missing “context photos” is a common mistake that leads to partial denials. If you capture a close-up of a leak but fail to show the exterior entry point, the adjuster cannot verify the cause of loss. Avoid blurry shots, lack of scale, and missing date stamps. A photo without a ruler or a reference point is just a picture; a photo with context is evidence.
Winning the Adjuster’s Trust
Speak the adjuster’s language. They prefer reports that mirror their own professional standards because it makes their job easier. Mastering how to document storm damage for insurance means thinking like an investigator. Use your homeowners insurance policy as a roadmap for what needs to be proven. Incorporating “before and after” evidence is a game-changer for establishing the timeline of a loss. Claim cycle time is the duration from the first notice of loss to the final payment. Reduce that time by delivering a dispute-proof report on day one!
The Comprehensive Storm Damage Photo Checklist: What to Capture
Capture everything. Start with a wide lens before you zoom in on the specific details. To master how to document storm damage for insurance, you must provide total context. Begin with “Overview” shots of every elevation. Photograph the front, back, and both sides of the property from a distance. This establishes the overall condition and the exact location of the structure. Next, document the “Peril” itself. If hail hit the property, place a ruler next to the hailstones to prove their size. If a tree fell, capture the impact point and the surrounding debris. This is your evidence. This strategy aligns with the NAIC’s guide to navigating the claims process, which emphasizes recording damage before you start cleaning up or making repairs.
Move inside. Use a systematic “Room-by-Room” method for all interior documentation. Start at the ceiling and work your way down to the floors. Don’t forget the “Hidden” areas. Check the attics, crawlspaces, and the back corners of closets. Water follows the path of least resistance, and so should your camera. Finally, document your high-value assets. Capture the serial number plates on all HVAC units, water heaters, and major appliances. These plates confirm the age and model of the unit. This ensures you get the correct replacement value for your equipment!
Exterior and Roofing Documentation
Focus on the “soft metals” first. Gutters, downspouts, and roof vents show hail impact more clearly than shingles. Photograph these from multiple angles to highlight the indentations. When you move to the roof, look for shingle “bruising” or granule loss. These signs are subtle but critical. Document the entire perimeter. Photograph damaged fences, detached sheds, and even uprooted landscaping. Every detail adds value to your final report. Using a professional photo app can help you organize these hundreds of images instantly while you walk the site.
Interior and Personal Property
Track the moisture. Photograph every water stain and use a moisture meter to verify the extent of the saturation. Document the digital reading on the meter next to the damaged area. When dealing with belongings, create a “damaged contents” pile. Photograph each item individually before you discard anything. Capture samples of materials like carpet padding or wallpaper. This quality verification ensures the adjuster matches the “like kind and quality” of your original materials. Be thorough, be precise, and be professional!
Organizing the Chaos: Manual Photo Sorting vs. Automated Labeling
Stop the photo dump. Taking hundreds of pictures is only half the battle. If you send an adjuster a folder full of files named IMG_001 through IMG_200, you’ve created a puzzle, not a report. Adjusters are swamped. They don’t have time to guess which blurry corner belongs to the master bedroom or the guest bath. When you are figuring out how to document storm damage for insurance, organization is your secret weapon. You need instant labeling while you are still standing in front of the damage. Waiting until you get back to the office is a recipe for disaster.
Use your voice. Typing on a cracked screen in the rain is frustrating and slow. Modern voice-to-text technology allows you to describe the peril, the location, and the severity of the damage hands-free. This ensures every photo has a clear, descriptive caption the moment it’s taken. Secure your data in the cloud. Relying on a single physical device or a fragile SD card is a massive risk. Cloud-based storage ensures your evidence is safe, searchable, and accessible from any jobsite. Treating your claim like a business negotiation is one of the top 10 tips for insurance claims, and nothing says “professional” like an organized, digital file structure.
The Manual Documentation Nightmare
Manual sorting is a massive time-sink. You spend hours downloading, renaming, and folder-sorting photos on a PC after a long day in the field. It’s exhausting work. There’s also a high risk of data loss or corrupted SD cards during the transfer process. Even worse, memory fades. Three days after a storm, it’s incredibly difficult to match a generic photo of a water stain to a specific closet. This confusion leads to errors, missed items, and smaller payouts. Don’t let manual busywork drain your productivity!
The Automated Efficiency Advantage
Flip the script with automation. Automated photo labeling software categorizes your images by room or feature instantly. You take the shot, and the system labels it. It’s fast, accurate, and seamless. This allows for instant photo report generation. You can literally submit a finished, professional report to the carrier before you even leave the property! Use custom inspection templates to maintain a strict workflow. These templates act as a digital safety net, ensuring you never miss a critical area of the property. Capture. Label. Submit. It’s that simple!
Step-by-Step Guide to Building a Dispute-Proof Damage Report
Safety first. Always. Before you even touch your camera, verify the site is secure. Ensure utilities are disconnected and the structure is stable. Once you’re safe, execute a virtual inspection using a mobile app to maintain a logical, step-by-step flow. This isn’t just about taking pictures; it’s about building a narrative. When you master how to document storm damage for insurance, you provide a roadmap for the adjuster to follow. A structured report is the difference between a fast approval and a long, painful dispute.
Add detailed descriptions to every single image. Avoid vague language. Instead of “broken roof,” use industry-standard terminology like “wind-uplift.” This technical precision builds immediate trust with the carrier. Your final output must be a professional PDF report. It should feature clear labels, precise timestamps, and verified GPS coordinates. Submit this comprehensive document alongside your official Proof of Loss form to your insurance agent. This combined package is the gold standard for evidence. It provides the adjuster with everything they need to approve the claim at full value!
Standardizing Your Descriptions
Speak the language of the industry. Using technical terms like “spalling,” “alligatoring,” or “thermal tracking” helps adjusters categorize damage quickly. It shows you know exactly what you’re looking at. Always include directional photos in your report. A label like “North Elevation – Roof Hail Damage” provides essential orientation for someone who isn’t on-site. GPS-stamped photos provide irrefutable proof of location and time. This data makes your evidence bulletproof and dispute-proof!
Integrating with Industry Software
Don’t waste time on double entry. Your documentation should work for you, not against you. Professional reports can be easily imported into Xactimate or Verisk platforms, allowing for seamless estimate creation. High-quality documentation also integrates aerial measurements to verify roof dimensions for the adjuster. Ensure your report format is compatible with all major insurance carrier portals to avoid technical delays. Speed up your process and generate instant inspection reports with a single tap!
By standardizing your workflow, you eliminate the back-and-forth that kills claim momentum. You provide the clarity, the context, and the technical data required for a full payout. This professional approach to how to document storm damage for insurance separates the experts from the amateurs. Get it right the first time, every time!
Accelerate Your Claim with PHOTO iD’s Automated Inspection Tools
Restore order to the storm site. PHOTO iD isn’t just an app; it’s your game-changing partner in the field. When you’re looking for how to document storm damage for insurance, you need tools that work as hard as you do. Forget the manual grind of sorting through thousands of files. Our Automated Photo Labeling identifies and organizes your images the moment you snap them. No more renaming files at midnight. No more sorting folders at the office. You get pure, streamlined efficiency that turns a chaotic inspection into a professional report before you even leave the driveway!
Keep your eyes on the damage and your hands free. Typing on a mobile device in the middle of a jobsite is slow and dangerous. Our Voice-to-Text labeling allows you to narrate the inspection in real-time. Just speak, and the app documents the peril, the location, and the severity instantly. This tech-driven approach ensures you capture every detail without missing a beat. Once the walk-through is done, your work is essentially finished. Instant Photo Report Generation creates a professional, carrier-ready PDF in seconds. Move to the next job faster, close claims sooner, and leave the paperwork behind!
Features for Homeowners and Contractors
Standardize your success with every click. Use custom inspection templates that act as a digital checklist for a perfect storm assessment. These templates guide you through the property to ensure you never miss a damaged shingle, a dented vent, or a cracked window. For contractors overseeing a crew, the Team Management Dashboard provides a bird’s-eye view of every active site. Track progress, review photos, and manage reports from one central hub. Stay safe and stay accurate with aerial roof and wall measurements. Eliminate dangerous ladder climbs and get precise dimensions delivered right to your device. It’s safer, faster, and smarter!
Ready to Restore Order to the Chaos?
Stop wasting time on manual documentation and data entry. Join thousands of field professionals who have already slashed their reporting time by 50%. This software is designed for the mobile professional who values speed and accuracy above all else. Take back your day. Restore your focus. Reclaim your profits. Download the PHOTO iD app and start documenting your property with professional-grade precision today. Don’t let a disorganized report stand between you and a full payout. Start Your Professional Inspection with PHOTO iD Now and experience the future of field documentation!
Take Control of Your Property Recovery
You now have the professional blueprint for success. Documentation is no longer a burden; it’s your strongest leverage. By following a strategic checklist and using technical terminology, you ensure your evidence is undeniable. Remember, precision always beats volume. Mastering how to document storm damage for insurance transforms a chaotic jobsite into a structured, dispute-proof asset that adjusters can’t ignore.
Don’t let manual photo sorting or data entry drain your productivity. Join the thousands of professional adjusters and contractors nationwide who have already revolutionized their field assessments. Our technology features AI-powered automated photo labeling and instant report generation for seamless Xactimate integration. You can finalize your professional report before you even pack up your gear. Stop the chaos. Save your time. Secure your payout!
Streamline Your Documentation with the PHOTO iD Mobile App
You have the knowledge and the technology to win. Take the first step toward a faster, fuller claim approval right now. Document. Detail. Deliver!
Storm Damage Documentation FAQs
How many photos should I take for a storm damage claim?
Take as many as required to tell the complete story of the loss. Most professionals capture between 100 and 200 photos for a standard single-family home. Start with wide overview shots of every side of the building. Move closer to document specific impact points. It is better to have too many photos than to miss a critical detail that could lead to a claim denial!
Can I start cleaning up before the insurance adjuster arrives?
Only perform emergency repairs necessary to prevent further damage to the property. You have a duty to mitigate loss under your policy. Stop the leaks and board up windows, but do not throw away damaged materials. Keep samples of carpet, padding, or drywall for the adjuster to inspect. Documenting how to document storm damage for insurance involves capturing the “before” state of every area you must clean or repair.
What should I do if I find more damage after I already filed my claim?
Document the new findings immediately and file a supplemental claim with your carrier. It’s common to discover hidden issues like mold or structural shifts days after the initial inspection. Capture fresh photos with timestamps and clear labels. Submit these to your adjuster as an addendum to your original report. Speed and clarity are essential to ensure these late discoveries are covered under your existing claim!
Is video better than photos for documenting storm damage?
Photos are the preferred format for insurance adjusters because they are easier to categorize and include in official estimates. Video is excellent for providing a quick overview of the context and scale of the disaster. Use video to walk through the property and narrate the damage. However, always follow up with high-resolution, labeled still photos of every specific peril to ensure your evidence is processed quickly!
What are the most important things to photograph after a hurricane or tornado?
Prioritize the “big three”: elevations, roofing, and interior water entry points. Capture all four sides of the exterior to show the storm’s path. Focus on soft metals like gutters and vents that show hail or wind impact clearly. Inside, photograph every ceiling stain and floor saturation. Don’t forget the serial number plates on your HVAC units and major appliances to ensure you receive the correct replacement value!
How do I prove the damage was caused by a specific storm and not old age?
Look for fresh indicators of impact like “bruising” on shingles or clean splatter marks on siding. Contrast these with areas of the home that show normal weathering. If you have “before” photos from a recent home inspection or maintenance project, use them to establish a baseline. This clear timeline makes it difficult for an adjuster to classify new storm damage as pre-existing wear and tear.
Do I need a professional app to document my own home’s damage?
You aren’t required to use a professional app, but it significantly reduces the risk of human error. Using a specialized tool for how to document storm damage for insurance automates the labeling and organization process. It ensures your photos are timestamped, GPS-located, and categorized by room instantly. This level of professionalism builds immediate trust with your adjuster and helps your claim move through the system much faster!
What happens if my insurance company says my photos aren’t clear enough?
Re-take the photos immediately using better lighting and multiple angles if the site is still accessible. If the damage has already been repaired, you may need to rely on contractor invoices or witness statements. This is why getting it right the first time is so critical. Use a professional camera or app that ensures high-resolution output and automated labeling to prevent these technical delays from stalling your payout!