
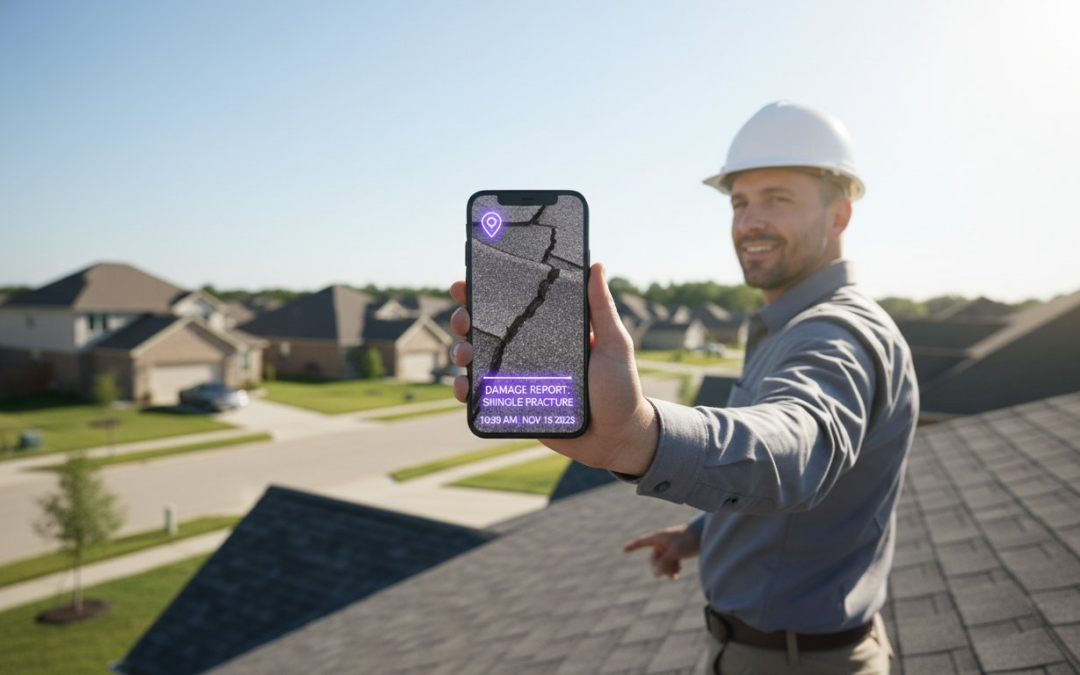
Your high-resolution photos are worthless if an insurance adjuster labels them as “pre-existing” damage. In 2026, learning how to prove property damage with photos is no longer just about pointing and shooting. It’s about capturing the verifiable metadata and specific failure points that carriers demand to see. You’ve likely felt the sting of claim denials or spent way too many hours manually labeling hundreds of inspection photos after a long day in the field. It’s a chaotic, exhausting process that slows down your cycle times and puts your professional reputation at risk.
We’re here to restore order to that chaos. This guide reveals the exact photographic techniques and documentation standards required to verify property damage and secure successful insurance claims in 2026. You’ll learn how to implement the industry-standard three-tier photo method, utilize GPS data to bypass manual fraud reviews, and generate professional reports that insurers simply cannot dispute. Let’s transform your onsite documentation into a fast, seamless, and bulletproof asset that gets your claims approved and your projects moving.
Key Takeaways
- Learn the precise “Wide-Mid-Close” documentation standard to establish undeniable structural context for every claim.
- Discover how to prove property damage with photos by capturing the specific failure points that carriers require for approval.
- Use embedded metadata like GPS and timestamps to provide verifiable, fraud-proof evidence that speeds up the claim cycle.
- Avoid common documentation pitfalls like poor lighting and “missing link” shots that frequently lead to claim denials.
- Adopt an automated workflow to capture, label, and report your findings instantly while still onsite!
Why Photographic Evidence is the Backbone of Every Property Claim
In the high-stakes world of insurance adjustments, the burden of proof rests squarely on your shoulders. You must demonstrate that a loss occurred, that it falls under policy coverage, and that the damage is fresh. Mastering how to prove property damage with photos is the difference between a full payout and a flat denial. Without a rigorous visual record, your claim is just a collection of opinions. Carriers often default to “gradual wear and tear” to deny coverage, but professional imagery stops that narrative in its tracks. High-resolution photos provide the undeniable proof needed to distinguish a sudden storm impact from years of neglect. Document the truth, secure the claim, and protect your client.
Establishing the Date of Loss (DOL) is where many field professionals stumble. If you can’t prove exactly when the damage happened, the carrier can argue the policy wasn’t active or the claim was filed too late. This is why understanding forensic photography principles is vital for your workflow. By capturing metadata-rich images, you create a digital paper trail that links the damage to a specific event. This level of professional documentation reduces friction, builds trust with adjusters, and accelerates the entire settlement process. It turns a chaotic inspection into a structured, verifiable asset.
The Four Legal Questions Your Photos Must Answer
Your photo report isn’t just a gallery; it’s a legal argument. To effectively show how to prove property damage with photos, every inspection must answer four critical questions. First, what was damaged? You must clearly identify the specific asset, room, or structural component. Second, when did it happen? Use timestamps to lock in the timeline. Third, what caused it? Capture the “failure point” to connect the peril to the effect. Finally, what is the cost? Detailed shots support accurate valuations. Answer these questions clearly, and you make the adjuster’s job easy while securing your own results!
Visual Evidence vs. Personal Accounts
Insurers prioritize objective digital evidence over subjective personal accounts every single time. A homeowner’s memory of a storm is a story; a high-resolution photo of a cracked shingle is a fact. This is why capturing “pre-loss” condition photos is a game-changer for contractors and inspectors. When you have a “before” image to compare against the “after,” disputes over pre-existing damage vanish instantly. Use high-resolution imagery to document the current state clearly. It eliminates ambiguity, prevents disputes, and ensures you get paid for the work you actually perform. Stop guessing and start documenting with precision.
The Three-Tier Photo Method: Capturing Comprehensive Evidence
Adjusters look for any reason to doubt the validity of a claim. If your photos are disjointed or lack context, you’re handing them a reason on a silver platter. The “Wide-Mid-Close” method is the industry standard for a reason. It creates a logical, visual narrative that guides the viewer from the street level down to the microscopic fracture. Mastering this sequence is exactly how to prove property damage with photos without leaving room for carrier interpretation. It’s about building a stack of evidence that is impossible to ignore. Follow this structured approach to ensure your documentation stands up to the toughest scrutiny.
Step 1: Establishing Context with Wide-Angle Shots
Start by capturing the big picture. You need to photograph all four elevations of the property to show the structure in its entirety. These “anchor” shots prove the damage didn’t occur in a vacuum and help establish the overall condition of the asset. Don’t forget to include local landmarks like street signs or house numbers in at least one shot. This verifies the location beyond any doubt. Ensure the entire damaged area is visible in relation to the whole structure so the adjuster understands exactly where the loss occurred. It’s about setting the stage before you dive into the details.
Step 2: Linking Damage with Mid-Range Photos
Once you’ve set the scene, move within 5 to 10 feet of the damage site. Mid-range photos are the “missing link” in most failed claims. They show how the specific damage relates to the surrounding unaffected areas. This is where you capture the “pattern of loss.” For example, you can show how wind uplift affected one corner of a roof while the rest remained intact. By framing the damage against healthy sections of the property, you prove the loss is localized and event-driven. To keep these sequences organized while you work, try using a professional photo app that labels your shots in real-time.
Step 3: Documenting Severity with Close-Ups
Now, get into the weeds. Close-up shots are your opportunity to prove the severity of the impact or intrusion. Focus on the fine details like hairline fractures, water lines, or mechanical failures. Always use a reference object, such as a coin or a tape measure, to provide an immediate sense of scale. Take multiple photos of the same damage point from different angles to eliminate shadows that might hide the depth of a crack. This final step is the most critical part of learning how to prove property damage with photos. When you document the severity with this much precision, you leave the carrier with no choice but to acknowledge the full extent of the loss.
Leveraging Metadata and Instant Labeling for Verifiable Proof
A photo without data is just a picture; a photo with metadata is evidence. If you want to know how to prove property damage with photos that an adjuster can’t ignore, you must protect your digital fingerprint. EXIF metadata is the hidden DNA of every image you capture. It contains the GPS coordinates, the precise timestamp, and the device information. In 2026, insurance carriers are increasingly using this data to flag fraud. Photos lacking these embedded details often face manual reviews, which can delay your claim for weeks. Capture the damage. Secure the data. Win the claim!
Manual labeling is the primary cause of documentation errors and project delays. Spending hours at a desk trying to remember which blurry bedroom photo belongs to which floor is a recipe for disaster. Automated systems are now the standard for modern inspections. They ensure every image is categorized the moment you press the shutter. This level of organization transforms a pile of random files into a professional narrative. It’s the fastest way to establish credibility with an adjuster before they even step foot on the property.
Why GPS and Timestamps are Non-Negotiable
GPS coordinates are your primary defense against “wrong property” claim denials. They prove exactly where you stood when the image was taken. Similarly, “Date Taken” metadata provides an airtight defense against claims that the damage was pre-existing. Never send photos through generic messaging apps like WhatsApp or iMessage. These platforms often scrub metadata to save space, leaving your evidence vulnerable to dispute. Always use a dedicated platform that preserves the integrity of your digital files from the field to the final report.
The Power of Automated Photo Organization
Categorizing photos by room or elevation in real-time saves hours of tedious desk work. Use automated photo labeling to create instant narratives that tell the story of the loss as you walk the site. This technology allows you to maintain a high-velocity workflow without sacrificing accuracy. If the damage is complex, leverage voice-to-text labeling. Speak your observations. Label on the fly. Stay focused on the damage. This keeps your hands free and your focus sharp, ensuring you never miss a critical detail. This is how to prove property damage with photos while maximizing your productivity and minimizing your stress.
Avoiding Common Documentation Mistakes that Kill Claims
One bad photo is all it takes for an adjuster to toss a file. If you’re learning how to prove property damage with photos, you must avoid the amateur errors that scream “unreliable evidence.” Poor lighting is the most frequent culprit. “Blown out” images from a flash reflecting off a wet surface or pitch-black photos of a crawlspace are useless for proof. They don’t just fail to show damage; they suggest a lack of professional rigor. Capture the light. Show the detail. Win the argument!
Don’t fall for the “Missing Link” trap. Taking fifty close-ups of a foundation crack without a single wide shot to show where that crack is located is a waste of time. Adjusters need to see the relationship between the damage and the structure. Similarly, failing to document “non-damage” is a critical oversight. Photographing unaffected rooms proves the loss is localized and helps define the scope of work. It provides a baseline for comparison that makes the actual damage stand out as a sudden event. It builds a wall of evidence that carriers cannot climb over.
Never use filters or digital editing tools. Even if you think a filter makes a water stain appear clearer, it compromises the legal integrity of the image. In a legal context, any digital alteration can be labeled as evidence tampering. Keep your files raw, original, and metadata-rich. If the photo is too dark, retake it with better lighting rather than trying to “fix” it later at your desk. Maintain your integrity and your payouts will follow.
Lighting and Clarity Challenges
Documenting dark attics or crawlspaces requires more than just a phone flash. Use high-lumen work lights to flood the space with neutral light before snapping your shots. If you’re hitting glare on windows or reflective surfaces, change your angle to 45 degrees to minimize bounce-back. Professional inspections require a “blur-free” standard where every edge is sharp, every texture is discernible, and every pixel serves as a witness to the loss. Sharp photos lead to fast approvals.
The Importance of a Consistent Narrative
Your photo sequence must tell a logical story that flows from the front door to the attic. Adjuster skepticism grows when photos are out of order, missing steps, or disjointed. Using custom inspection templates ensures you follow a proven path every time and never forget a critical area. It forces a rhythm that adjusters respect and trust. Stop losing money on rejected photos and start documenting like a pro. Download the professional inspection app today and start generating bulletproof reports instantly!
Streamline Your Inspections with PHOTO iD’s Automated Workflow
Stop wasting your evenings on manual labor. You’ve mastered the technical theory of how to prove property damage with photos; now it’s time to automate the execution. PHOTO iD is the all-in-one solution that transforms your smartphone into a high-velocity documentation engine. Our platform is a game-changing partner that restores order to the chaos of onsite inspections. By moving from a fragmented process to a unified digital workflow, you eliminate the friction that causes claim delays. Capture the truth. Label the loss. Report the results!
The “Capture, Label, Report” workflow is designed specifically for the mobile professional. It allows you to document damage in real-time without ever losing your momentum. Field professionals using our automated systems report saving up to 40% in field time compared to traditional manual methods. That is nearly half your workday reclaimed from tedious administrative tasks. Whether you are climbing a roof or crawling through a basement, our interface keeps you fast, focused, and efficient. It is the smartest way to ensure every photo is a bulletproof piece of evidence.
For large-scale losses or catastrophic events, our team management dashboard provides real-time oversight. You can coordinate multiple inspectors, monitor progress across several sites, and ensure every report meets your high professional standards. This level of control is essential for maintaining consistency and credibility with carriers. It turns a massive workload into a manageable, structured operation. When the pressure is on, PHOTO iD keeps your team moving forward with total precision.
Professional Reports at the Push of a Button
Eliminate the “night shift” of manual photo uploading and labeling forever. PHOTO iD generates professional, branded PDFs in seconds, not hours. Our system integrates seamlessly with industry-standard estimating platforms, ensuring your data flows exactly where it needs to go. This compatibility reduces errors and speeds up the entire settlement process. Additionally, our virtual inspection software empowers you to handle remote adjusting with ease. It is the ultimate tool for the modern, tech-savvy professional who values speed and accuracy above all else.
Take Control of Your Documentation Today
The competitive advantage of professional-grade photo reports cannot be overstated. In 2026, adjusters expect verifiable, metadata-rich documentation that tells a clear story. Moving from manual chaos to automated precision doesn’t just save time; it secures your reputation as a top-tier field professional. Don’t let another claim get bogged down by poor documentation or missing labels. You now know how to prove property damage with photos using the most advanced tools available. It is time to work smarter, not harder. Experience the future of property inspections with PHOTO iD!
Master Your Documentation and Secure Every Claim
Mastering the three-tier photo method and protecting your metadata are the ultimate ways to ensure your evidence remains undeniable. You now have the professional blueprint for how to prove property damage with photos by capturing context, linking damage, and documenting severity with surgical precision. Stop letting “pre-existing damage” labels or manual labeling errors eat into your profits and drain your energy. It is time to transition from a disorganized camera roll to a structured, verifiable asset that adjusters respect.
Founded by industry veteran Ken Perry, “The Claims Coach,” PHOTO iD was built to handle the daily grind of onsite assessments. Leverage automated voice-to-text labeling to finish your field work 40% faster while generating instant, carrier-ready reports. This platform is more than just a tool; it’s a game-changing partner that restores order to your documentation process. Replace the exhaustion of manual organization with a streamlined, digital workflow that works as hard as you do.
Start your free trial of PHOTO iD today and automate your inspection reports!
Take control of your workflow, impress every adjuster, and get paid what you deserve. Your future of efficient, bulletproof documentation starts right now!
Frequently Asked Questions
How many photos do I need to prove property damage?
Take as many photos as necessary to tell a complete story without leaving gaps. While a single room might require 10 to 15 shots using the three-tier method, a full property inspection can easily exceed 100 images. Focus on capturing every angle, every failure point, and every unaffected area to provide a baseline for the adjuster. Comprehensive documentation is the only way to ensure your claim isn’t reclassified as wear and tear.
Is a video walkthrough better than photos for an insurance claim?
Photos remain the industry standard because they provide higher resolution and easier metadata verification. While a video is helpful for general context, adjusters cannot easily attach specific video frames to line-item estimates in professional estimating software. Use high-resolution imagery to document the fine details like cracks or water stains. This is the most effective method for how to prove property damage with photos while maintaining a professional edge.
What is metadata, and why does the insurance company want it?
Metadata is the digital DNA of your photo, containing the GPS coordinates, timestamp, and device info. Carriers use this data to verify that the damage occurred at the insured location on the reported Date of Loss. Without this verifiable proof, your photos may be flagged for manual fraud review. Protect your evidence by using a professional app that preserves this data from the field to the final report.
Can I use my smartphone for professional property inspections?
Your smartphone is a powerful inspection tool when paired with professional documentation software. Modern mobile devices capture high-resolution images that meet or exceed carrier requirements for clarity. Use a dedicated inspection app to organize your shots, apply instant labels, and generate reports while still onsite. This approach combines digital capability with mobile efficiency to restore order to your workday.
What should I do if the damage is in a dark or hard-to-reach area?
Flood the area with neutral light using high-lumen work lamps rather than relying on a standard phone flash. For tight crawlspaces or high roof peaks, use extension poles or specialized inspection cameras to maintain safety while capturing the shot. Ensure every image meets the “blur-free” standard. Clear visibility is non-negotiable when you are documenting the severity of a loss for a carrier.
How do I label hundreds of photos without spending hours at my computer?
Leverage automated photo labeling and voice-to-text technology to handle the heavy lifting while you’re still in the field. This eliminates the need for manual data entry and reduces documentation errors significantly. Simply speak your observations as you capture each shot. The software categorizes and labels everything instantly. Work faster, stay organized, and get home on time!
Does the insurance company accept digital photo reports?
Digital reports are the preferred standard for insurance carriers in 2026. In fact, a high volume of property claims are now processed using digital photo submissions to speed up cycle times. Professional PDF reports that include organized labels and embedded metadata are processed much faster than loose files. Send a structured, professional report to reduce friction and secure faster payouts for your clients.
What happens if I forget to take a wide-angle shot of the damage?
Go back and take the shot immediately to establish the necessary structural context. A close-up of a crack without a wide-angle “anchor” shot is often dismissed as unverifiable or pre-existing. This “missing link” error is a leading cause of claim disputes. Every piece of evidence must be linked to a specific room or elevation to prove how to prove property damage with photos effectively.