

A long inspection report doesn’t automatically mean a serious problem. Reports can list 50 items, even when many are small issues, so start by separating routine, age-related conditions from findings that merit closer attention. If you’re feeling overwhelmed by post-inspection paperwork, pause before responding and clarify the significant concerns with your inspector.
It’s easy to see a long list and assume every item needs the same urgent response. Use these practical steps to sort routine findings from potential red flags and make a clearer decision. First, consider what each finding describes and how it affects the home. Then, use the inspection conversation to resolve uncertainty. An organized review helps you identify what deserves attention, what questions to ask, and how to prepare your response without reacting to every line at once.
Key Takeaways
- Sort findings by their potential impact, then identify which ones need follow-up before you respond.
- Use your transaction documents to identify the paperwork and deadlines that apply to your inspection response.
- Reduce inspection anxiety by breaking the review into manageable steps and writing down the questions you still need answered.
- PHOTO iD’s Mobile App Subscription, Automated Photo Labeling, Instant Photo Report Generation, and Custom Inspection Templates can help organize inspection documentation.
1. Separating routine findings from significant concerns
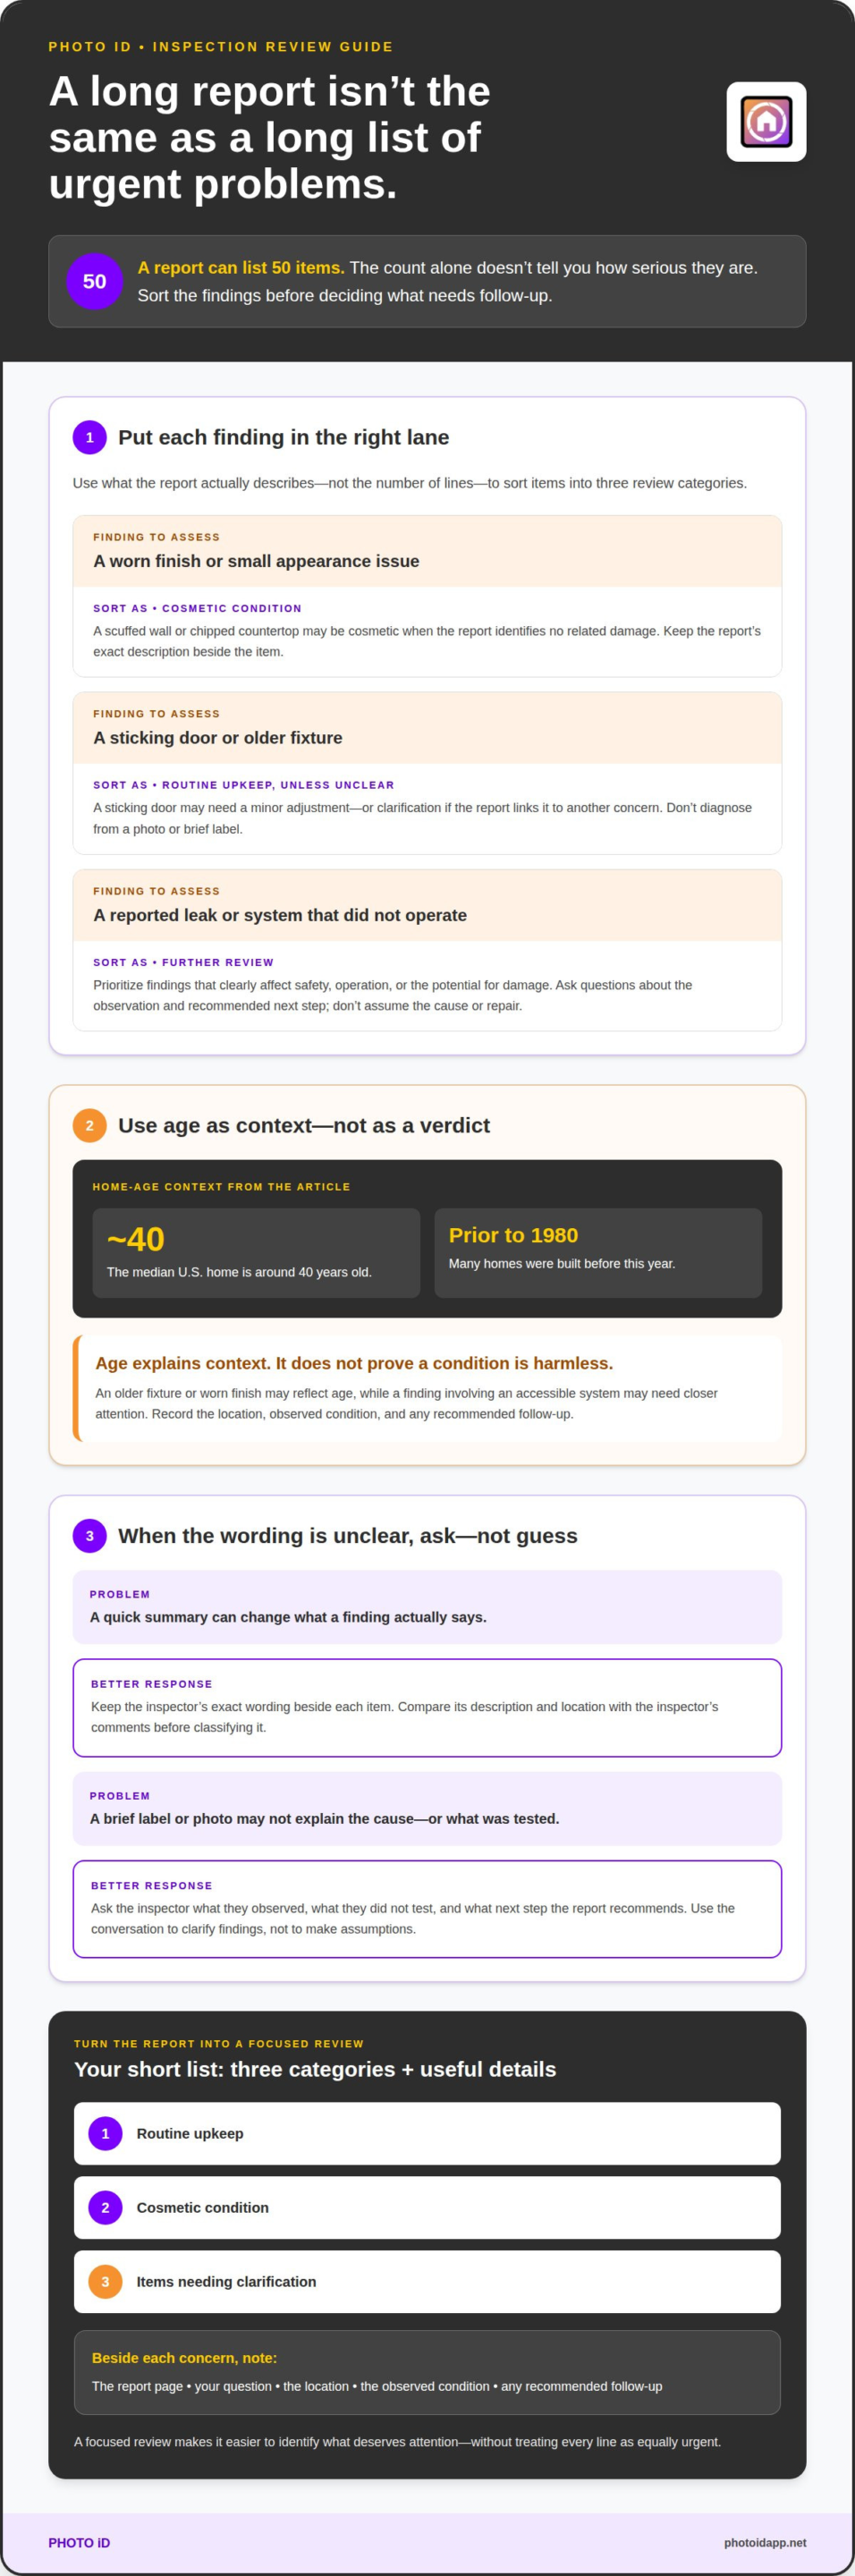
A report can list 50 items, but that number alone doesn’t show severity. Start by sorting each note into cosmetic, maintenance, or further-review concerns. A scuffed wall, for example, differs from a report describing active water intrusion. Keep the inspector’s exact wording beside each item. That prevents a quick summary from changing what the finding actually says.
Use the home’s age and the affected system as context. The median U.S. home is around 40 years old. Many homes were built prior to 1980. An older fixture or worn finish may reflect age, while a finding involving an accessible system may need closer attention. Age explains context; it doesn’t prove a condition is harmless. Note the location, observed condition, and any recommended follow-up.
Next, separate appearance from function. A chipped countertop is cosmetic if the report identifies no related damage. A sticking door may need only a minor adjustment, or it may warrant clarification if the report links it to another concern. Don’t diagnose from a photograph or brief label. Compare the description and location with the inspector’s comments before deciding how to classify the finding.
Prioritize findings that clearly affect safety, operation, or the potential for damage. For example, distinguish a dated finish from a reported leak or a system that did not operate during the inspection. These findings call for questions, not assumptions about the cause or repair. Mark unclear wording and ask the inspector what they observed, what they did not test, and what next step the report recommends.
Finally, make a short review list with three categories: routine upkeep, cosmetic condition, and items needing clarification. Add the report page and your question beside each concern. An inspector can help you understand what was observed and clarify the report’s findings. This turns a long report into a focused discussion and gives you a clearer basis for considering your response, rather than treating every line as equally urgent.
3. What paperwork is typically required after a home inspection?
After a home inspection, the report is the central record of observed conditions. The documents you need for a response depend on your purchase agreement and transaction process. Don’t assume every buyer must submit the same forms. Review the agreement’s inspection terms and any instructions from your real estate agent. Identify the required response method, recipient, and deadline in those documents.
Keep these records together as you review:
- Inspection report: Save the complete report, including photos, notes, and recommendations.
- Relevant agreement pages: Keep the inspection clause and any related addenda handy.
- Written response: Record which findings you’re raising and what action you’re requesting.
- Supporting material: Attach relevant photos, estimates, or specialist evaluations when available and useful.
A request for repairs or other changes may use a form, an addendum, or written communication, depending on the transaction. Follow the format specified in your agreement or transaction instructions. Be precise: identify the report item, describe your request, and keep the wording consistent with the inspection record. For example, cite the report page and description instead of writing “fix everything.”
Track the paper trail, too. Save the version you sent, its delivery record, and any written reply. If the other party proposes a change, keep the revised document with the original. This makes it easier to see what changed and which terms remain open. Don’t rely on a phone conversation as your only record of a decision.
Feeling overwhelmed by post-inspection paperwork? Create one folder for the report, agreement, response, and supporting documents. Add clear filenames, such as “Inspection report” or “Repair request,” so you can retrieve each item quickly. Custom Inspection Templates can help structure inspection documentation, while keeping transaction forms tied to your agreement. Finish by comparing your response against the required process and deadline shown in your documents.
Discuss inspection findings with the inspector and ask clarifying questions rather than guessing what they mean. Home inspection reports document conditions across accessible systems, including conditions that may be normal for the home’s age. Taking time to understand the findings before responding can support clearer decision-making.
4. What risks come from missing a post-inspection deadline or document?
A missed response deadline can narrow your options under the purchase agreement. The inspection clause sets the process, required notices, and timing. If you send a request late, the seller may not consider it within the agreed review process. Don’t assume an informal conversation changes written terms. Read the clause, note its deadline, and follow the stated delivery method. Save the date and time when you send your response.
A missing document can create another problem: an incomplete record. If a request refers to a repair without identifying the report finding, the other party may not understand what you mean. Before sending, confirm that your response includes:
- The relevant inspection finding and report page.
- The requested action, stated in clear language.
- Any supporting document you refer to, such as a photo.
- The recipient and delivery method stated in your transaction instructions.
Watch for version mix-ups. If you revise a request, label the updated copy and save the earlier version. Keep the sent message, attachments, and delivery record together. For example, if an email refers to a photo, check that it’s attached before sending. A missing attachment can slow the discussion and prompt another round of messages. A clear file trail helps everyone identify the current request.
Build a simple deadline routine. Copy the inspection response date from your agreement into your calendar and set a reminder ahead of it. Keep the inspection report, agreement clause, draft response, and supporting records in one folder. Before sending, compare each item with the clause and recipient instructions. If a required form or signature is missing, address it before submission. If you discover an omission afterward, document what happened and promptly follow the transaction’s written communication process. This won’t change the agreement’s terms, but it keeps your next step clear and creates a reliable record of your response.
Inspection anxiety
A report listing 20-plus items can make buyers panic. The page count alone doesn’t tell you which finding deserves attention first. Pause before drafting a response. Read one item at a time, then note what it describes, where it appears, and whether the inspector recommends follow-up. This turns a dense report into a set of specific questions.
Use a simple reset when the paperwork feels difficult to process. Step away from the report briefly, then return with a notepad and mark only unclear findings. For example, write “What does this note mean for the roof?” beside a vague roof comment. Separate what the inspector observed from what you fear it might mean. That distinction helps keep assumptions from driving your next step.
You can also speak directly with the inspector. Buyers can attend the final 20 minutes of a home inspection to hear findings firsthand. If the inspection has ended, ask focused questions about the report’s wording, the observed condition, and recommended next steps. Clarifying a term is more useful than guessing at its meaning. Record the answer beside the relevant page or item.
Feeling overwhelmed by post-inspection paperwork? Break the review into short tasks: read, mark, clarify, then decide. Start with the findings you don’t understand, rather than the easiest pages. Pause between tasks if you notice yourself treating every observation as equally urgent. A written question list keeps the discussion focused and makes it easier to return to the report without rereading every detail.
Keep the final decision separate from the first emotional reaction. Once you’ve clarified the report, compare each finding with your priorities and purchase agreement. Then decide what needs a response and what simply needs to be understood. To keep inspection notes and photos organized as you review them, organize your inspection documentation.
PHOTO iD: PHOTO iD Mobile App Subscription
PHOTO iD’s Mobile App Subscription helps organize inspection photos and reporting when documentation feels scattered. Automated Photo Labeling keeps images associated with relevant inspection details, while Instant Photo Report Generation turns documented findings into a report. Custom Inspection Templates provide a consistent structure, making it easier to capture information clearly as you work.
These tools support documentation, not decisions about how to respond to a purchase agreement. Keep transaction forms and deadlines within your agreed process, and use organized inspection records to review findings and prepare questions. If repeated photo sorting and report assembly are slowing your workflow, PHOTO iD brings those documentation tasks together.
Contact PHOTO iD to learn more about the Mobile App Subscription.
Move forward with a clearer process
Your next step is to create a repeatable way to turn inspection documentation into decisions. Set aside a focused review period, keep your questions in one place, and respond only after you understand the findings that matter to you. A steady process can help you stay deliberate, even when several decisions compete for attention.
If you’re feeling overwhelmed by post-inspection paperwork, make the next action small: organize the material, identify what remains unclear, and choose one question to resolve first. Keep your transaction documents and response instructions close as you work. For help with inspection documentation, contact PHOTO iD for support.
You don’t need to resolve every question at once. Take the next clear step, then build from there with confidence.
Frequently Asked Questions
How do I organize and prioritize post-inspection paperwork?
Use a simple tracker to manage each open question and its next step. Create columns for the report reference, who needs to respond, the action, and its status. For example, mark an item “awaiting clarification” while you gather details, then update it when resolved. Review the tracker alongside your transaction calendar so unanswered questions don’t disappear among completed tasks.
Are there checklists or apps to manage home inspection paperwork?
Yes. A checklist can track documents and follow-ups, while an inspection app can organize photos and findings. Choose a format that lets you locate an image by room or system, add a note, and see what still needs review. For example, list “attic photo” on your checklist and connect it to the report comment you’re examining.